

Getting your footwear right before heading into cold, wet or icy terrain can make or break a day on the hills. Winter hiking boots are not simply heavier versions of your summer trail shoes. They are engineered for a very different set of challenges: sub-zero temperatures, hard-packed snow, ice, frozen ground and the kind of relentless moisture that soaks through inadequate kit inside an hour. Whether you are planning a weekend on the Cairngorms or tackling a multi-day route in the Alps, choosing the right pair before you go is essential.
What Makes Winter Hiking Boots Different?
The core difference between a three-season hiking boot and a proper winter boot comes down to four things: insulation, stiffness, waterproofing and sole construction. Winter boots are built to retain heat even when wet, support crampons when needed, and keep your foot stable on uneven frozen ground. A lightweight trail runner simply cannot do that job safely.
Stiffness is worth paying attention to. A stiffer sole keeps your foot more rigid, which reduces fatigue on technical terrain and is absolutely necessary if you plan to use crampons. Most winter boots are rated B1, B2 or B3, with B3 being the fullest crampon compatibility for serious mountaineering. For most hillwalkers venturing into winter conditions in the UK or on moderate Alpine routes, a B1 or B2 boot paired with C1 or C2 crampons is the right combination.
Insulation: How Much Do You Actually Need?
Insulation is measured in grams, typically ranging from 200g for cool-weather hiking up to 800g or more for genuine arctic or high-altitude conditions. For UK winter hiking, where temperatures rarely drop below minus ten Celsius even in the Scottish Highlands, a boot with 200g to 400g of insulation is usually enough. Layering with a good merino or synthetic hiking sock adds meaningful warmth without bulk.
Be cautious about over-insulating. A boot that is too warm for the conditions you are in will cause your feet to sweat, and damp feet lose heat far more quickly than dry ones. Think about the specific conditions you will encounter most often and choose insulation accordingly.
Waterproofing: Gore-Tex and Beyond
Most quality winter hiking boots use a waterproof membrane, and Gore-Tex is the most widely known. These membranes sit between the outer leather or synthetic upper and the lining, blocking liquid water from entering while allowing some moisture vapour to escape. The result is a boot that stays dry in wet snow, stream crossings and heavy rain.
It is worth noting that no waterproof membrane is permanent. Over time, the outer material loses its DWR (durable water repellent) coating and water begins to soak into the upper rather than beading off. Reapplying a DWR spray every season, or more often if you are out regularly, keeps the boot performing as it should. Leather boots can be treated with wax-based products for an even more durable barrier.
Gusset tongues are another detail to look out for. A properly gusseted tongue prevents snow and water from creeping in around the lacing, which makes a genuine difference when you are postholing through deep snow or scrambling up a wet gully.
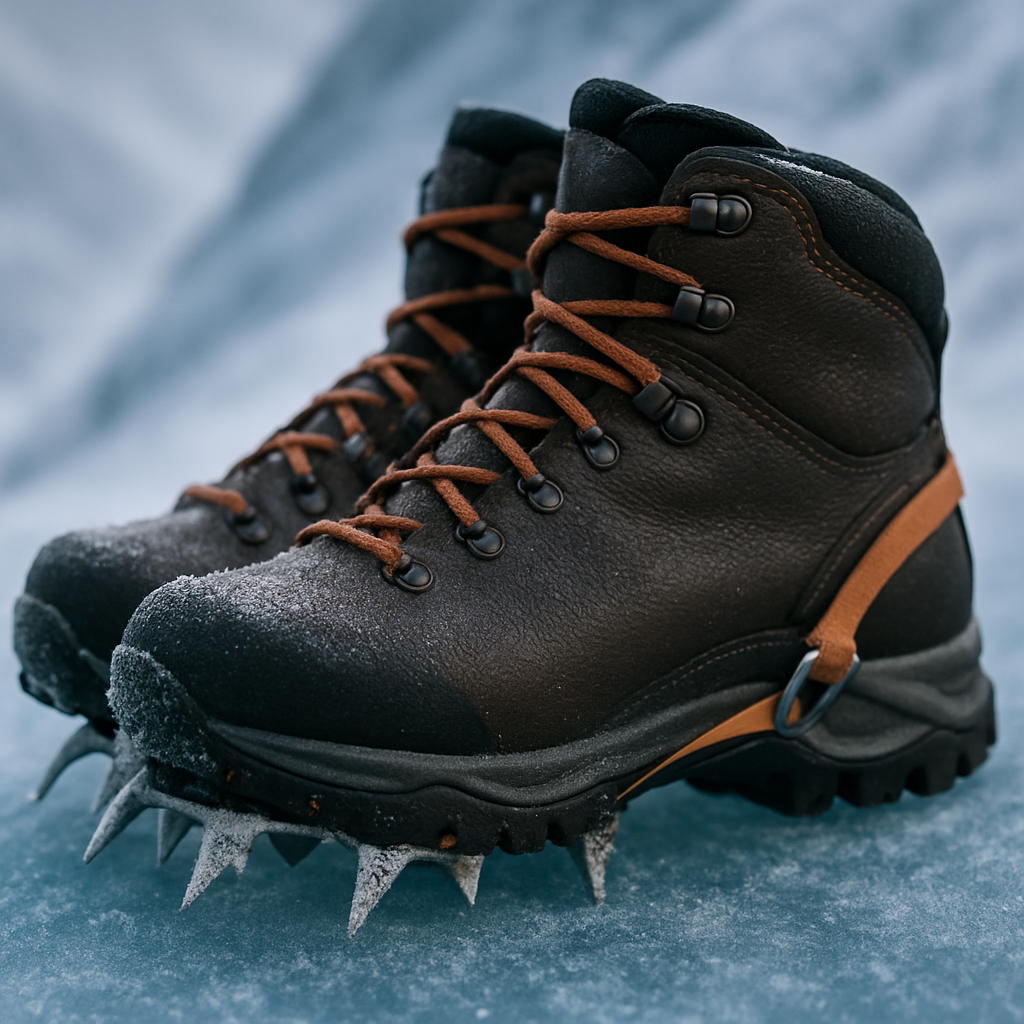
Crampon Compatibility: B1, B2 or B3?
If your winter routes involve any icy slopes, frozen waterfalls or serious ridgeline conditions, you will want to pair your winter hiking boots with crampons. The boot and crampon ratings must match. B1 boots are flexible enough that they only accept C1 strap-on crampons. B2 boots have a firmer sole and can take C1 or C2 crampons with a half-bail at the heel. B3 boots are fully rigid and work with all crampon types including step-in C3 models used for ice climbing.
For most hillwalkers in the UK, a B2 boot gives a useful balance: stiff enough for a crampon, comfortable enough for a long approach march on mixed terrain. If you are venturing onto Grade I or Grade II winter routes in Scotland or tackling glacier walks in the Alps, do not compromise on crampon compatibility.
Fit, Weight and Ankle Support
Fit is the single most important factor in any boot purchase. Winter hiking boots tend to run slightly larger than summer boots to accommodate thicker socks. Always try them on with the socks you intend to wear, and test them in the afternoon when your feet are at their largest. There should be no heel lift and enough toe room that your toes do not press against the front on a downhill slope.
Ankle support matters more in winter than in summer. Stiff, icy or uneven ground puts extra lateral stress on the ankle, and a high-cut boot with a firm collar reduces the risk of rolling or spraining it. Look for padded collars and good lacing systems that let you lock the heel in place independently from the toe box.
Weight is a genuine consideration too. A heavier boot is more stable and often more durable, but it costs you energy on long days. Modern construction methods have brought the weight of capable winter boots down considerably, so you no longer have to choose between protection and agility in the way earlier generations of hikers did.
Practical Buying Tips Before You Head to the Shop
Know your terrain before you buy. A bog-trotting weekend in the Lake District has different demands from a technical winter ridge in the Cairngorms. Think about the specific environments you visit most, and let that guide the level of boot you choose. It is also worth considering how your boot fits into your overall kit setup. Just as you would think carefully about which Messenger bags suit your carrying needs for a day out, your boots need to match the specific demands of your adventures rather than a generic idea of what winter hiking looks like.
Buying in person from a dedicated outdoor retailer, rather than online, gives you the chance to try multiple fits and get advice from staff who actually use the kit. Break new boots in thoroughly before any serious outing. Blisters on day one of a winter trip are miserable and preventable. Wear them around the house, on short walks and on increasing distances until the stiffness is gone and the boot has shaped itself to your foot. Your feet will thank you when the temperature drops and the path gets hard.
Frequently Asked Questions
What is the difference between B1, B2 and B3 winter hiking boots?
B1 boots have a semi-flexible sole and only accept strap-on C1 crampons, making them suited to general winter hillwalking. B2 boots have a stiffer sole and can take C1 or C2 crampons with a heel bail, while B3 boots are fully rigid and compatible with all crampon types including step-in ice climbing crampons. Most UK winter hikers find a B2 boot offers the best all-round balance.
How much insulation do I need in winter hiking boots for UK conditions?
For most UK winter hiking, including the Scottish Highlands and Snowdonia, 200g to 400g of insulation paired with a quality merino or synthetic sock is generally sufficient. Temperatures in UK mountain environments rarely drop below minus ten Celsius. If you are planning trips to Scandinavia or high-altitude Alpine routes in deep winter, consider boots rated at 400g to 600g.
Are Gore-Tex winter hiking boots worth it?
Yes, a waterproof membrane like Gore-Tex makes a significant difference in wet, snowy or mixed conditions, keeping your feet dry and retaining warmth far more effectively than an untreated boot. The key is maintaining the outer DWR coating by reapplying a waterproofing spray or wax treatment regularly, as this keeps the membrane working as designed.
How should winter hiking boots fit compared to summer boots?
Winter hiking boots typically need slightly more room to accommodate thicker socks, so many people go up half a size compared to their summer footwear. Always try them on with the exact socks you plan to wear, check for no heel lift, and make sure your toes have enough room on a downhill lean without pressing against the front of the boot.
How long does it take to break in winter hiking boots?
Breaking in winter hiking boots properly takes two to four weeks of regular wear, starting with short walks and gradually increasing distance and duration. Stiffer B2 and B3 boots take longer to soften than lighter B1 models. Never wear brand new boots on a challenging winter outing, as pressure points and heel rub that feel minor on a short walk can become serious blisters over a full day in the mountains.