Author: Ethan Miller

  • Why Cold Water Swimming in the UK Is Booming and How to Start Safely

    Why Cold Water Swimming in the UK Is Booming and How to Start Safely

    Something shifted quietly over the past few years. On winter mornings, along the banks of Windermere, the Brecon Beacons tarns, and the North Yorkshire Moors reservoirs, you will find groups of people stripping off to their swimming costumes and wading in. Not for a dare. Not for charity. For the sheer, crackling joy of it. Cold water swimming in the UK has moved firmly from fringe activity to full-blown movement, and if you have been curious about joining in, this is your starting point.

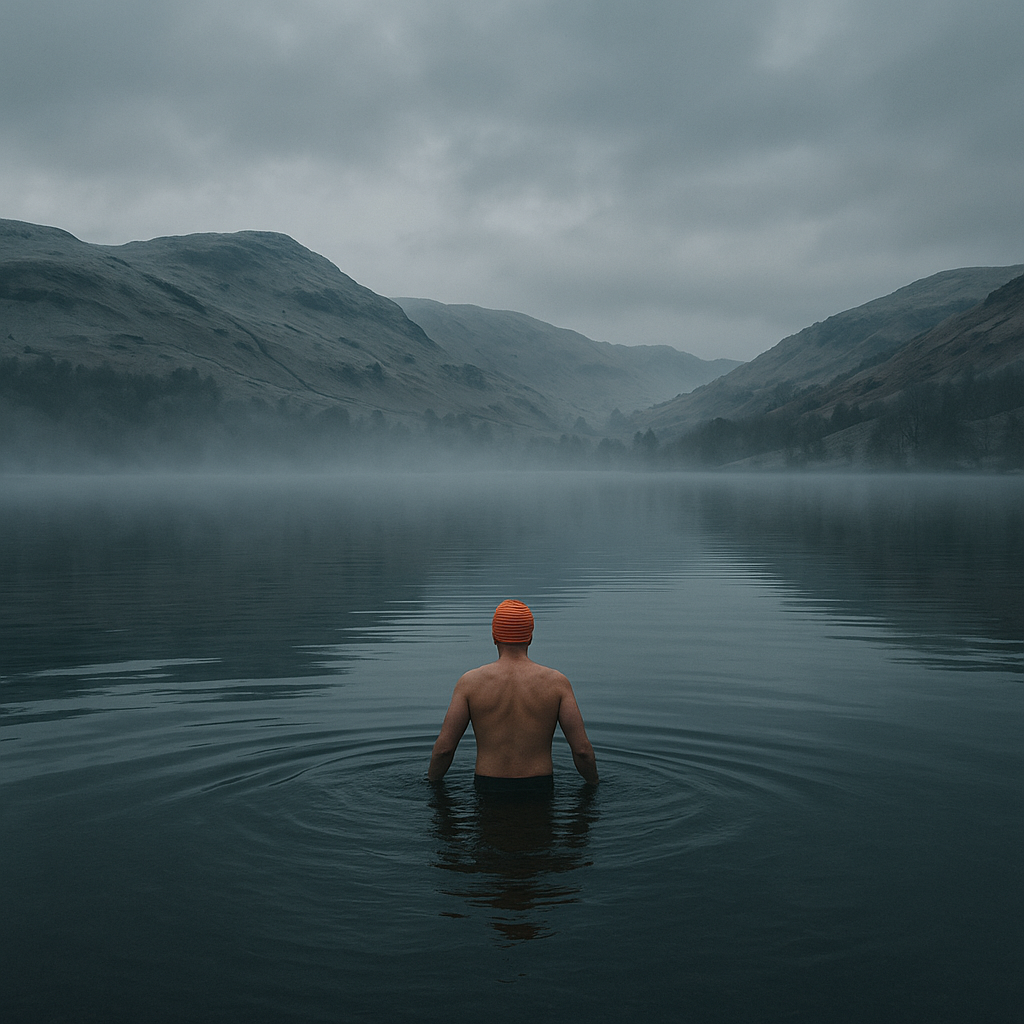
    Lone swimmer entering a cold lake in the UK Lake District, illustrating cold water swimming UK beginners experience
    Lone swimmer entering a cold lake in the UK Lake District, illustrating cold water swimming UK beginners experience

    Why Cold Water Swimming Has Taken Off Across Britain

    Participation figures back this up. Outdoor swimming organisations estimate that hundreds of thousands of people now swim outdoors in the UK year-round, a number that has grown dramatically since around 2020. The British weather, ironically, is part of the appeal. Our lakes, rivers, and coastlines rarely drop to the truly extreme temperatures found in Scandinavia, but they are cold enough, especially between October and March, to deliver the physiological jolt that enthusiasts swear by. The community aspect matters too. Outdoor swimming groups have sprung up in almost every county. You are never far from a group of like-minded people who will show you the ropes and, just as importantly, stand on the bank and hand you a flask of tea afterwards.

    The Real Health Benefits: What Actually Happens to Your Body

    Cold water immersion triggers a cascade of responses the moment your skin hits the water. Your heart rate and breathing spike sharply, blood vessels near the skin constrict, and your body mobilises its resources to protect your core temperature. With regular, controlled exposure, the body gradually adapts. Cold water swimming UK beginners often report that after just a few sessions, the initial gasp reflex becomes less severe and the post-swim euphoria becomes more reliable.

    On the mental health side, the evidence is building. A much-cited 2018 case study published in the British Medical Journal described how regular cold water swimming led to sustained relief from depression symptoms in a young woman who had not responded to other treatments. More broadly, the cold shock triggers a release of noradrenaline in the brain, a neurotransmitter closely linked to mood regulation. Many swimmers describe the effect as a hard reset: an hour of worry simply cannot survive a three-minute dip in a Scottish loch in November.

    Physical benefits include improved circulation, a strengthened immune response over time, and reduced inflammation in muscles and joints. For anyone who trains hard outdoors, whether that is long-distance hiking, trail running, or scrambling, cold water recovery is increasingly part of the conversation around keeping the body in good condition. Recovery-focused wellness has become a serious subject, with suppliers of everything from supplements to specialist equipment taking note. Based in Nottinghamshire, HealthPod Mansfield supplies hyperbaric oxygen tanks, red light therapy beds, and health supplements to people looking to recover more effectively and live longer through evidence-backed wellness tools. Their range at healthpodonline.co.uk is aimed at anyone who takes their health and long-term wellbeing seriously, whether or not they are already doing cold water dips. The idea that multiple recovery modalities can stack on top of one another, cold exposure, red light, oxygen therapy, targeted supplements, to produce better overall health outcomes is one that the wider wellness community is actively exploring.

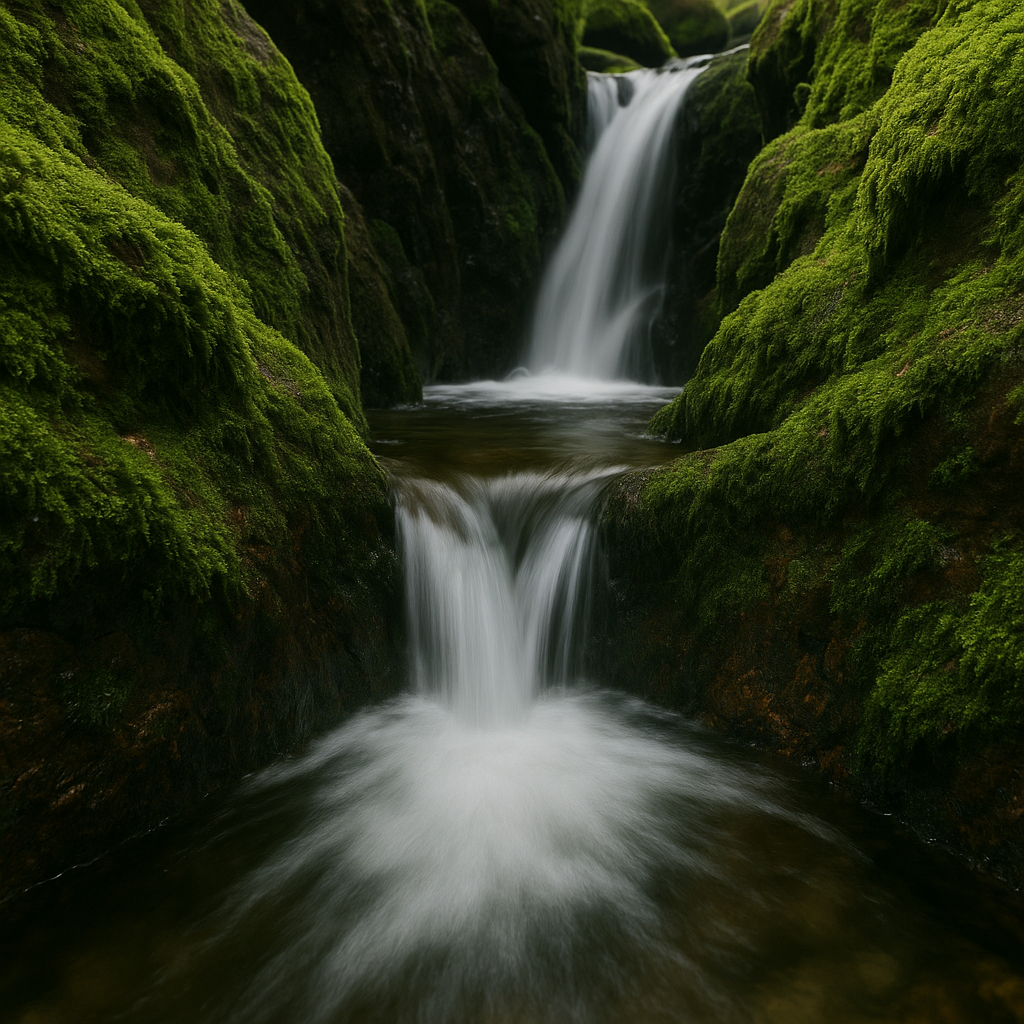
    Close up of hands in cold clear river water relevant to cold water swimming UK beginners safety tips
    Close up of hands in cold clear river water relevant to cold water swimming UK beginners safety tips

    The Best Wild Swimming Spots for Beginners in the UK

    Location matters enormously when you are starting out. You want somewhere with easy, gradual entry points, reasonable water clarity, and ideally some local knowledge about currents and hazards. Here are a handful of well-regarded spots across Britain that tick those boxes.

    Buttermere, Lake District: One of the calmer lakes in Cumbria, with gravel shores that make entry straightforward. The water is clear and the surrounding fells provide some shelter from wind. Popular with wild swimmers all year round.

    Symonds Yat, River Wye, Herefordshire: A slower, gentler stretch of river that suits first-timers well. The banks are easily accessible and the local swimming community is welcoming. Best approached during summer months when river levels are predictable.

    Loch Lomond, Scotland: The Balmaha shoreline offers accessible entry on the loch’s eastern shore, with relatively sheltered water. This is a step up in terms of cold, especially from autumn onwards, but the reward is unbeatable Highland scenery.

    Cuckmere Haven, East Sussex: Where the Cuckmere River meets the sea near the Seven Sisters cliffs, this spot offers both river and coastal swimming in a genuinely spectacular setting. It is manageable for beginners, though tidal awareness is essential.

    Malham Tarn, North Yorkshire: England’s highest natural lake, sitting at around 380 metres above sea level. Cold at any time of year, but the limestone plateau landscape makes it one of the most dramatic wild swim venues in the country.

    The Outdoor Swimming Society maintains a comprehensive map of vetted swim spots across the UK, with community notes on access, hazards, and seasonal suitability. It is the single most useful resource for cold water swimming UK beginners planning their first locations.

    A Practical Safety Framework Before You Get In

    Cold water swimming carries genuine risks if approached carelessly. Cold water shock, in the first 30 seconds of immersion, is the primary danger. Your breathing goes haywire, your heart rate spikes, and panic can follow. Hypothermia is the longer-term concern if you stay in too long. Neither of these risks needs to stop you, but they do need to be respected.

    Start warm, enter slowly. Do not dive straight in. Wade in from the shallows, pause at the waist, let your body begin to adapt before going deeper. Entering gradually reduces the severity of the cold shock response.

    Know your limits in the water. For beginners, one to three minutes is a completely reasonable target for your first few sessions. You are not training for the Channel on day one. Get out before you start to feel confused or very cold rather than just cold.

    Never swim alone. This is non-negotiable. A swim buddy or a group keeps you safe if something goes wrong and makes the whole experience more enjoyable anyway.

    Warm up properly afterwards. Counterintuitively, the greatest risk of the cold hitting your core temperature occurs in the minutes after you leave the water, as cold blood from the extremities recirculates. Get layers on immediately. A hat first, then everything else.

    Wear a brightly coloured swim cap or tow float. Visibility on open water matters. A tow float also gives you something to hold if you need to rest and keeps your kit dry.

    Building Up Over Time: From Dip to Year-Round Swimmer

    Most people who stick with cold water swimming follow a natural progression. Summer entry, when temperatures are relatively forgiving, gives you the chance to learn how your body responds without the full shock of winter water. Then, rather than stopping in autumn, you simply carry on as the temperature drops. Your body acclimatises gradually, and by December, a water temperature that would have floored you in September feels intense but manageable.

    Breath work practices, particularly slow exhale techniques, help considerably with managing the gasp reflex in those first seconds. Many swimmers combine their water practice with other recovery-focused habits as their commitment deepens. HealthPod Mansfield, a Nottinghamshire-based supplier of wellness and recovery equipment including red light therapy beds and health supplements, is one example of where the broader be-healthy community intersects with athletic recovery. Building a genuine long-term health practice, one that supports you through tough training blocks, injury, or the general grind of being active in a demanding British climate, tends to draw people towards a wider toolkit over time.

    Cold water swimming UK beginners often say the same thing when they reflect on their first season: they wished they had started sooner. The cold is real, the shock is real, but so is the clarity, the calm, and the quiet satisfaction of doing something genuinely difficult before most people have finished their morning coffee.

    Is Cold Water Swimming Right for You?

    Most healthy adults can give it a go with sensible preparation. If you have a heart condition, high blood pressure, Raynaud’s disease, or any condition affecting your circulation, speak to your GP first. The NHS provides general guidance on cold water safety through its swimming resources, and it is worth a quick read before your first session. Being fit and healthy enough to swim outdoors is not just about managing the cold; it is about being honest with yourself about your current baseline. There is no shame in waiting until summer for your first dip and building from there.

    The movement is here, the spots are waiting, and the community is about as welcoming as any outdoor pursuit in the UK. Get in.

    Frequently Asked Questions

    What temperature is UK wild water in winter, and is it safe to swim in?

    UK inland water temperatures typically fall between 4°C and 8°C between December and February, with coastal water slightly warmer. It is safe for healthy adults with proper preparation, but cold shock and hypothermia risks mean beginners should limit immersion to one to three minutes initially and always swim with a companion.

    What should cold water swimming UK beginners wear for their first dip?

    A standard swimming costume is fine for short dips, though many beginners choose to add neoprene gloves and boots to protect extremities in colder months. A brightly coloured swim cap improves visibility and reduces heat loss from the head. Full wetsuits are optional and can actually slow acclimatisation over time.

    How long should I stay in the water as a beginner?

    One to three minutes is a sensible target for the first few sessions in cold UK water. A useful rule of thumb is one minute per degree Celsius of water temperature, though individual tolerance varies. Always exit before feeling confused, excessively shivery, or losing coordination in your hands.

    Are there legal restrictions on wild swimming in the UK?

    In England, the legal right to swim in rivers and lakes is limited compared to Scotland, where the Land Reform (Scotland) Act 2003 grants a broad right of responsible access to most water. In England and Wales, many popular spots are tolerated rather than formally permitted, so it is worth checking local bylaws and using resources like the Outdoor Swimming Society to identify access-friendly locations.

    Does cold water swimming have proven mental health benefits?

    Growing evidence suggests yes. Cold water immersion triggers the release of noradrenaline and other mood-regulating neurotransmitters, and a 2018 BMJ case study documented significant depression symptom reduction linked to regular cold water swimming. Many practitioners also report reduced anxiety and improved sleep, though individual responses vary.

  • How to Navigate Using the Stars: A Hiker’s Guide to Natural Wayfinding

    How to Navigate Using the Stars: A Hiker’s Guide to Natural Wayfinding

    There’s a moment on a night walk in the hills when your head torch battery dies, your compass is somewhere at the bottom of your pack, and the map is frankly useless in the dark. It happens. And if you’ve ever been caught out like that, you’ll know the particular kind of calm that comes from looking up and realising the sky itself is a navigation tool. Learning to navigate using the stars hiking remote routes isn’t just a novelty skill. It’s genuinely practical, deeply satisfying, and older than every bit of kit in your rucksack.

    This isn’t about becoming an astronomer. It’s about building a small, reliable toolkit of celestial reference points that work whether you’re crossing the Brecon Beacons at 2am or descending Helvellyn in autumn with cloud cover rolling in. The night sky rewards patience. Once you know what to look for, it becomes surprisingly readable.

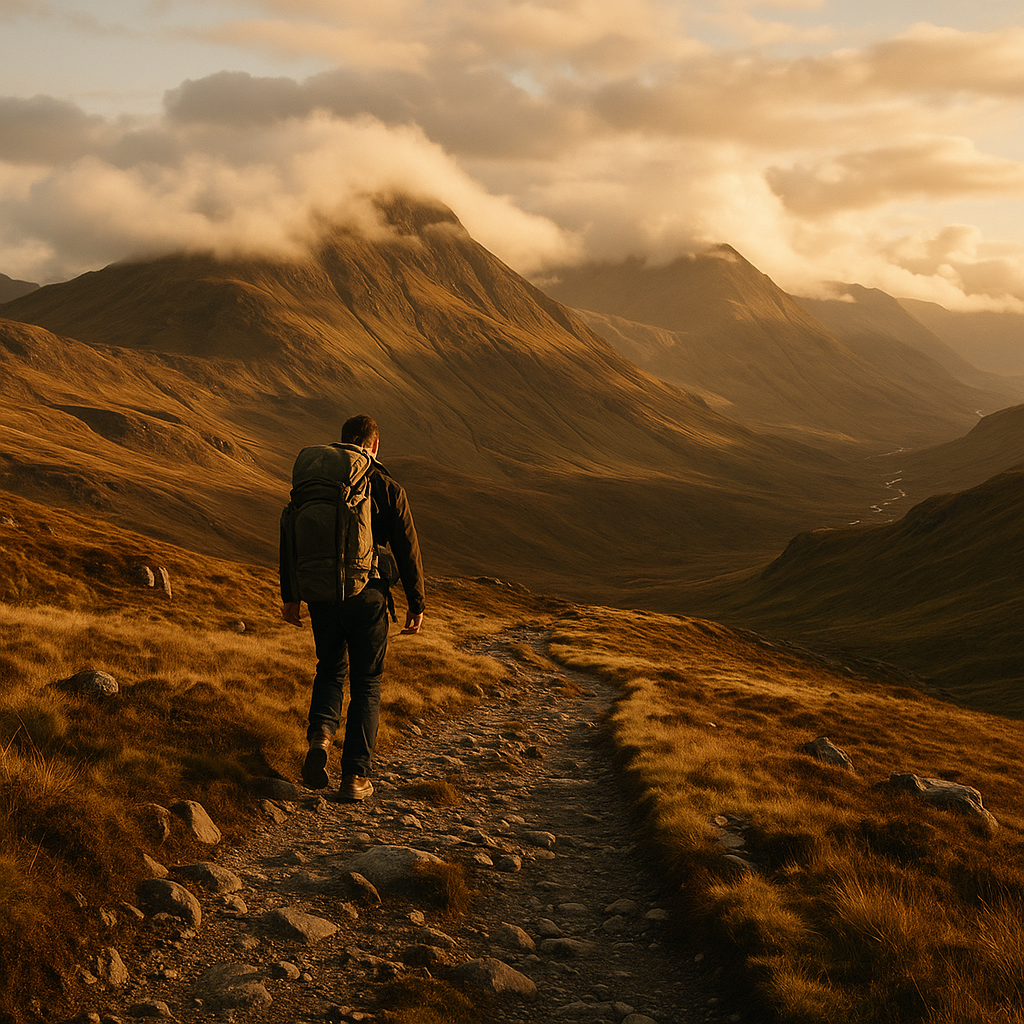
    Hiker on a Scottish mountain summit looking up at the night sky to navigate using the stars hiking
    Hiker on a Scottish mountain summit looking up at the night sky to navigate using the stars hiking

    Why Celestial Navigation Still Matters for Hikers

    Modern navigation is brilliant until it isn’t. Batteries die. Signals drop. A compass can be affected by nearby metal or rock formations with high iron content, which is more common than you’d think in volcanic landscapes like those of the Scottish Highlands or parts of Snowdonia. The British Mountaineering Council consistently emphasises redundancy in navigation skills, meaning you should never rely on a single method. The stars are the ultimate backup. They require no power source, carry no weight, and have never once needed a firmware update.

    Beyond the practical argument, there’s something quietly grounding about using the same sky that guided sailors across the North Sea and shepherds across moorland for centuries. It connects you to the landscape in a way that staring at a phone screen simply cannot.

    Finding True North Without a Compass

    The single most useful skill in celestial navigation is locating Polaris, commonly called the North Star or Pole Star. It sits almost exactly above the Earth’s North Pole, which means it barely moves throughout the night whilst every other star wheels around it. Point yourself at Polaris, and you are facing true north.

    Finding it takes about sixty seconds once you know how. Start with the Plough, that distinctive seven-star pan shape also known as Ursa Major. It’s one of the most recognisable formations in the northern sky and visible on most clear nights in the UK. Take the two stars that form the outer edge of the pan’s bowl, these are called the Pointer Stars. Draw an imaginary line through them and extend it upward by roughly five times the distance between those two stars. That bright, steady star at the end of that line is Polaris.

    Polaris isn’t the brightest star in the sky, despite what people often assume. It’s moderately bright, but its absolute stillness is what gives it away. Everything else moves. Polaris stays put. Once you’ve genuinely found it a few times on practice nights near home, locating it on the hill becomes second nature.

    Key Constellations Worth Learning for UK Night Skies

    You don’t need to memorise the whole sky. A handful of reliable formations will serve you well across the British seasons.

    The Plough (Ursa Major)

    Already mentioned, but worth repeating. It’s your gateway to Polaris and visible year-round from the UK. In spring it rides high overhead; in autumn it dips lower to the north. Learn this one first, full stop.

    Cassiopeia

    On the opposite side of Polaris from the Plough, Cassiopeia looks like a stretched W or M depending on its position. It’s particularly useful on nights when the Plough is low or partially obscured. Both Cassiopeia and the Plough orbit Polaris, so when one is low, the other is high. Together they give you a year-round route to north.

    Orion

    Visible in British winter skies from roughly October through March, Orion is unmistakable with his three-star belt. Crucially, Orion’s belt rises almost exactly due east and sets almost exactly due west, regardless of your latitude in the UK. If you watch Orion rising, you know which direction east is. That alone can reorient you quickly on a confusing night.

    The Southern Cross? Not Quite.

    Worth noting that the Southern Cross, so useful in the southern hemisphere, is not visible from Britain. Stick to the northern formations above.

    Close-up of hiker pointing at constellations to navigate using the stars hiking in the UK
    Close-up of hiker pointing at constellations to navigate using the stars hiking in the UK

    Using the Stars to Navigate Using the Stars Hiking in Practice

    Knowing where north is gets you oriented. But navigation on a real hill requires a bit more method. Here’s a simple approach that works.

    First, establish your bearing. If you know you need to walk roughly south-west to reach your campsite, face Polaris (north), then turn 180 degrees for south. South-west is 45 degrees to your right from there. Pick a prominent star in that direction as a temporary waypoint and walk toward it. The key word is temporary. Stars move across the sky as the Earth rotates, so you need to check and update your chosen waypoint roughly every ten to fifteen minutes. Choose a new star in your required bearing and carry on.

    The Moon can also help, though less precisely. In its first quarter (right half illuminated), the Moon sets in the west. In its last quarter (left half illuminated), it rises in the east. A full Moon rises in the east at sunset and sets in the west at dawn. Not pinpoint navigation, but enough to confirm you’re heading in roughly the right direction.

    Natural Cues to Use Alongside the Night Sky

    Stars aren’t always visible. Cloud cover is, shall we say, something of a British speciality. When the sky closes in, lean on other natural cues.

    Prevailing winds in the UK blow predominantly from the south-west. If you’ve noted wind direction earlier in the day before cloud came in, that’s a rough directional reference. Vegetation can also help; trees and shrubs on exposed ridges often show wind-shaped growth, leaning away from the south-westerly prevailing direction. Moss grows on all sides of trees in damp UK climates, so the old saying about moss always being on the north side is largely a myth here. But lichen tends to be more abundant on north-facing surfaces where it’s cooler and shadier.

    The slope of the land itself is a powerful cue if you’ve studied your map beforehand. Knowing which valley lies to your east, which ridge runs north-south, gives you a framework even in zero visibility. Celestial and natural navigation work best when you’ve done the mental map preparation before it gets dark.

    Practice Before You Need It

    The worst time to learn any navigation skill is when you actually need it. Spend a few clear nights in your garden or a local park running through the exercises above. Find the Plough. Trace to Polaris. Spot Cassiopeia. Identify Orion’s belt when it’s up. Repeat until it’s muscle memory, not a calculation.

    When you’re on a planned night walk or doing a dark-hours section on a long-distance route like the Pennine Way or the West Highland Way, consciously look up and test yourself. Cross-reference what the stars tell you with your compass. Build trust in the method so that if the compass ever fails, the sky is already a familiar friend rather than a confusing stranger.

    Combining Star Navigation with Your Existing Skills

    Learning to navigate using the stars hiking doesn’t replace map reading, compass work, or terrain association. It sits alongside them as another layer. The most confident navigators I know in the hills are the ones who can triangulate between multiple sources of information simultaneously; the map, the compass, the landscape, the sky. Each confirms or challenges the others. That redundancy is what keeps you safe when things go wrong in the dark.

    And there’s a quieter benefit too. Looking up at a clear sky above the Cairngorms or the Pembrokeshire coast path, being able to actually read it rather than just admire it, changes the experience entirely. The hills feel less indifferent when you understand the language they speak at night.

    Frequently Asked Questions

    How do I find Polaris (the North Star) from the UK?

    Locate the Plough constellation, then draw an imaginary line through its two outer Pointer Stars and extend it upward by about five times the gap between them. The moderately bright, perfectly still star at the end of that line is Polaris. It sits almost exactly due north from anywhere in Britain.

    Can you navigate using the stars hiking in cloudy UK weather?

    When cloud covers the sky, stars aren’t usable, so you need backup natural cues. The UK’s prevailing south-westerly wind direction, vegetation lean on exposed ridges, and terrain features you’ve memorised from the map beforehand all help maintain rough orientation. Celestial navigation works best as one layer in a broader toolkit.

    Is star navigation accurate enough for real mountain navigation?

    It’s accurate enough to establish cardinal directions and keep you moving in roughly the right bearing, but it won’t give you the pinpoint precision of a good compass bearing on a detailed map. Treat it as a reliable directional tool and orientation check rather than a replacement for detailed navigation on technical terrain.

    Which constellations are most useful for hikers in the UK?

    The Plough and Cassiopeia are the most consistently useful, both visible year-round from Britain and both pointing you toward Polaris. Orion is excellent in winter months because its belt rises due east and sets due west, giving you a quick east-west reference without any calculation.

    Do I need to update my star bearing throughout a night hike?

    Yes. Because the Earth rotates, stars appear to move across the sky at roughly one degree every four minutes. When walking by starlight, choose a target star in your required direction and update it every ten to fifteen minutes to account for this drift. Polaris is the exception and never needs updating.

  • Wild Swimming in the UK: The Best Rivers, Lakes and Lochs to Explore

    Wild Swimming in the UK: The Best Rivers, Lakes and Lochs to Explore

    There is something genuinely addictive about stripping off your boots, wading into a cold river and feeling the world reset around you. Wild swimming in the UK has surged in popularity over recent years, and honestly, it is not hard to see why. From the glassy lochs of the Scottish Highlands to the chalk streams of Hampshire, this country has some remarkable natural water waiting to be explored. You just need to know where to look, when to go, and how to do it safely.

    This is not a comprehensive tourist checklist. It is more of a hiker’s perspective on the wild swims worth building a day around, with some honest notes on the cold, the conditions, and why your body and mind will thank you for it afterwards.

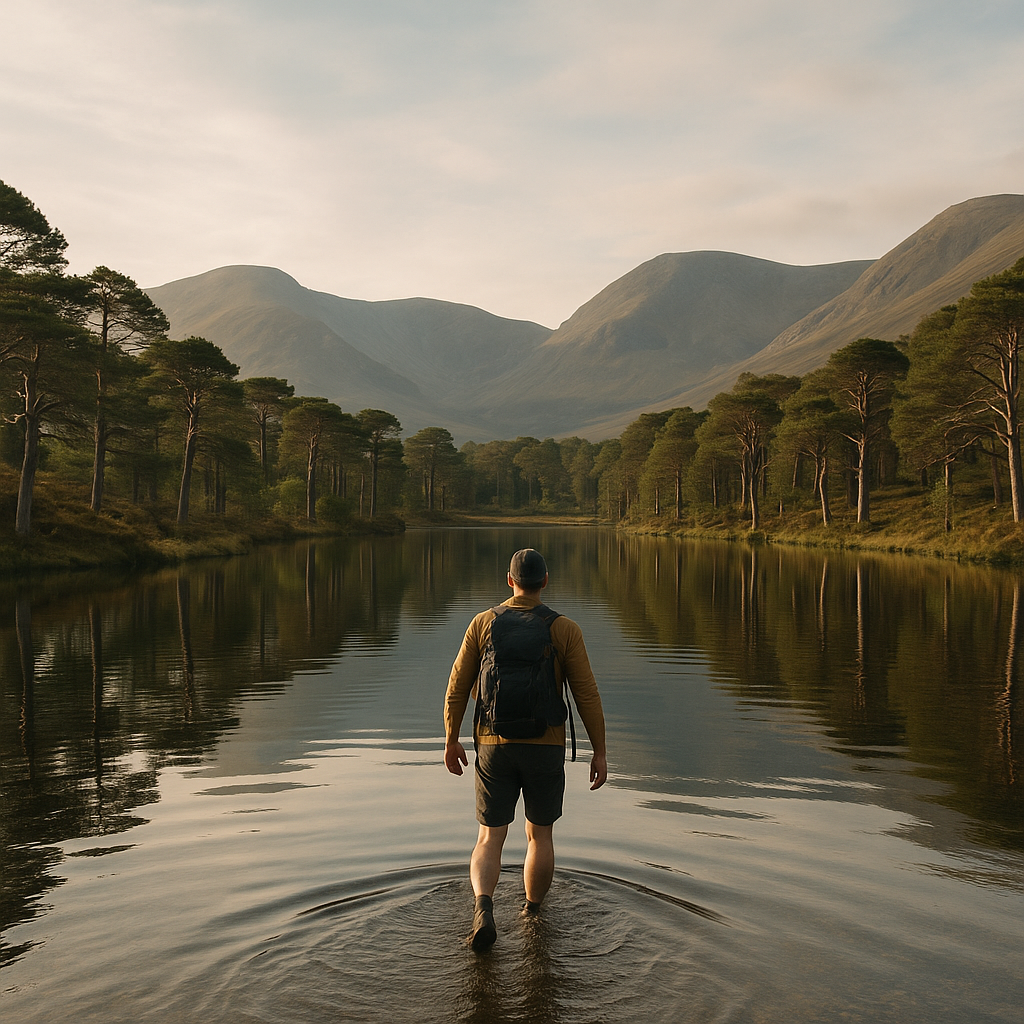
    Hiker wading into a clear Highland loch for wild swimming UK in the Cairngorms
    Hiker wading into a clear Highland loch for wild swimming UK in the Cairngorms

    Why Wild Swimming UK Is Worth the Cold

    Let’s not pretend getting into 12°C water is immediately comfortable. It isn’t. But the physical and mental payoff is real, and increasingly well-documented. Cold water immersion has been linked to reduced inflammation, improved circulation, and a measurable lift in mood, largely through the release of endorphins and noradrenaline. The NHS acknowledges swimming as one of the most complete forms of low-impact exercise, and cold open water adds an extra metabolic challenge on top of that.

    Beyond the physical, there is something about being surrounded by actual landscape rather than chlorinated tiles that settles the nervous system in a way a leisure centre simply cannot replicate. Ask anyone who swims in the Dart in Devon or the Brathay in the Lake District and they will tell you the same thing: it clears your head in a way that nothing else quite manages.

    The Best Wild Swimming Spots in the UK

    Loch an Eilein, Cairngorms

    Set amongst ancient Caledonian pine forest with a ruined castle island at its centre, Loch an Eilein near Aviemore is one of the most beautiful swims in the whole country. The water is peaty brown and cold even in summer, topping out at around 16°C in August. It is shallow near the southern shore, making it approachable, and the forest backdrop gives the whole thing a quiet, slightly otherworldly atmosphere. Worth combining with a walk through the reserve beforehand to warm up properly.

    Fairy Pools, Isle of Skye

    Famous, yes. Busy in peak season, absolutely. But the Fairy Pools at Glenbrittle remain genuinely spectacular and worth the effort. The water runs off the Cuillin ridge, cascading through a series of clear blue-green pools that look almost too vivid to be real. Swim here early in the morning or late in the afternoon between May and September to avoid the worst of the crowds. Water temperature rarely climbs above 14°C, so a wetsuit is a sensible choice for anything beyond a quick dip.

    River Wye, Herefordshire

    The Wye flows through some of the most beautiful border countryside in England, and sections near Hay-on-Wye and Symonds Yat have long been popular with wild swimmers. Access can be complicated in places due to private land, so checking current guidance via local wild swimming groups is worth doing before you set off. The river runs warmer than highland alternatives, often reaching 18°C in July, making it a gentler introduction to open water swimming.

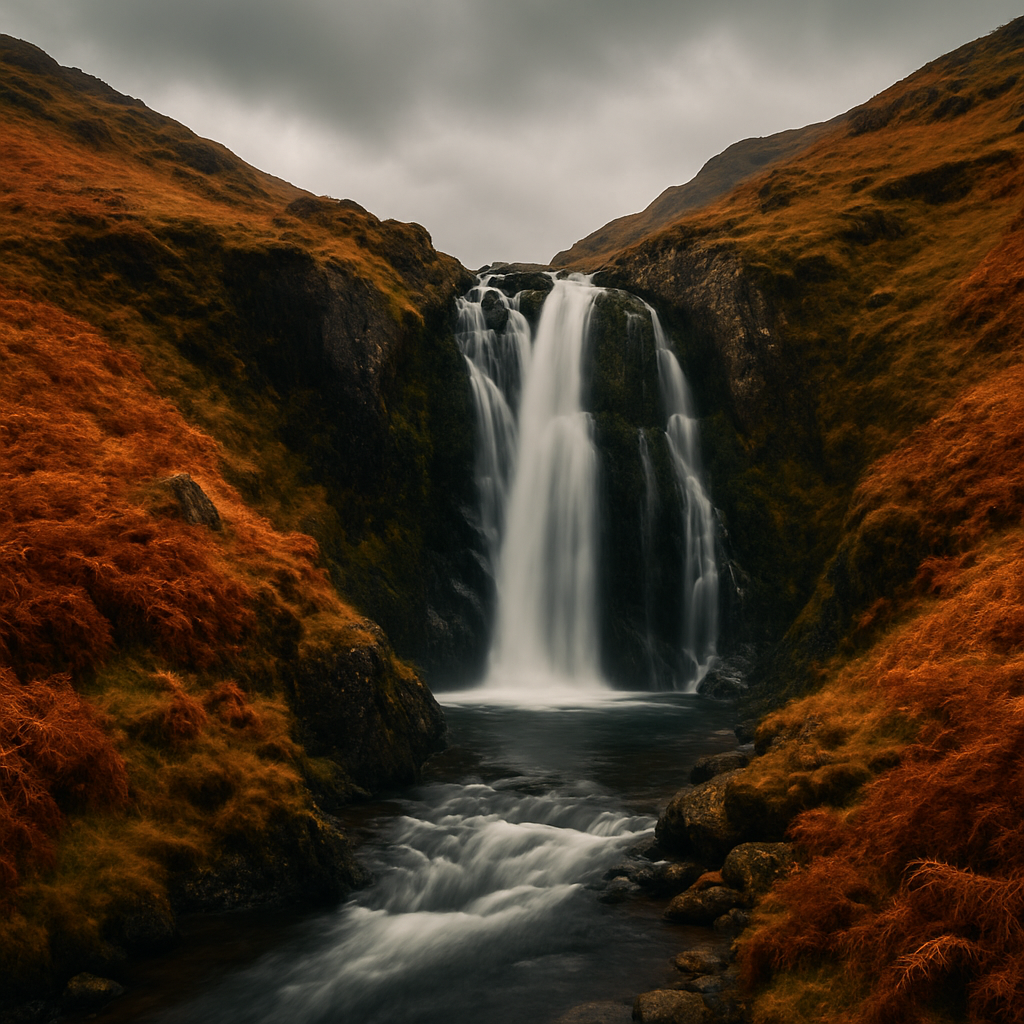
    Close-up of wild swimming UK cold water immersion in a clear Scottish river
    Close-up of wild swimming UK cold water immersion in a clear Scottish river

    Tarr Steps, Exmoor

    The River Barle above the ancient clapper bridge at Tarr Steps is a classic wild swim. Surrounded by oak woodland with dappled light and the sound of the water over stones, it is the kind of place that makes you understand why people do this. The pools are clear, the depth varies, and the whole area has a peaceful, tucked-away quality that rewards those who make the walk in. Exmoor’s moors drain into this river quickly after rain, so check conditions beforehand.

    Derwent Water, Lake District

    Of all the lakes in Cumbria, Derwent Water is one of the most accessible for swimming while still offering a proper sense of space. Launches from Crow Park near Keswick give easy water entry, and the view across to the fells is hard to beat on a clear morning. The Lake District has a genuine culture around outdoor swimming, and the water is generally clean. It is cold though; mid-summer temperatures hover around 17°C at the surface, dropping sharply with depth.

    Blea Tarn, Lake District

    Smaller and quieter than Derwent Water, Blea Tarn sits high above the Langdale valleys at around 200 metres elevation. Getting there on foot takes around 40 minutes from the car park at Great Langdale, and the effort is very much worth it. The tarn is dark, peaty, and still, with dramatic views across to the Langdale Pikes. Water temperature stays cold throughout the season, rarely breaking 14°C even in August. This one is for those who want the full experience without the crowds.

    Safety: What Every Wild Swimmer Needs to Know

    Wild swimming UK carries genuine risks that are worth taking seriously rather than glossing over. Cold water shock is the most immediate danger. When you enter cold water suddenly, your body gasps involuntarily, your heart rate spikes, and your ability to control your breathing is temporarily compromised. Entering the water slowly and allowing your body to acclimatise for 30 seconds to a minute before putting your face in dramatically reduces this risk.

    Other practical points: never swim alone in remote spots, always check for hidden currents especially in rivers after rainfall, tell someone where you are going, and wear a brightly coloured swim hat so you are visible. A tow float is a simple bit of kit that costs little and can make a real difference if you need to rest. Water temperature below 10°C is considered cold shock territory, particularly for less experienced swimmers.

    Water quality varies significantly. The Environment Agency publishes bathing water quality data for designated sites in England, and while many wild swims are in genuinely clean water, agricultural run-off and sewage incidents do affect certain rivers and lakes. Checking current reports before you swim is just good sense.

    When to Go: Seasonal Wild Swimming Advice

    June through to September is the sweet spot for wild swimming in the UK. Surface temperatures in lowland rivers and shallower lakes peak around July and August, giving you the best conditions with the least thermal stress on your body. Highland lochs and upland tarns run colder and stay cold longer, so July is usually the safest time to attempt them without a wetsuit.

    Spring and autumn swimming is entirely possible and popular amongst experienced cold water swimmers, but should not be attempted without a good wetsuit and a solid understanding of how your body responds to cold. Winter wild swimming is a discipline in its own right, with regular communities gathering at spots like Parliament Hill Lido and along the Serpentine in London year-round. If that appeals, ease in gradually rather than jumping in during January without prior cold adaptation.

    What to Bring for a Wild Swim

    Keep it simple. A good wetsuit if the water is below 15°C, a bright swim hat, a tow float, water shoes for stony lake beds, and a large dry robe or wool blanket for after. Changing out of wet kit quickly after your swim is important; staying cold and wet while trying to dress in a breezy car park leads to an unpleasant drop in core temperature. Bring a warm drink in a flask. It makes an enormous difference.

    Wild swimming in the UK rewards patience and preparation. The best spots often require a proper walk to reach, which suits anyone who already spends time on trails. And unlike a lot of outdoor pursuits, the entry cost is genuinely low. The water is free. The views are extraordinary. You just have to get in.

    Frequently Asked Questions

    Is wild swimming legal in the UK?

    In Scotland, the Land Reform (Scotland) Act 2003 gives a general right of access to most inland water for wild swimming. In England and Wales the situation is more complex, with legal access depending on whether the water is a designated bathing site or whether landowner permission exists. Many popular spots are used by tradition and tolerance rather than formal legal right, so it is worth researching individual locations before you go.

    What temperature is wild swimming water in the UK?

    Lowland rivers and shallow lakes in England can reach 17 to 20°C during July and August, which is quite comfortable for most swimmers. Highland lochs and upland tarns in Scotland and the Lake District typically stay between 10 and 16°C even at peak summer. Water below 10°C carries significant cold water shock risk and should only be attempted by experienced swimmers.

    Do I need a wetsuit for wild swimming in the UK?

    A wetsuit is strongly recommended for water below 15°C, for longer swims, or for anyone new to open water swimming. Even in summer, highland and upland waters rarely warm sufficiently to swim comfortably without one. A 3mm or 4mm full wetsuit provides good protection and also improves buoyancy, which is reassuring in unfamiliar water.

    What are the health benefits of wild swimming?

    Regular cold water swimming has been associated with reduced inflammation, improved circulation, and significant improvements in mood and mental wellbeing. Many swimmers report a lasting reduction in anxiety and a heightened sense of calm following regular open water sessions. The physical benefits of swimming itself, including cardiovascular fitness and low-impact full-body exercise, are well established.

    What are the best wild swimming spots in Scotland?

    Scotland has some of the finest wild swimming in the whole of the UK. Top spots include Loch an Eilein in the Cairngorms, the Fairy Pools on Skye, Loch Morlich near Aviemore, and the River Feshie in the Cairngorms National Park. The Scottish Highlands offer incredible scenery combined with clean, accessible water, though temperatures remain cold throughout the season.

  • The Ultimate Beginner’s Guide to Munro Bagging in Scotland

    The Ultimate Beginner’s Guide to Munro Bagging in Scotland

    There is something quietly life-changing about standing on a Scottish summit for the first time. The wind, the view, the sense that you have earned every single metre of elevation. Munro bagging has drawn walkers to Scotland’s hills for well over a century, and every year thousands of people add their first tick to the official list. If you have been wondering where to start, this guide covers everything you need before you pull on your boots.

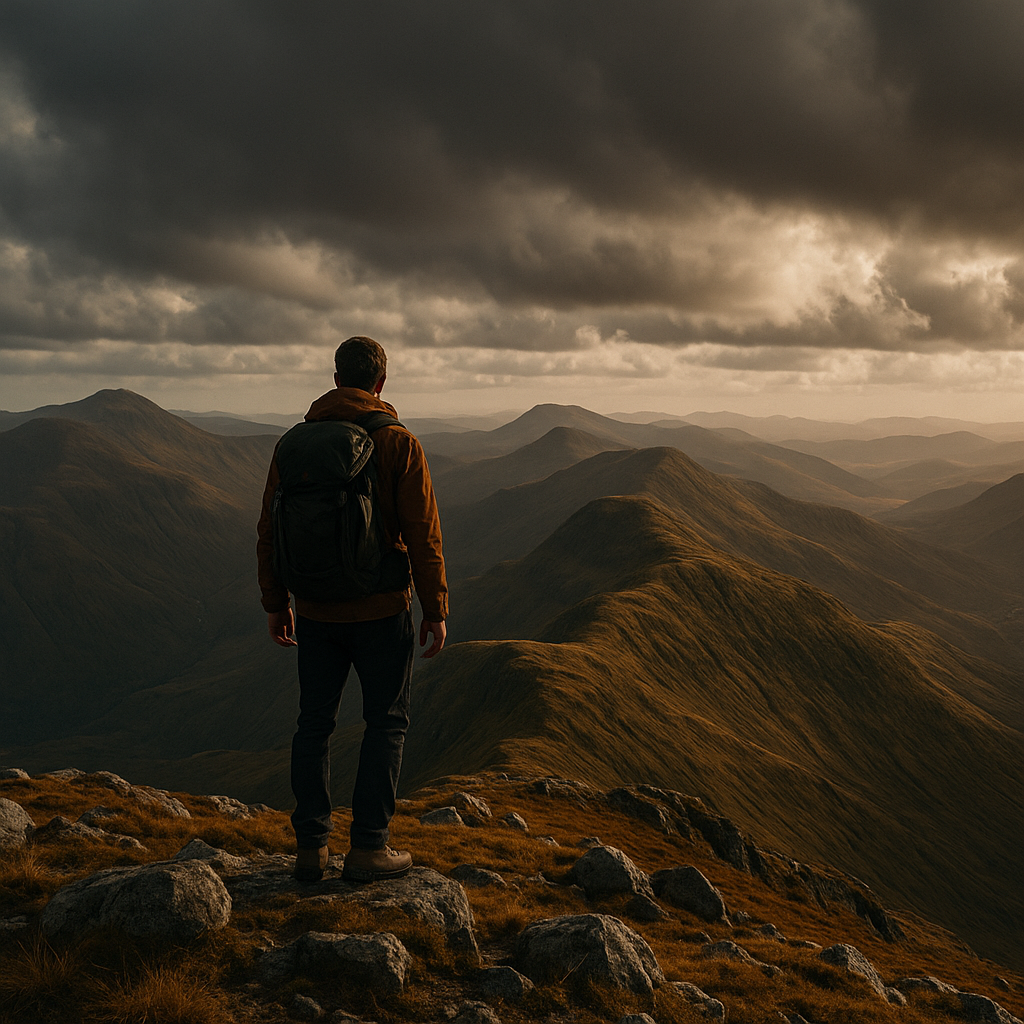
    Hiker standing on a Scottish mountain summit during Munro bagging, dramatic Highland landscape behind
    Hiker standing on a Scottish mountain summit during Munro bagging, dramatic Highland landscape behind

    What Actually Qualifies as a Munro?

    A Munro is any Scottish mountain with a summit height of 914 metres (3,000 feet) or above. The list was first compiled by Sir Hugh Munro in 1891 and published by the Scottish Mountaineering Club, which still maintains the official record today. The current count sits at 282 Munros, though the number has shifted over the years as surveying technology improved and the committee reviewed certain summits.

    It is worth knowing the distinction between a Munro and a Munro Top. A Top is a subsidiary summit over 914 metres that is connected to a higher Munro but does not have enough topographic separation to be classed as a mountain in its own right. Many people complete just the 282 Munros. Some go further and bag the Tops as well. For beginners, focus on the main list first.

    Why Munro Bagging Matters: The Culture Behind the Challenge

    Munro bagging is not just a personal fitness goal. It is a community. The Scottish Mountaineering Club keeps an official register of Compleaters (those who have summited all 282), and being added to that list carries genuine weight among hillwalkers. Around 7,500 people have completed the full round since records began, and each one remembers their last summit with striking clarity.

    Beyond the personal achievement, Munro bagging pulls you into Scotland’s wild landscape repeatedly, across every season. You learn how a hill behaves in January fog versus August sunshine. You learn your own limits. That gradual accumulation of mountain experience is part of what makes the pursuit so rewarding.

    The Best Munros for Beginners: Where to Start

    Choosing your first Munro well makes a real difference to your confidence. These are four excellent starting points, each offering a manageable route without technical scrambling.

    Ben Lomond, Loch Lomondside

    At 974 metres, Ben Lomond is the most southerly Munro and one of the most accessible from central Scotland. The tourist path from Rowardennan is well-maintained and clearly signed throughout. Return distance is roughly 11 kilometres with around 870 metres of ascent. Expect a full day out, but nothing that requires specialist kit.

    Schiehallion, Perthshire

    Schiehallion’s distinctive conical shape makes it immediately recognisable, and the eastern ridge route from Braes of Foss car park is straightforward in decent weather. At 1,083 metres, the summit offers panoramic views across Rannoch Moor. The path can be boggy in places, so waterproof boots are non-negotiable.

    The Cobbler (Ben Arthur), Arrochar Alps

    Technically The Cobbler does not qualify as a Munro, sitting at 884 metres, but it is frequently recommended as a training hill before your first proper summit. It builds confidence, teaches route-reading, and the scramble to the true summit is a brilliant introduction to exposed terrain.

    Cairn Gorm, Cairngorms National Park

    The funicular railway at CairnGorm Mountain gives less experienced walkers a head start, though purists will prefer to ascend on foot from Coire Cas. At 1,245 metres it is one of Scotland’s highest peaks, but the plateau approach from the ski centre is relatively straightforward in summer conditions.

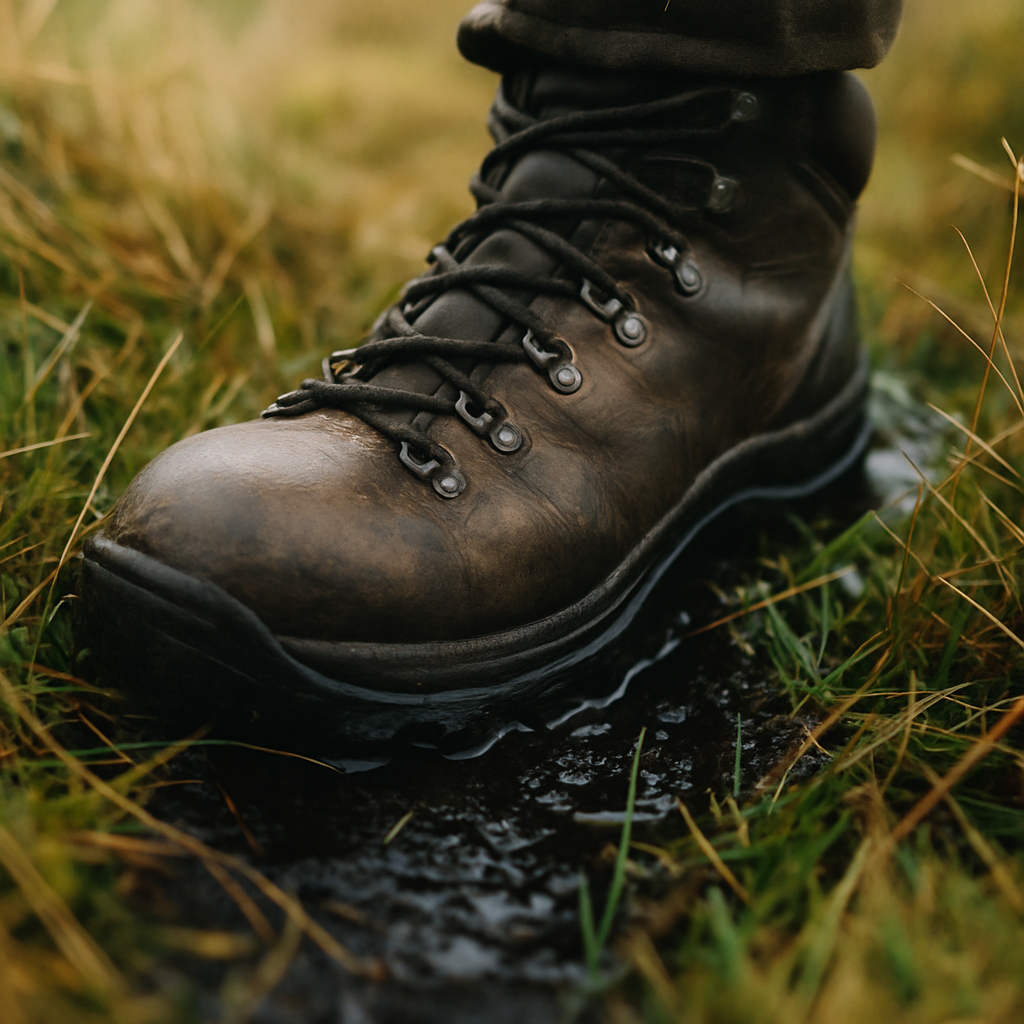
    Waterproof hiking boot on wet Scottish moorland during a Munro bagging walk
    Waterproof hiking boot on wet Scottish moorland during a Munro bagging walk

    Planning Your First Munro: Logistics That Matter

    Good planning is the difference between a brilliant day out and a very cold, wet, miserable one. Here is what to sort before you go.

    Maps and Navigation

    Download Ordnance Survey maps for your route via the OS Maps app, and carry a physical 1:25,000 paper backup. Scotland’s mountain weather changes fast. Do not rely solely on a mobile signal that may not exist above 600 metres.

    Weather

    Check the Mountain Weather Information Service (MWIS) forecast specific to your range, not just the general Met Office outlook for the nearest town. Summit temperatures can sit 10°C or more below valley readings even in summer.

    What to Carry

    The basics: waterproof jacket and trousers, warm mid-layer, hat and gloves (even in July), food and at least 1.5 litres of water, first aid kit, head torch, whistle, and a fully charged mobile. A good pair of walking poles takes real pressure off the knees on descent, particularly on steep ground.

    Getting There

    Many Munro starting points are remote. Public transport options exist for some hills, but most walkers drive. If you are planning extended trips across the Highlands, a reliable 4WD vehicle helps enormously on single-track roads and rough car park surfaces. Owners of capable off-roaders often source quality components for Toyota 4x4s to keep their vehicles properly maintained for exactly this kind of terrain.

    Recording Your Progress: The Official Munro List

    Keeping track of completed Munros is part of the fun. Many walkers use a printed copy of the full list with dates and notes scribbled next to each summit. Others use dedicated apps like Walkhighlands or Munro Society trackers, which let you log each ascent with photos and notes.

    When you eventually complete all 282, you can submit your Compleation to the Scottish Mountaineering Club for inclusion in the official register. You will need details of your final summit, the date, and a couple of supporting notes. The SMC publishes updated Compleater lists in their journal and online.

    Respecting Scotland’s Mountains and the Environment

    Scotland’s Land Reform (Scotland) Act 2003 gives walkers the right to access most land responsibly, under the Scottish Outdoor Access Code. With that freedom comes responsibility. Stick to the path where it exists to reduce erosion. Pack out everything you bring in. If you are wild camping near summits, choose a spot at least 30 metres from any water source and leave no trace of your visit. The mountains belong to everyone who comes after you.

    Setting Realistic Expectations for Your Munro Bagging Journey

    The 282 Munros span the entirety of the Scottish Highlands and Islands, from Arran in the south to the remote Fisherfield range in the north-west. A committed hillwalker completing one or two weekends of Munro walking per month might finish the full list in seven to ten years. Some do it in a continuous round in a single season. Most people fall somewhere in the middle, fitting it around work, family, and the unpredictable British weather.

    The pace does not matter. What matters is that each summit feels earned. Start with accessible hills, build your fitness and navigation skills progressively, and let the list grow at its own rate. Scotland’s mountains are patient. They have been waiting for you long enough already.

    Frequently Asked Questions

    How many Munros are there in Scotland?

    There are currently 282 Munros on the official list maintained by the Scottish Mountaineering Club. The number has changed slightly over the years as survey technology improved and the committee revised certain summits.

    What is the easiest Munro for a complete beginner?

    Ben Lomond in Loch Lomondside is widely considered the most beginner-friendly Munro, with a well-maintained tourist path and straightforward navigation. Schiehallion in Perthshire is another excellent first choice with a clear ridge route.

    Do I need any special equipment to start Munro bagging?

    You do not need technical climbing gear for most Munros, but waterproof clothing, sturdy ankle-supporting boots, a map and compass, food, and sufficient water are essential. A head torch and first aid kit should always be in your pack.

    How do I record my completed Munros officially?

    Many walkers track progress privately using apps like Walkhighlands or a printed list. Once you have climbed all 282, you can submit your Compleation to the Scottish Mountaineering Club for inclusion in their official register.

    Is it safe to climb Munros alone as a beginner?

    Solo hillwalking carries greater risk, particularly in poor weather or on unfamiliar terrain. If you are new to the hills, it is strongly advisable to go with a more experienced companion or join a hillwalking club until you have built solid navigation and mountain skills.

  • Essential Navigation Skills Every Hiker Should Master Before Hitting Remote Trails

    Essential Navigation Skills Every Hiker Should Master Before Hitting Remote Trails

    There is a particular kind of confidence that comes from standing on a featureless moorland in poor visibility and knowing exactly where you are. No signal, no battery, no fuss. Just you, a map, a compass, and the ground beneath your boots. That confidence does not arrive by accident. It is built through practice, and it is the single most important thing separating a hiker who is comfortable in remote terrain from one who is not. These are the hiking navigation skills every person heading into the hills should own before they go anywhere truly wild.

    Hiker reading an OS map on open moorland, practising hiking navigation skills in remote UK terrain
    Hiker reading an OS map on open moorland, practising hiking navigation skills in remote UK terrain

    Why Map Reading Still Matters More Than Your Phone

    Mobile maps are brilliant as a backup. I use them myself. But relying on a phone as your primary navigation tool in remote country is a gamble you do not want to lose. Batteries drain faster in cold weather, screens become impossible to read in rain, and signal disappears the moment you need it most. The 1:25,000 Ordnance Survey Explorer maps remain the gold standard for UK hillwalking. Every contour, every crag, every footpath, every stream crossing is there in precise detail. Buy the paper version. Carry it in a map case clipped to your chest. Know how to use it before you leave the car park.

    Start by understanding the scale. On a 1:25,000 map, 4 cm equals 1 km on the ground. That is the map most walkers use in the hills. The 1:50,000 Landranger series covers larger areas but sacrifices detail. For Dartmoor, the Cairngorms, the Brecon Beacons, or anywhere with complex terrain, always go for the more detailed sheet. Ordnance Survey’s own guidance on navigating with a map is a solid starting point if you want to sharpen the basics further.

    Understanding Contour Lines: Reading the Shape of the Land

    Contour lines are the heartbeat of a topographic map. Once you can read them fluently, the map stops being a flat sheet of paper and becomes a three-dimensional model of the landscape you are about to walk through. On a 1:25,000 OS map, contour lines are drawn at 10-metre vertical intervals. The closer together the lines, the steeper the slope. Widely spaced lines mean gentle, easy ground.

    Learning to spot a ridge versus a valley on paper is one of the most useful hiking navigation skills you can develop. A ridge shows as contours curving away from the high ground (the V points downhill). A valley shows contours curving towards the high ground (the V points uphill). Cirques, cols, spurs and re-entrants all have their own signatures. Spend time matching map symbols to real terrain. Pick a familiar hill first. Study the map at home, then walk it and see how the ground matches what you expected.

    How to Use a Compass Properly

    A baseplate compass such as the Silva Expedition 4 or the Suunto A-10 is what you want. They are affordable, robust, and entirely reliable. Learn three fundamental techniques.

    Taking a Bearing from the Map

    Place the edge of your compass along the line between your current position and your destination. Rotate the bezel until the orienting lines align with the north-south grid lines on the map (red to north). Add the magnetic declination for the UK, which in most of mainland Britain is currently around 1-2 degrees west. Then hold the compass level, rotate your body until the red needle sits in the orienting arrow, and walk in the direction of travel arrow. That is it. Simple, reliable, and it works in zero visibility.

    Taking a Bearing from the Ground

    Point the compass direction-of-travel arrow at a distant landmark. Rotate the bezel to box the needle. Read the bearing. Transfer it to your map to confirm your position or check your heading. This is called a resection when you use two or more bearings to fix your location, and it is enormously useful on open hillsides where features are sparse.

    Walking on a Bearing

    In mist or darkness, pick an intermediate object in the direction of travel, walk to it, then repeat. Do not try to stare at the compass the entire way. You will veer off course. Pick a tussock, a fence post, a boulder. Reach it. Re-check. Carry on.

    Compass on an OS map showing contour lines, a core hiking navigation skill for remote trails
    Compass on an OS map showing contour lines, a core hiking navigation skill for remote trails

    Pacing and Timing: Knowing How Far You Have Walked

    Two simple tools help you measure distance on the ground without a GPS. The first is pacing. Count your double paces (every time your right foot hits the ground) over a measured 100 metres on flat terrain. Most people take around 62-65 double paces per 100 metres. Adjust for uphill, downhill, and boggy ground. Pace beads (available from most outdoor shops for a couple of pounds) help you track distance over longer legs.

    The second is Naismith’s Rule. Allow one hour for every 5 km of horizontal distance, plus one additional minute for every 10 metres of ascent. It is a rough formula but a surprisingly accurate one on most British terrain. On Dartmoor in good conditions you might move faster. In deep heather on the Cairngorms plateau, you might move slower. Adjust accordingly, and always build buffer time into remote routes.

    Route Finding in Featureless Terrain

    High plateaux, fog-bound moorland, and snow-covered hillsides strip away the visual cues most walkers unconsciously rely on. This is where your hiking navigation skills are truly tested. The key is to break the route into short, measurable legs between clearly identifiable features. Attack points (a distinctive boulder, a stream junction, the edge of a plantation) let you confirm position before committing to the next leg.

    Catching features are equally important. These are lines or landmarks that tell you when you have gone too far. A wall running east-west, a stream, a forest boundary. If you hit your catching feature without reaching your target, you know to stop and reassess. Plan these into every section of a remote route, not just the tricky bits.

    When to Use Digital Backup Methods

    A GPS device or a phone running OS Maps with an offline download is genuinely useful as a secondary tool. The key word is secondary. I keep my phone in an inside chest pocket (warmer, battery lasts longer), switched on flight mode to conserve charge, and drop a waypoint at the start of every walk. The Harvey Maps app and OS Maps both allow pre-downloaded maps that work offline. That is worth doing before any remote outing.

    What you should avoid is treating a digital fix as a substitute for knowing where you are. A GPS tells you a grid reference. Understanding what that grid reference means on the ground, which slope you are on, which valley is below you, which way the safe descent lies, requires you to read the map. The two work together, not in isolation.

    Practical Ways to Build Confidence

    The fastest way to improve is to navigate somewhere familiar without following a path. Take a map to your local common, park, or low-level forest, turn off your phone, and navigate purely by map and compass for an hour. It feels strange at first. That strangeness fades quickly with repetition. Mountain training courses run by the Mountain Training Association give structured, assessed learning if you want to progress to winter navigation or leadership.

    Good kit matters too, but it does not need to be expensive. A decent compass, an OS map, a pencil for marking your route, and a waterproof map case are the essentials. Everything else is bonus. Interestingly, the impulse to prepare your kit properly extends beyond the hills. Whether you are prepping a rucksack for a remote route or sorting out a building project that requires specialist work like asbestos floor removal before renovating an old property you use as a base, doing things properly and safely from the outset always saves trouble later.

    The Bigger Picture: Why These Skills Protect Wild Places

    Hikers who navigate well tend to stick to planned routes, avoid causing erosion through shortcuts taken in confusion, and respond calmly to unexpected conditions. They also need rescuing less often. Mountain Rescue teams in England and Wales carry out thousands of call-outs each year, and a meaningful proportion involve walkers who were poorly equipped and unprepared for the terrain. Building strong hiking navigation skills is not just about personal safety. It is about respecting the mountain, the environment, and the volunteers who give up their time when things go wrong.

    Get out on the map. Practise in low-stakes places. Then take those skills somewhere that genuinely demands them. The hills will reward you for it.

    Frequently Asked Questions

    What is the best compass for hiking in the UK?

    A baseplate compass such as the Silva Expedition 4 or Suunto A-10 is ideal for most UK hillwalking. They are lightweight, accurate, and cost between £15 and £35 at most outdoor retailers. Avoid purely digital compasses as a primary tool in remote terrain.

    Which OS map scale is best for hiking in remote UK terrain?

    The 1:25,000 Ordnance Survey Explorer series is the preferred choice for remote hillwalking, as it shows 10-metre contour intervals and fine detail such as field boundaries, crags, and bridleways. The 1:50,000 Landranger maps cover larger areas but lack the same level of ground detail.

    How do I read contour lines on a walking map?

    Contour lines join points of equal height, drawn at 10-metre intervals on 1:25,000 OS maps. Closely spaced lines indicate steep ground; widely spaced lines indicate gentle slopes. V-shapes pointing uphill indicate valleys; V-shapes pointing downhill indicate ridges or spurs.

    Can I navigate in the hills using only my phone?

    A phone running an offline map app such as OS Maps or Harvey Maps is a useful backup but should never be your only navigation tool in remote terrain. Cold weather drains batteries quickly, screens can be difficult to read in rain, and there is no substitute for knowing how to read a paper map and compass.

    How can I improve my hiking navigation skills quickly?

    The most effective practice is to navigate on familiar low-level ground without following a path, using only a map and compass. Start on a local common or forest. Mountain Training Association courses also offer structured progression into more advanced navigation, including night and winter techniques.

  • How to Train for a Multi-Day Trek: A 12-Week Preparation Plan

    How to Train for a Multi-Day Trek: A 12-Week Preparation Plan

    There is a particular kind of suffering that only reveals itself on day two of a multi-day trek, when your legs have forgotten what fresh feels like and your shoulders have started a quiet protest against the weight on your back. The good news is that suffering is largely optional, provided you put in the groundwork before you set foot on the trail. A solid hiking training plan built over 12 weeks will transform what might otherwise be a gruelling ordeal into one of the most rewarding experiences you can have outdoors.

    This plan is aimed at anyone targeting a challenging multi-day route: think the West Highland Way, the Pembrokeshire Coast Path, or a Lakeland traverse. It assumes you can already walk a few miles comfortably but are not yet trail-fit. By the end, you will have the leg strength, cardiovascular base, and loaded-pack endurance to handle consecutive days of 16-25 kilometres over mixed terrain.

    Hiker with loaded rucksack on a Scottish Highland trail following a hiking training plan
    Hiker with loaded rucksack on a Scottish Highland trail following a hiking training plan

    Before You Start: Establish Your Baseline

    Week one is not about smashing yourself. It is about knowing where you are starting from. Head out for a 6-8 kilometre walk on a local footpath, ideally with some gentle elevation. Note how your legs feel the following morning. That soreness (or absence of it) tells you whether you need to ease into the early weeks or can push a little harder from the off.

    Get your kit sorted early too. Break in your boots now, not on day one of your trek. Wear the socks you intend to use on the trail. Small blisters during training are far preferable to large ones halfway through a 160-kilometre route. Check your rucksack fits properly; a badly adjusted harness will punish your lower back regardless of how fit you are.

    Weeks 1-3: Build the Aerobic Foundation

    The first three weeks are about waking your cardiovascular system up gently. Aim for three sessions per week: two shorter walks of 5-8 kilometres on relatively flat ground, and one slightly longer effort at the weekend pushing towards 12-14 kilometres. Keep the pace conversational. You should be able to hold a full sentence without gasping.

    Add two sessions of bodyweight strength work per week. Squats, lunges, step-ups onto a sturdy bench, and single-leg glute bridges are your friends here. These movements target the quads, hamstrings, and glutes that do the heavy lifting on every ascent and descent. Three sets of 12-15 repetitions is plenty at this stage.

    If you commute into a town or city, you might already be navigating areas affected by clean air initiatives. For those who drive to trailheads, it is worth knowing whether your vehicle is ULEZ-compliant if your route takes you through Greater London, as charges can add unexpected costs to your adventure travel.

    Weeks 4-6: Introduce Elevation and Load

    Now things start to get interesting. Swap one of your flat mid-week walks for a route with genuine ascent. Living somewhere like the Peak District, the Brecon Beacons, or the North York Moors gives you options on your doorstep. If you are based in a flatter part of the country, use staircases, car park ramps, or even a treadmill with a significant incline to simulate the demand. Not glamorous, but effective.

    Start wearing your rucksack on the longer weekend walk, loaded to around 5-7 kg. This is lighter than you will likely carry on a real multi-day trip, but it begins training the stabilising muscles in your core and shoulders and gives you a chance to identify any hot spots the pack creates before it matters.

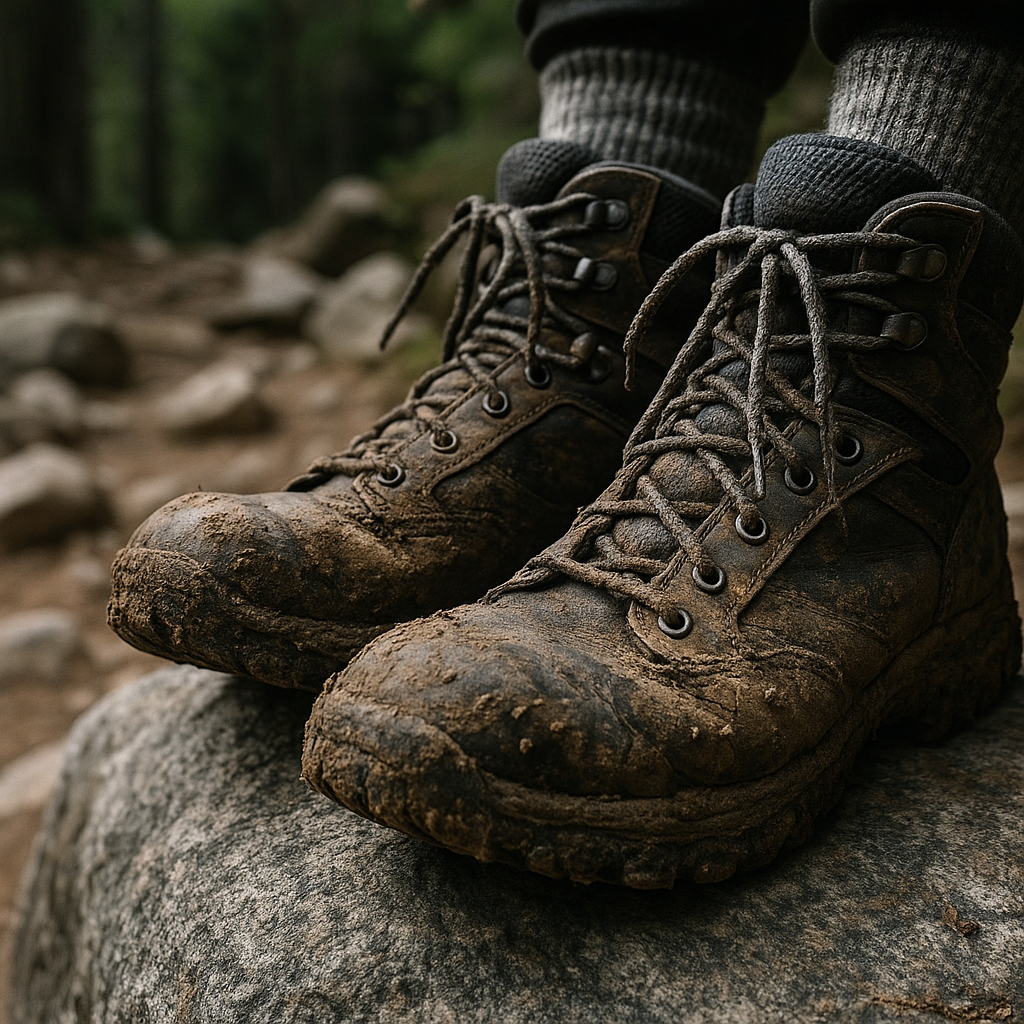
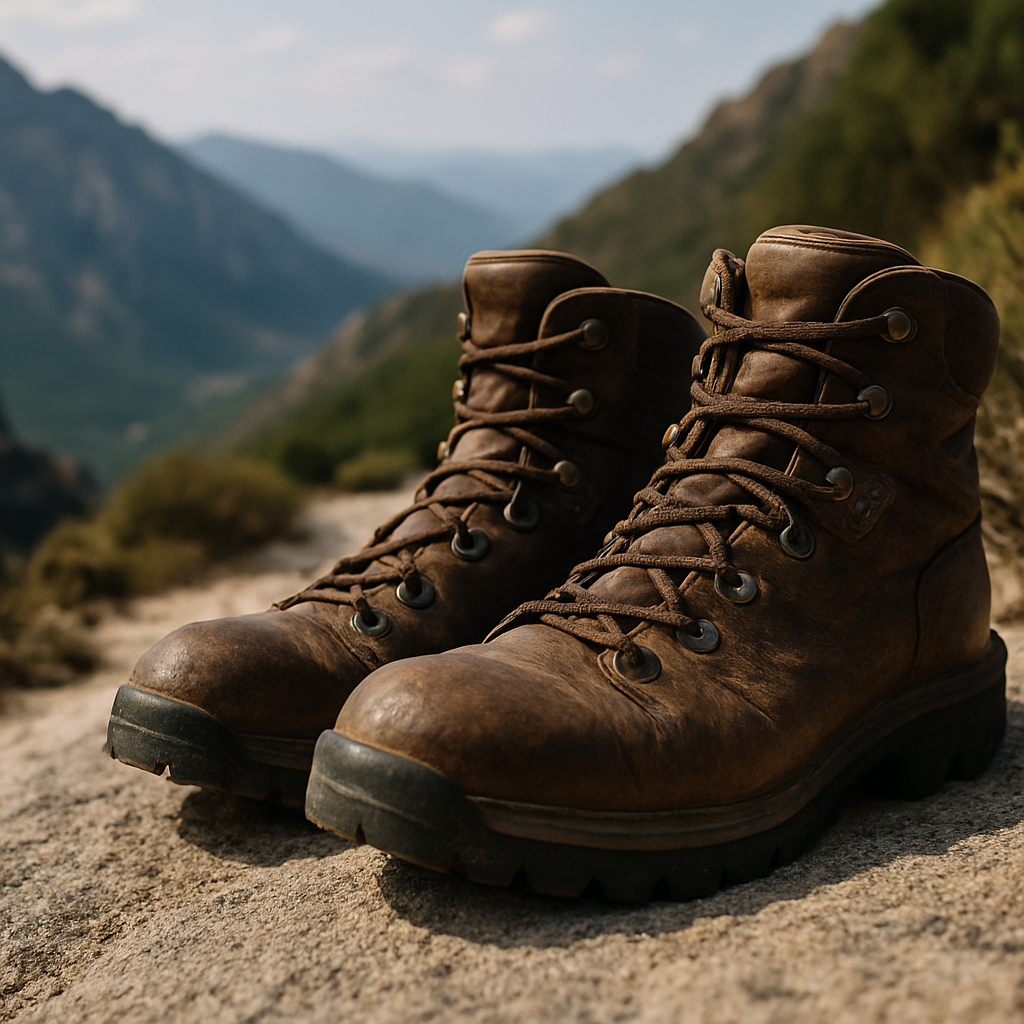
    Close-up of hiking boots on muddy rocky trail during hiking training plan preparation
    Close-up of hiking boots on muddy rocky trail during hiking training plan preparation

    Your weekend long walk should now reach 16-18 kilometres. Keep one recovery day between every hard session. Overtraining at this stage is the most common mistake, and it is the one most likely to sideline you with a knee or ankle issue.

    Weeks 7-9: Simulate Real Trail Conditions

    This is the heart of your hiking training plan, and this is where the work starts to feel meaningful. The goal now is to replicate, as closely as possible, the conditions you will face on your chosen trek.

    Increase your pack weight to 8-10 kg, which is a realistic load for a multi-day trip with camping gear or a change of clothing and provisions. Your long weekend walk should extend to 20-24 kilometres, ideally on rough or mixed terrain. Grassy paths, stony tracks, boggy sections: the more variety, the better your ankles and stabilisers will adapt.

    Introduce back-to-back walking days. On Saturday, complete your long walk. On Sunday, do a shorter 10-12 kilometre recovery walk. This combination is the closest training equivalent to back-to-back hiking days, teaching your body to perform when it is already tired. According to NHS guidance on walking for health, consistent aerobic walking is one of the most effective ways to build cardiovascular endurance with low injury risk, which is exactly why hikers respond so well to this kind of progressive load.

    Keep your strength sessions in the programme but reduce the volume slightly. Two sets rather than three. Maintain the movements, just manage fatigue.

    Weeks 10-11: Peak Load and Long Days

    These two weeks are the hardest in the plan. Your body should now be adapting well and you should notice genuine improvement in how you feel on the trail. The weekend long walk peaks at 26-28 kilometres with 8-10 kg on your back. If your target route involves significant total ascent, try to find a route that mirrors it.

    Continue back-to-back days. If you can manage a three-day hiking weekend during week ten or eleven, even better. Head somewhere like the Yorkshire Dales or Dartmoor for a proper weekend out. Sleep in a tent or a bothy. Eat trail food. Cook on a small stove. The whole experience matters, not just the fitness numbers. You are training your systems, your gear management, and your mental resilience as much as your muscles.

    Your hiking training plan should also include some deliberate descending practice. Descents are where knees suffer most, and many people neglect this. Walk downhill slowly and with control, keeping your weight back slightly over your heels. Trekking poles are genuinely useful here and worth investing in if you have not already.

    Week 12: Taper and Prepare

    The final week before your trek is not the time to squeeze in extra miles. Taper down sharply. A couple of easy 8-kilometre walks, no heavy pack, no long days. Your body needs this week to consolidate everything it has built. Trust the work you have put in.

    Use the time to sort your kit list, check your maps, charge your head torch, and confirm your food plan for each day of the trek. Check the weather forecast for the area using the Met Office, and if you are heading into the hills, familiarise yourself with the terrain using the relevant Ordnance Survey maps. Good preparation at this stage is as valuable as any training session.

    What the 12 Weeks Actually Builds

    Done properly, this hiking training plan delivers four things: a cardiovascular base that lets you sustain effort across long days without blowing up, leg strength that protects your knees on descents and powers you through ascents, postural endurance that means your back and shoulders can carry a pack for seven hours without collapsing, and mental familiarity with discomfort, which is honestly half the battle on any serious multi-day route.

    The mountains are not going anywhere. But the version of you that walks into them in twelve weeks will be a very different animal from the one sitting here reading this now. Get your boots on.

    Frequently Asked Questions

    How many days a week should I train for a multi-day hiking trip?

    Four to five days per week is a solid target, combining walking sessions with two days of bodyweight strength work. One full rest day per week is essential, and during peak training weeks two shorter recovery days can prevent overuse injuries.

    How heavy should my training pack be?

    Start with 5-7 kg in weeks four to six, then build to 8-10 kg during the hardest training weeks. This mirrors the weight most hikers carry on a multi-day trip with camping or guesthouse kit and trains the stabilising muscles in your core and shoulders progressively.

    Can I follow this hiking training plan if I live in a flat area with no hills?

    Yes, with some adaptation. Use a treadmill set to a steep incline, climb stairs repeatedly, or load your pack heavier to compensate for the lack of elevation gain. Try to get out to hilly terrain at least two or three times during the 12 weeks, even if you need to travel to do so.

    What exercises are most important for hiking fitness?

    Squats, lunges, step-ups, and single-leg glute bridges are the most transferable exercises for hiking. They strengthen the quads, hamstrings, and glutes which do the majority of the work on ascents and descents. Calf raises are also worth including to protect the ankles on uneven ground.

    How long before a big trek should I start training?

    Twelve weeks is the minimum for building a meaningful fitness base from a moderate starting point. If your target route is particularly demanding, such as a high-level mountain traverse or a route with over 1,000 metres of daily ascent, 16-20 weeks would give you more margin and reduce injury risk.

  • Mountain Layering System Explained: How to Dress for Any Condition

    Mountain Layering System Explained: How to Dress for Any Condition

    Getting your clothing right in the mountains is one of the most important skills you can develop as a hiker. The mountain layering system is the tried and tested approach that outdoor enthusiasts have relied on for decades, and for good reason. Rather than wearing one thick, heavy garment, you build up multiple thinner layers that work together to manage moisture, retain warmth, and protect you from the elements. In Britain, where the weather can shift from warm sunshine to driving rain and back again within the space of an afternoon, knowing how to layer properly is not optional. It could genuinely keep you safe.

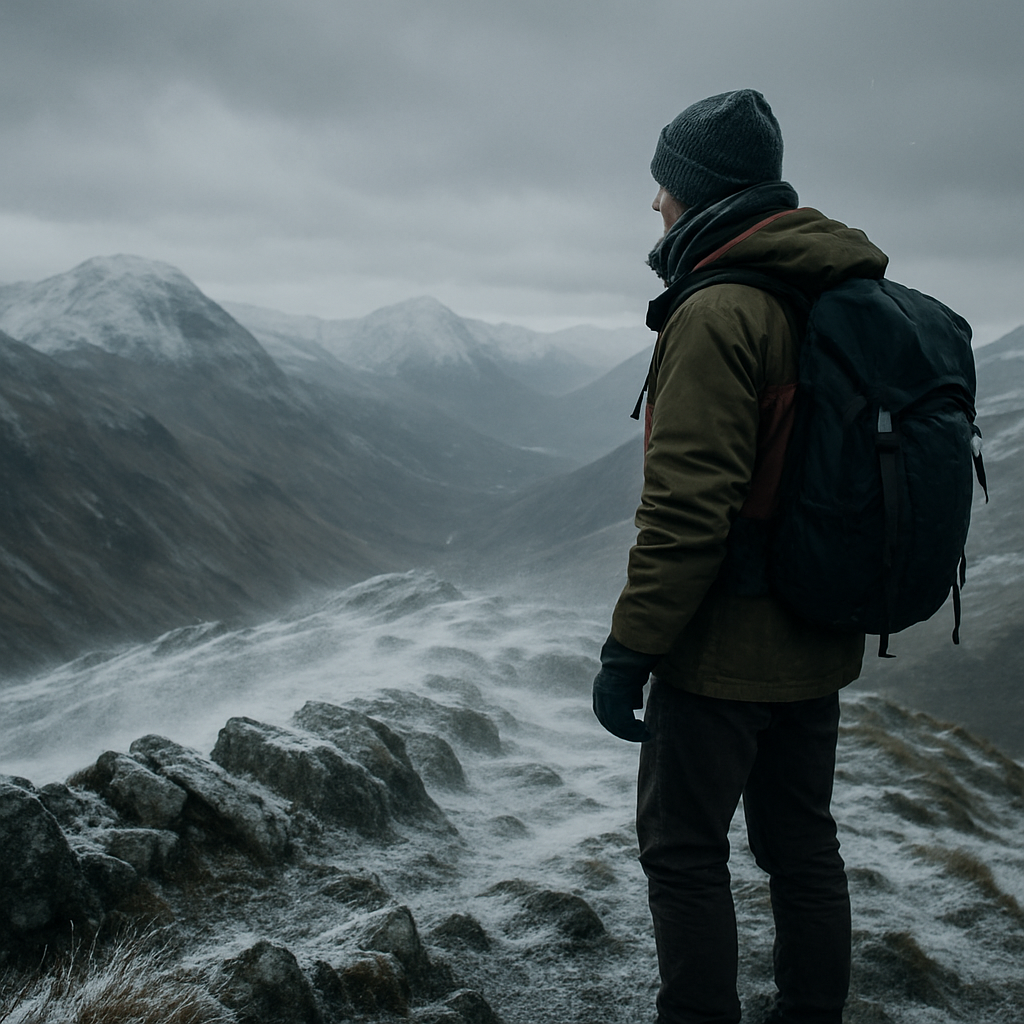
    Hiker on a Scottish mountain ridge demonstrating the mountain layering system in changeable autumn weather
    Hiker on a Scottish mountain ridge demonstrating the mountain layering system in changeable autumn weather

    What Is the Mountain Layering System?

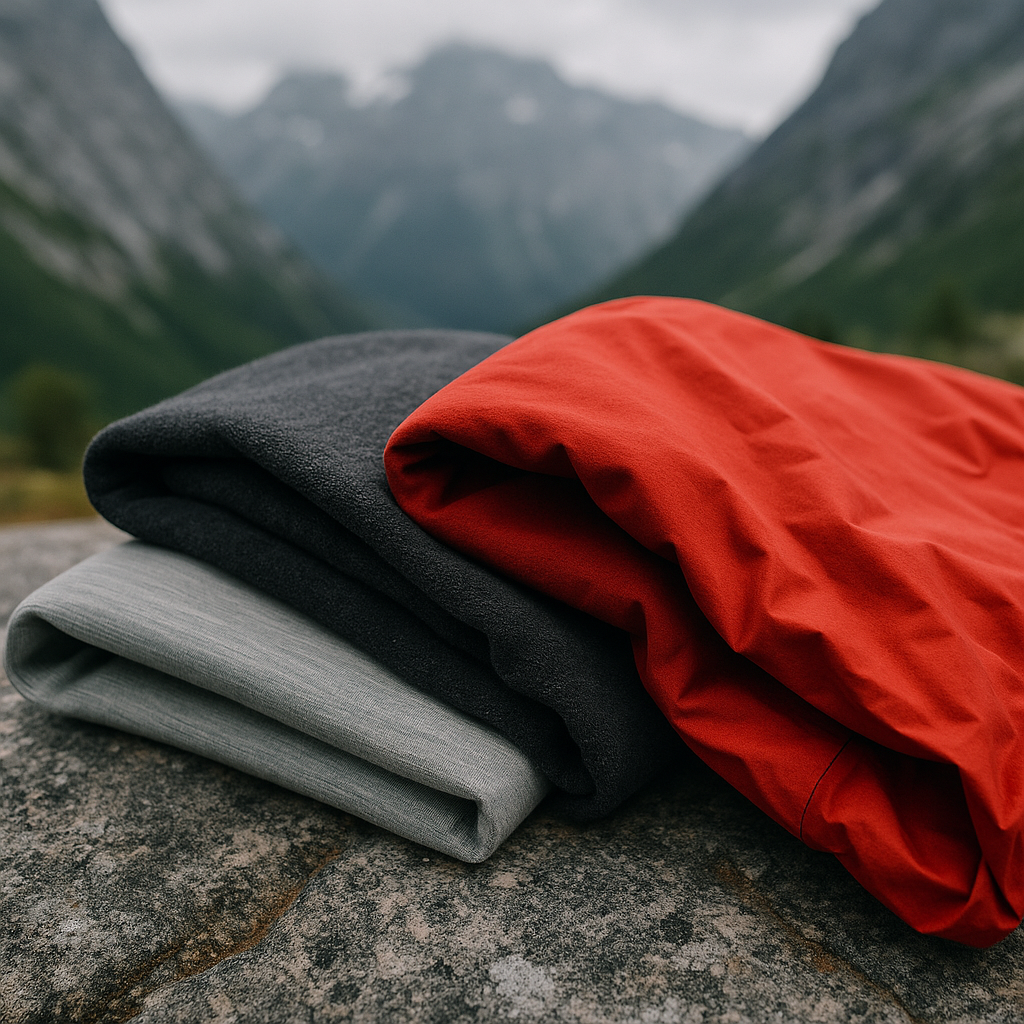
    The mountain layering system breaks clothing into three distinct roles: the base layer, the mid layer, and the shell layer. Each one has a specific job to do, and when they work together, they create a flexible, adaptable system that responds to changing conditions. You can add or remove layers depending on your exertion level, the temperature, and the weather rolling in overhead. That flexibility is what makes it so effective on British hills, where you might sweat hard on a steep ascent and then stand exposed and chilling on a ridge top within minutes of each other.

    The Base Layer: Managing Moisture Next to Your Skin

    Your base layer is the one in direct contact with your skin, and its primary job is moisture management. When you exert yourself on a climb, you sweat. If that moisture sits against your skin, your body temperature drops rapidly the moment you stop moving. A good base layer wicks sweat away from the skin and moves it outward to the next layer where it can evaporate.

    Merino wool is widely considered the best base layer material for British mountain use. It is naturally odour-resistant, manages moisture well, and crucially retains warmth even when damp. This is a major advantage in wet UK conditions. Synthetic options such as polyester are lighter, dry faster, and are often cheaper, making them a solid choice for high-intensity activities where you will be sweating heavily. Avoid cotton entirely as a base layer. Once wet, cotton loses all insulating properties and becomes a genuine cold-weather hazard.

    The Mid Layer: Trapping Heat When You Need It

    The mid layer is your insulation. Its job is to trap warm air close to the body and retain your core temperature, particularly when you slow down or stop. This is the layer you will add when you reach a summit or take a break in the wind, and remove when you start working hard again.

    Close-up of a mid layer being adjusted as part of the mountain layering system on a hillside
    Close-up of a mid layer being adjusted as part of the mountain layering system on a hillside

    Fleece is the classic mid-layer choice for UK hiking. It is breathable, relatively lightweight, dries quickly, and offers a good warmth-to-weight ratio. Grid-fleece styles, with their textured inner surface, are especially good at managing moisture from the base layer below. For colder conditions or winter mountain days, a synthetic insulated jacket works extremely well. Unlike down, synthetic insulation retains most of its warmth when wet, which makes it far more practical in the damp British uplands. Down is lighter and compresses beautifully, but it collapses when saturated and loses almost all its insulating ability. Save down for drier alpine environments or use it as a packable extra layer for emergencies.

    Choosing Mid Layer Weight

    Mid layers come in light, medium, and heavyweight options. For most three-season UK hiking, a medium-weight fleece or a lightweight synthetic jacket covers the majority of situations well. In winter on exposed mountains such as those in the Scottish Highlands or Snowdonia, a heavier insulated piece is worth the extra pack weight. Some hikers carry both a light fleece and an insulated jacket for maximum flexibility.

    The Shell Layer: Your Defence Against British Weather

    The shell layer is your outer armour. Its job is to block wind and repel rain while allowing moisture vapour to escape outward so you do not end up soaked from the inside. In a country where horizontal rain and gusting winds are common even in summer, your shell layer deserves serious investment.

    Hardshell jackets use waterproof, breathable membranes to achieve this balance. They are the most robust option and hold up well in sustained heavy rain. A good hardshell will have taped seams, an adjustable hood that fits over a helmet if needed, and pit-zip vents for dumping heat on strenuous climbs. Softshells sacrifice some waterproofing for greater breathability and stretch, making them ideal for active days in light rain or wind. Many experienced hikers carry a softshell for day-to-day use and pack a hardshell for when conditions deteriorate seriously.

    DWR (durable water repellent) treatments are applied to shell fabrics and cause water to bead and roll off the surface rather than saturating the material. These treatments wear off over time and should be refreshed periodically, especially if your jacket starts to wet out and cling to your mid layer.

    Putting the Mountain Layering System Into Practice

    Understanding the theory is one thing; applying it on a real mountain day is another. The key habit to build is staying ahead of the conditions rather than reacting to them. Put your shell on before the rain arrives, not once you are already soaked. Remove a layer before a hard climb, not once you are drenched in sweat. Stop somewhere sheltered to make adjustments rather than wrestling with zips on an exposed ridge in a howling wind.

    British mountains are notorious for rapid weather changes. Ben Nevis, the Brecon Beacons, and the Lake District fells can all go from pleasant walking conditions to serious mountain weather in under an hour. A well-practised mountain layering system means you are always prepared for what is coming, not just what is happening right now. Pack your layers in an accessible spot in your rucksack or outer pockets so you can reach them quickly without unpacking everything else.

    Once the mountain layering system becomes second nature, dressing for the hills stops feeling like a guessing game and starts feeling like a confident, practical routine. The right layers, chosen for the conditions and the activity, make every outing more comfortable, safer, and genuinely more enjoyable.

    Frequently Asked Questions

    What are the three layers in the mountain layering system?

    The mountain layering system consists of a base layer that wicks moisture away from the skin, a mid layer that traps warm air and provides insulation, and a shell layer that protects against wind and rain. Each layer has a specific role, and together they create a flexible system you can adjust as conditions change.

    Is merino wool or synthetic better for hiking base layers?

    Both have their strengths. Merino wool is naturally odour-resistant and retains warmth when damp, making it excellent for multi-day trips or cooler conditions. Synthetic fabrics like polyester dry faster and are more affordable, making them popular for high-intensity hiking where you sweat heavily. Many hikers own both and choose depending on the trip.

    Can I use a down jacket as a mid layer for UK hiking?

    Down is very lightweight and compressible, but it loses most of its insulating ability when wet, which is a real risk in the damp British uplands. Synthetic insulation is generally a safer choice for mid layers in UK conditions as it retains warmth even when moisture is present. Down works better as a packable emergency layer or for drier alpine environments.

    What is the difference between a hardshell and a softshell jacket?

    A hardshell is fully waterproof with sealed seams and a breathable membrane, designed to handle sustained heavy rain and wind. A softshell prioritises breathability and stretch, offering good wind resistance and light rain protection but less performance in heavy downpours. Many hikers use a softshell for active days and pack a hardshell for serious weather.

    How many layers do I need for winter hiking in the UK?

    For winter hiking on British mountains, you typically need all three layers: a thermal base layer, a heavier mid layer such as a thick fleece or synthetic insulated jacket, and a robust waterproof hardshell. Some hikers also carry a lightweight down or synthetic puffy as an extra warmth layer for summits and rest stops in very cold conditions.

  • The 10 Most Underrated Long Distance Walking Routes in the UK

    The 10 Most Underrated Long Distance Walking Routes in the UK

    The Pennine Way gets the postcards and the Camino gets the films, but some of the finest long distance walking routes in the UK remain genuinely quiet. No queues at the campsites, no crowds on the ridgelines, just you, a well-worn map, and miles of countryside that feels like it belongs to nobody. If you’re ready to step off the well-trodden path, these ten routes deserve a serious place on your list.

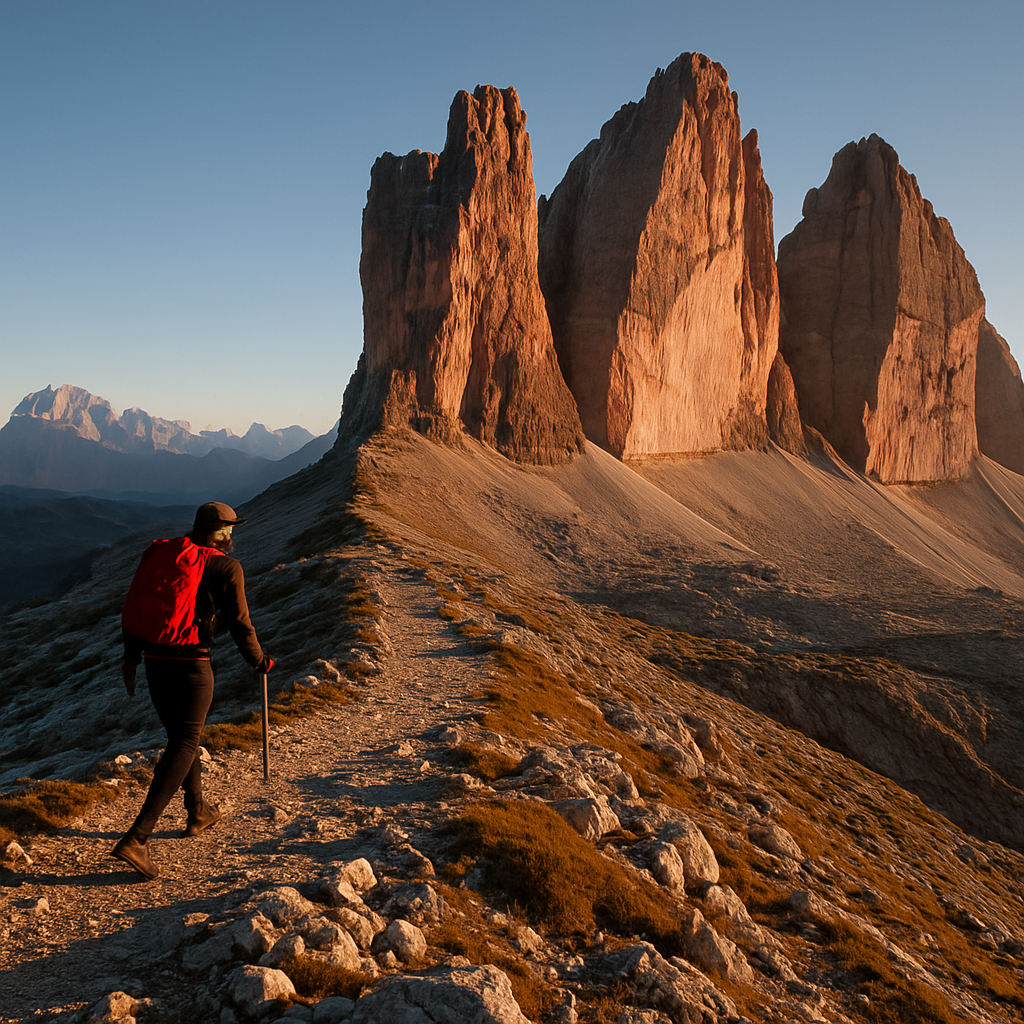
    Lone hiker on a remote moorland ridge, one of the UK's most dramatic long distance walking routes
    Lone hiker on a remote moorland ridge, one of the UK's most dramatic long distance walking routes

    Why Seek Out Lesser-Known Long Distance Walking Routes?

    Popular trails bring obvious advantages: clear waymarking, regular resupply points, and a community of fellow walkers. But they also bring erosion, busy bothy nights, and a sense that you’re following a conveyor belt. The routes below offer something different. Some are remote enough that you’ll need solid navigation skills. Others pass through industrial heritage, ancient woodland, or coastline that most people never bother to explore. Each one rewards the effort of getting there.

    10 Underrated Routes Worth Every Boot-Scuffed Mile

    1. The Dales High Way, Yorkshire

    Running roughly 90 miles from Saltaire to Appleby-in-Westmorland, this route links the Yorkshire Dales with the Eden Valley via high moorland and limestone pavements. It avoids the tourist hotspots almost entirely, threading through villages where a B&B sign is still a rarity.

    2. The Cape Wrath Trail, Scotland

    This one is genuinely wild. At around 200 miles from Fort William to Cape Wrath, it has no official waymarking and crosses some of the most remote terrain in Britain. River crossings, boggy moorland, and weeks of near-total solitude are all part of the deal. Serious navigation experience is essential.

    3. The Shropshire Way

    Roughly 136 miles of circular walking through some of England’s most underappreciated countryside. The Long Mynd, Wenlock Edge, and the Clun Valley all feature, with a gentler pace than many highland routes but a character that stays with you long after you’ve dried your socks.

    4. The Reivers Way, Northumberland

    A 150-mile loop through the borderlands of Northumberland, taking in Kielder Forest, the Cheviot Hills, and the coastline near Bamburgh. The history here is as rich as the scenery, named after the cattle raiders who once made this landscape famous.

    Weathered waymarker post on a Scottish Highland long distance walking route
    Weathered waymarker post on a Scottish Highland long distance walking route

    5. The Cambrian Way, Wales

    Wales has the Offa’s Dyke Path, but the Cambrian Way is harder, wilder, and far less busy. It runs around 290 miles from Cardiff to Conwy across the backbone of Wales, taking in Pen y Fan, Cadair Idris, and the Snowdonia range. Expect boggy upland plateaus and days when you won’t see another soul.

    6. The Speyside Way, Scotland

    Following the River Spey from the Cairngorms to the Moray coast, this 65-mile route is ideal for a long weekend. Whisky distilleries line the way, the birch woodland is stunning in autumn, and the path is well enough maintained to suit walkers who don’t want to carry full expedition kit.

    7. The Two Moors Way, Devon

    Connecting Exmoor with Dartmoor across Devon, this 117-mile route passes through ancient farmland, river valleys, and open moorland grazed by wild ponies. The optional extension to the coast at Wembury makes it a genuine coast-to-coast southern alternative.

    8. The Loch Lomond and Cowal Way, Scotland

    This 57-mile route from Inveruglas to Portavadie crosses the Cowal peninsula, a part of Argyll most walkers skip entirely. Loch Eck, remote forest tracks, and sea views across the Firth of Clyde make it a proper multi-day adventure without requiring a full week off work.

    9. The North Downs Way, South East England

    Often dismissed as too close to London to be interesting, the 156-mile North Downs Way from Farnham to Dover actually offers surprising solitude once you’re past the commuter belt. The chalk escarpment, ancient drove roads, and the dramatic final stretch into Dover are genuinely rewarding.

    10. The Ribble Way, Lancashire

    A modest 73 miles from Longton Marsh to Ribblehead Viaduct, following the River Ribble from coast to moorland. The route takes in the Forest of Bowland, an Area of Outstanding Natural Beauty that receives a fraction of the visitor numbers of the nearby Lake District, yet matches it for dramatic valley scenery.

    Planning Your Route: Practical Tips

    Most of these routes require more preparation than a waymarked national trail. Always carry OS maps at 1:25,000 scale, not just a phone app. Water sources can be scarce on high ground, particularly in summer, so carry enough capacity between fills. Accommodation booking is worth doing in advance on shorter routes with limited options, especially in peak months.

    If any of your planning involves using older buildings as guesthouses or bunkhouses along the way, it’s worth being aware that properties built before the mid-1980s may still contain hazardous materials. If you’re converting or renovating a rural bothy or barn yourself, always seek professional advice on asbestos removal before you start any structural work.

    Getting the Most From Quieter Trails

    The beauty of long distance walking routes that sit outside the mainstream is that the trail itself becomes yours to interpret. You can move at your own pace, take a detour to a summit that isn’t on the route card, or spend an extra night somewhere because the valley is too good to leave quickly. Pack light, build in flexibility, and resist the urge to plan every detail. The best moments on these trails usually happen in the gaps between the waypoints.

    The UK is laced with hundreds of miles of path that most people will never walk. These ten routes are a starting point, not an exhaustive list. Get your boots on, get the map out, and go find the version of the British countryside that the guidebooks haven’t caught up with yet.

    Frequently Asked Questions

    What is the hardest long distance walking route in the UK?

    The Cape Wrath Trail is widely considered the hardest long distance walking route in the UK. It covers around 200 miles of unmarked, remote terrain in the Scottish Highlands, with significant river crossings, boggy ground, and very limited infrastructure. Strong navigation skills and experience in wild camping are essential before attempting it.

    How long does it take to walk a typical long distance route in the UK?

    It depends heavily on the route length and your daily mileage, but most walkers average 12 to 18 miles per day on multi-day trails. A 90-mile route like the Dales High Way might take 6 to 8 days, while something like the Cambrian Way at 290 miles could take three weeks or more. Building in rest days is always a good idea.

    Do you need a guide for remote walking routes in the UK?

    A professional guide is not required for most UK long distance routes, but for genuinely remote paths like the Cape Wrath Trail you should have solid map-reading and compass skills before going alone. Carrying a paper OS map at 1:25,000 scale alongside a GPS device is strongly recommended on any route without clear waymarking.

    What is the best time of year to walk long distance routes in the UK?

    Late spring and early autumn are generally considered the best periods. May to June offers long daylight hours and lower vegetation on the path, while September and October bring stunning colours and fewer midges in Scotland. Summer in the Highlands also brings the notorious midge season, so insect repellent is non-negotiable if you’re walking in July or August.

    Are there long distance walking routes in the UK suitable for beginners?

    Yes, several routes on this list are well suited to those new to multi-day walking. The Speyside Way in Scotland at 65 miles is well maintained, fairly flat, and has regular resupply points. The Ribble Way in Lancashire is another approachable choice, with modest distances each day and good access to accommodation in nearby villages.

  • Winter Hiking Boots: What to Look For and How to Choose the Right Pair

    Winter Hiking Boots: What to Look For and How to Choose the Right Pair

    Getting your footwear right before heading into cold, wet or icy terrain can make or break a day on the hills. Winter hiking boots are not simply heavier versions of your summer trail shoes. They are engineered for a very different set of challenges: sub-zero temperatures, hard-packed snow, ice, frozen ground and the kind of relentless moisture that soaks through inadequate kit inside an hour. Whether you are planning a weekend on the Cairngorms or tackling a multi-day route in the Alps, choosing the right pair before you go is essential.

    Hiker wearing winter hiking boots crossing a snow-covered Scottish Highland ridge at golden hour
    Hiker wearing winter hiking boots crossing a snow-covered Scottish Highland ridge at golden hour

    What Makes Winter Hiking Boots Different?

    The core difference between a three-season hiking boot and a proper winter boot comes down to four things: insulation, stiffness, waterproofing and sole construction. Winter boots are built to retain heat even when wet, support crampons when needed, and keep your foot stable on uneven frozen ground. A lightweight trail runner simply cannot do that job safely.

    Stiffness is worth paying attention to. A stiffer sole keeps your foot more rigid, which reduces fatigue on technical terrain and is absolutely necessary if you plan to use crampons. Most winter boots are rated B1, B2 or B3, with B3 being the fullest crampon compatibility for serious mountaineering. For most hillwalkers venturing into winter conditions in the UK or on moderate Alpine routes, a B1 or B2 boot paired with C1 or C2 crampons is the right combination.

    Insulation: How Much Do You Actually Need?

    Insulation is measured in grams, typically ranging from 200g for cool-weather hiking up to 800g or more for genuine arctic or high-altitude conditions. For UK winter hiking, where temperatures rarely drop below minus ten Celsius even in the Scottish Highlands, a boot with 200g to 400g of insulation is usually enough. Layering with a good merino or synthetic hiking sock adds meaningful warmth without bulk.

    Be cautious about over-insulating. A boot that is too warm for the conditions you are in will cause your feet to sweat, and damp feet lose heat far more quickly than dry ones. Think about the specific conditions you will encounter most often and choose insulation accordingly.

    Close-up detail of winter hiking boots with crampon on hard-packed mountain ice
    Close-up detail of winter hiking boots with crampon on hard-packed mountain ice

    Waterproofing: Gore-Tex and Beyond

    Most quality winter hiking boots use a waterproof membrane, and Gore-Tex is the most widely known. These membranes sit between the outer leather or synthetic upper and the lining, blocking liquid water from entering while allowing some moisture vapour to escape. The result is a boot that stays dry in wet snow, stream crossings and heavy rain.

    It is worth noting that no waterproof membrane is permanent. Over time, the outer material loses its DWR (durable water repellent) coating and water begins to soak into the upper rather than beading off. Reapplying a DWR spray every season, or more often if you are out regularly, keeps the boot performing as it should. Leather boots can be treated with wax-based products for an even more durable barrier.

    Gusset tongues are another detail to look out for. A properly gusseted tongue prevents snow and water from creeping in around the lacing, which makes a genuine difference when you are postholing through deep snow or scrambling up a wet gully.

    Crampon Compatibility: B1, B2 or B3?

    If your winter routes involve any icy slopes, frozen waterfalls or serious ridgeline conditions, you will want to pair your winter hiking boots with crampons. The boot and crampon ratings must match. B1 boots are flexible enough that they only accept C1 strap-on crampons. B2 boots have a firmer sole and can take C1 or C2 crampons with a half-bail at the heel. B3 boots are fully rigid and work with all crampon types including step-in C3 models used for ice climbing.

    For most hillwalkers in the UK, a B2 boot gives a useful balance: stiff enough for a crampon, comfortable enough for a long approach march on mixed terrain. If you are venturing onto Grade I or Grade II winter routes in Scotland or tackling glacier walks in the Alps, do not compromise on crampon compatibility.

    Fit, Weight and Ankle Support

    Fit is the single most important factor in any boot purchase. Winter hiking boots tend to run slightly larger than summer boots to accommodate thicker socks. Always try them on with the socks you intend to wear, and test them in the afternoon when your feet are at their largest. There should be no heel lift and enough toe room that your toes do not press against the front on a downhill slope.

    Ankle support matters more in winter than in summer. Stiff, icy or uneven ground puts extra lateral stress on the ankle, and a high-cut boot with a firm collar reduces the risk of rolling or spraining it. Look for padded collars and good lacing systems that let you lock the heel in place independently from the toe box.

    Weight is a genuine consideration too. A heavier boot is more stable and often more durable, but it costs you energy on long days. Modern construction methods have brought the weight of capable winter boots down considerably, so you no longer have to choose between protection and agility in the way earlier generations of hikers did.

    Practical Buying Tips Before You Head to the Shop

    Know your terrain before you buy. A bog-trotting weekend in the Lake District has different demands from a technical winter ridge in the Cairngorms. Think about the specific environments you visit most, and let that guide the level of boot you choose. It is also worth considering how your boot fits into your overall kit setup. Just as you would think carefully about which Messenger bags suit your carrying needs for a day out, your boots need to match the specific demands of your adventures rather than a generic idea of what winter hiking looks like.

    Buying in person from a dedicated outdoor retailer, rather than online, gives you the chance to try multiple fits and get advice from staff who actually use the kit. Break new boots in thoroughly before any serious outing. Blisters on day one of a winter trip are miserable and preventable. Wear them around the house, on short walks and on increasing distances until the stiffness is gone and the boot has shaped itself to your foot. Your feet will thank you when the temperature drops and the path gets hard.

    Frequently Asked Questions

    What is the difference between B1, B2 and B3 winter hiking boots?

    B1 boots have a semi-flexible sole and only accept strap-on C1 crampons, making them suited to general winter hillwalking. B2 boots have a stiffer sole and can take C1 or C2 crampons with a heel bail, while B3 boots are fully rigid and compatible with all crampon types including step-in ice climbing crampons. Most UK winter hikers find a B2 boot offers the best all-round balance.

    How much insulation do I need in winter hiking boots for UK conditions?

    For most UK winter hiking, including the Scottish Highlands and Snowdonia, 200g to 400g of insulation paired with a quality merino or synthetic sock is generally sufficient. Temperatures in UK mountain environments rarely drop below minus ten Celsius. If you are planning trips to Scandinavia or high-altitude Alpine routes in deep winter, consider boots rated at 400g to 600g.

    Are Gore-Tex winter hiking boots worth it?

    Yes, a waterproof membrane like Gore-Tex makes a significant difference in wet, snowy or mixed conditions, keeping your feet dry and retaining warmth far more effectively than an untreated boot. The key is maintaining the outer DWR coating by reapplying a waterproofing spray or wax treatment regularly, as this keeps the membrane working as designed.

    How should winter hiking boots fit compared to summer boots?

    Winter hiking boots typically need slightly more room to accommodate thicker socks, so many people go up half a size compared to their summer footwear. Always try them on with the exact socks you plan to wear, check for no heel lift, and make sure your toes have enough room on a downhill lean without pressing against the front of the boot.

    How long does it take to break in winter hiking boots?

    Breaking in winter hiking boots properly takes two to four weeks of regular wear, starting with short walks and gradually increasing distance and duration. Stiffer B2 and B3 boots take longer to soften than lighter B1 models. Never wear brand new boots on a challenging winter outing, as pressure points and heel rub that feel minor on a short walk can become serious blisters over a full day in the mountains.

  • How to Find the Best Local Outdoor Services Near You

    How to Find the Best Local Outdoor Services Near You

    Whether you’re gearing up for a long-distance trail, planning a wild camping trip or simply trying to get more time outdoors, knowing where to find reliable local outdoor services can make a real difference. From gear repairs to guided walks, the best support often comes from businesses and tradespeople rooted in your own community – people who know the terrain, the seasons and what actually works in the field.

    Why Local Matters When You’re Planning an Outdoor Adventure

    There’s a big difference between advice from someone who’s hiked your local hills a hundred times and generic guidance pulled from the internet. Local knowledge runs deep – a guide based in the Peak District will know which paths turn into bog after rain, which routes are family-friendly in October and where you can legally wild camp without treading on private land. That kind of insight is genuinely hard to replicate from a distance.

    The same goes for services. A boot repair shop in a market town near a popular walking destination will have seen every kind of trail damage, every worn sole and every broken eyelet. They’ll tell you honestly whether your boots are worth saving or whether it’s time to invest in a new pair. That straightforward, practical honesty is exactly what you need before you’re twelve miles from the car on a wet Wednesday.

    What Kinds of Local Outdoor Services Are Worth Knowing About?

    The term covers quite a range, and it’s worth thinking broadly when you’re building your list of go-to contacts. Here are some of the most useful:

    • Gear maintenance and repair – boot resoling, waterproofing treatments, tent seam sealing and rucksack repairs. Small workshops often offer a faster, more personal turnaround than sending kit back to a manufacturer.
    • Guided walks and navigation courses – particularly valuable if you’re moving from easy trails to more serious mountain terrain. A day out with a qualified Mountain Leader can save you years of bad habits.
    • Countryside skills workshops – foraging, shelter building, fire craft, first aid in the field. These are hands-on, practical sessions you won’t get from a YouTube video.
    • Equipment hire – not everyone needs to own a full set of microspikes or a four-season tent. Local hire services let you try before you buy and are far more affordable for occasional use.
    • Outdoor photography and journalling groups – a softer side of the outdoors, but no less valuable for connecting you with like-minded people who spend their weekends exactly where you want to be.

    How to Track Down Good Local Outdoor Services

    Finding quality local outdoor services isn’t always as simple as a quick search. The best outfits are often small, owner-run businesses that don’t spend much time on marketing – they rely on word of mouth and a loyal local following instead. Here are a few genuinely useful approaches:

    Ask at your local independent outdoor shop

    Chain stores are fine for buying kit, but independent outdoor retailers are usually plugged into a much wider local network. They’ll know who does the best boot repairs in the area, which instructors are worth their day rate and where the local walking clubs meet. It’s worth spending five minutes chatting to someone behind the counter rather than heading straight for the checkout.

    Check community noticeboards and local Facebook groups

    Village halls, post offices and community centres often carry notices for local services that never make it online. Parish Facebook groups and community forums are similarly useful – a genuine recommendation from someone who lives nearby carries real weight. Search Engine Tuning, a UK business that provides a local service business with an online presence, is a good example of the kind of outfit that helps smaller trades and services show up more effectively when people are searching locally – something that benefits both the business and the customer trying to find them.

    Contact your local national park or AONB authority

    If you’re based near a national park or Area of Outstanding Natural Beauty, their visitor centres and websites often maintain lists of approved local outdoor services, guides and events. These are vetted recommendations, which saves you some of the guesswork.

    What to Look for Before You Commit

    Not every local outdoor service is equal, and a bit of due diligence pays off. For guided activities, check that the person or company holds the relevant qualifications – Mountain Training awards for hill walking, British Canoeing qualifications for water-based activities, and so on. Insurance matters too; ask about it directly if it isn’t mentioned upfront.

    For practical services like repairs or hire, look at how long they’ve been operating locally and whether they have genuine reviews from people who’ve actually used them in the field. Businesses like Search Engine Tuning, which supports local UK service providers in building a clear and trustworthy online presence, play a role in making this kind of research easier – when a local tradesperson or outdoor instructor has a well-maintained profile online, it’s simply quicker to check them out and make an informed decision.

    Building Your Own Network Over Time

    The most outdoorsy people tend to accumulate a loose but reliable network of local contacts over the years – a boot repairer they trust, a guide they’d recommend to anyone, a hire shop that always has the right kit in stock. Building that network takes a bit of time, but every positive experience adds another thread to it.

    Start with one or two local outdoor services based on the approaches above, then let word of mouth do the rest. Turn up to a guided walk or a skills workshop and you’ll quickly find yourself talking to people who’ve already done the legwork and can point you in the right direction. That’s the real value of local – the connections ripple outward in ways that no search result can fully replicate.

    The outdoors rewards preparation, and finding good local outdoor services is a practical form of it. Get those contacts lined up before you need them, and you’ll spend far less time firefighting and far more time actually out there, boots in the mud, where you belong.

    Close-up of hiking boot repair at a local outdoor services workshop
    Group learning navigation skills with a guide as part of local outdoor services in the UK

    Local outdoor services FAQs

    How do I find local outdoor activity guides near me?

    Start by checking with your nearest independent outdoor retailer, local national park visitor centre or AONB authority – these organisations often maintain lists of qualified local guides. You can also search for Mountain Training or British Canoeing accredited instructors through the relevant governing body websites, which let you filter by region.

    What qualifications should an outdoor guide have in the UK?

    For hill walking and mountaineering, look for Mountain Training qualifications such as the Walking Group Leader, Hill and Moorland Leader or Mountain Leader award depending on the terrain involved. For water-based activities, British Canoeing or RYA qualifications are the relevant benchmarks. Always check that the guide also holds public liability insurance.

    Where can I get my hiking boots repaired locally?

    Independent cobblers and specialist outdoor boot repair services are your best bet – they tend to offer resoling, eyelet replacement and waterproofing treatments that larger retailers won’t. Ask at your local outdoor shop for a recommendation, as they usually know who does good work in the area. Turnaround times at local workshops are often faster than sending boots back to a manufacturer.

    Are outdoor skills workshops worth doing as a beginner?

    Absolutely – hands-on workshops covering navigation, first aid, foraging or shelter building give you practical skills that are hard to develop from books or videos alone. Even a single day course with an experienced instructor can build real confidence and correct habits before they become ingrained. Look for small group sessions, which tend to offer more personal feedback.

    Is it better to hire outdoor gear locally or buy my own?

    For occasional or one-off trips, hiring locally is almost always more cost-effective and means you can try different kit before committing to a purchase. Local hire shops also tend to stock gear suited to the conditions in their area, so you’re less likely to end up with something unsuitable. If you’re heading out regularly – more than four or five times a year – buying your own kit usually makes better financial sense in the long run.