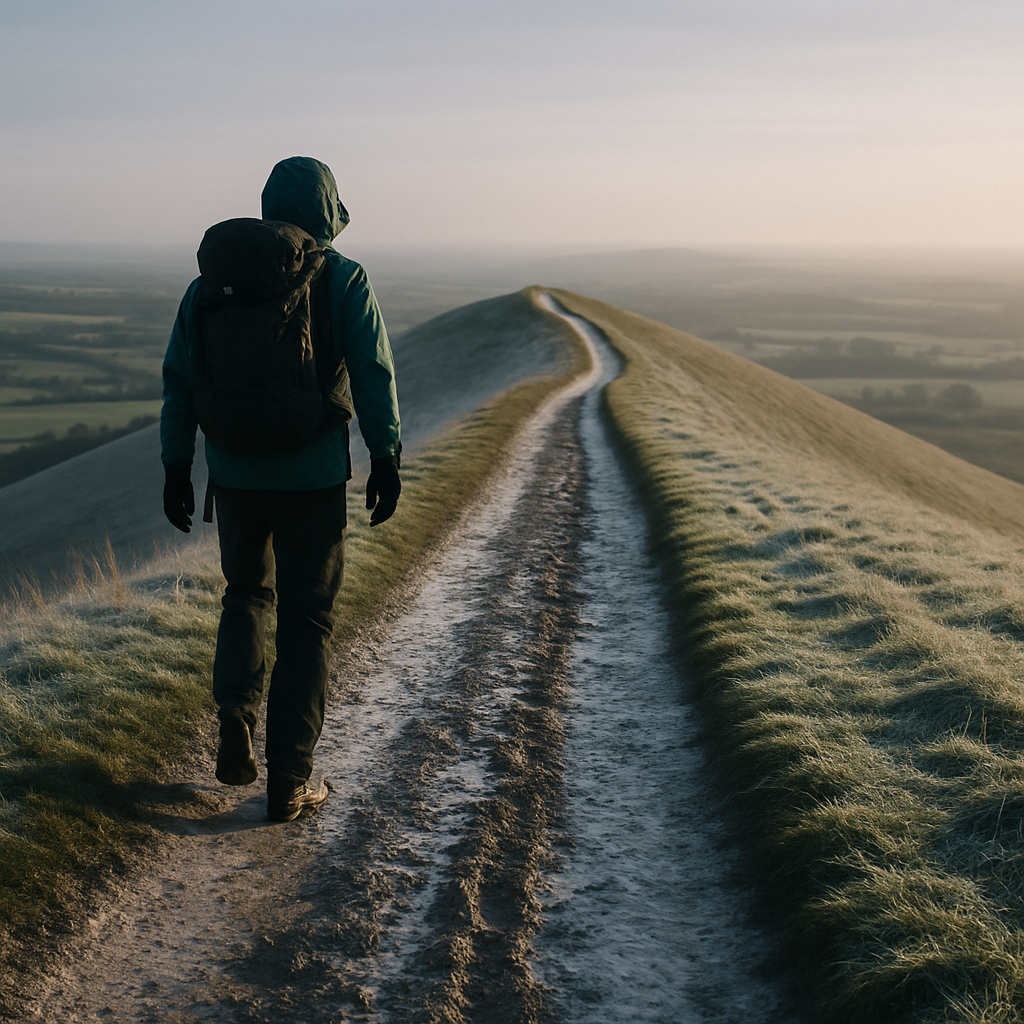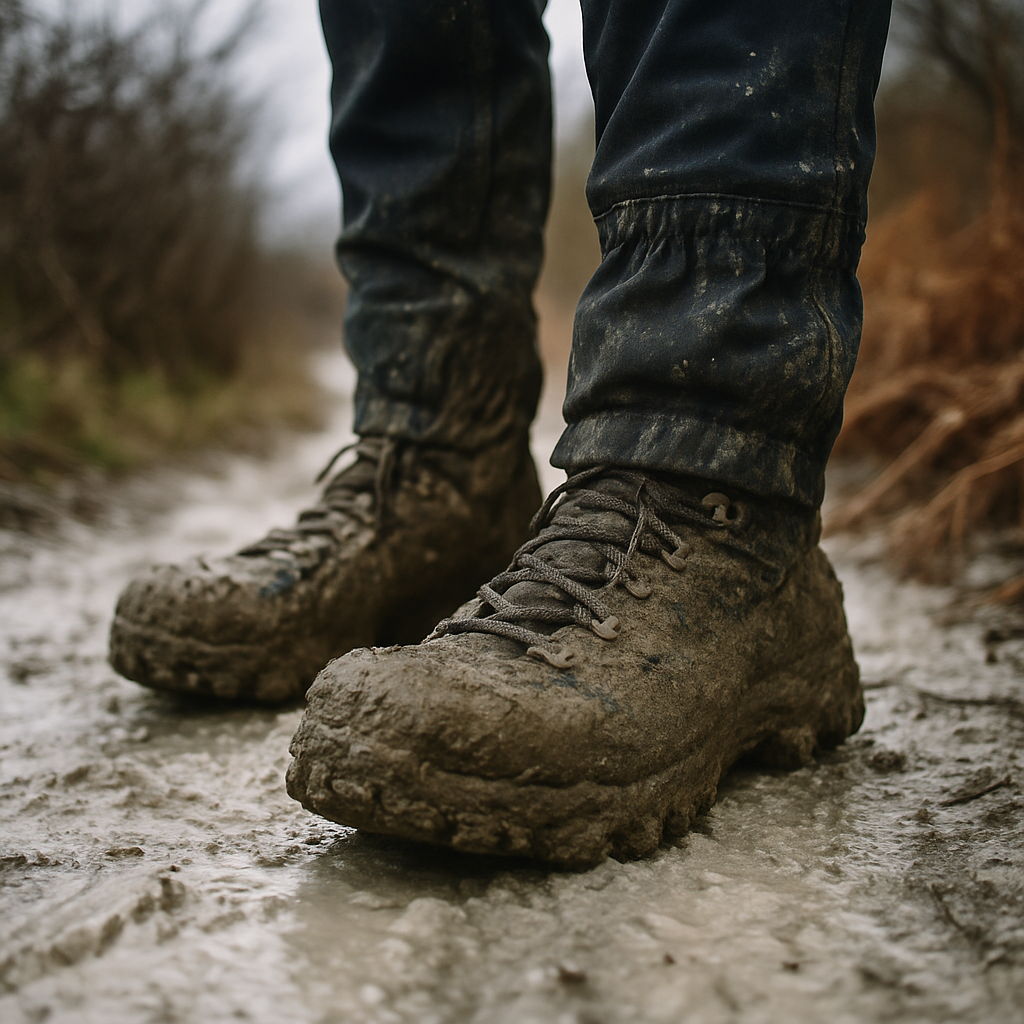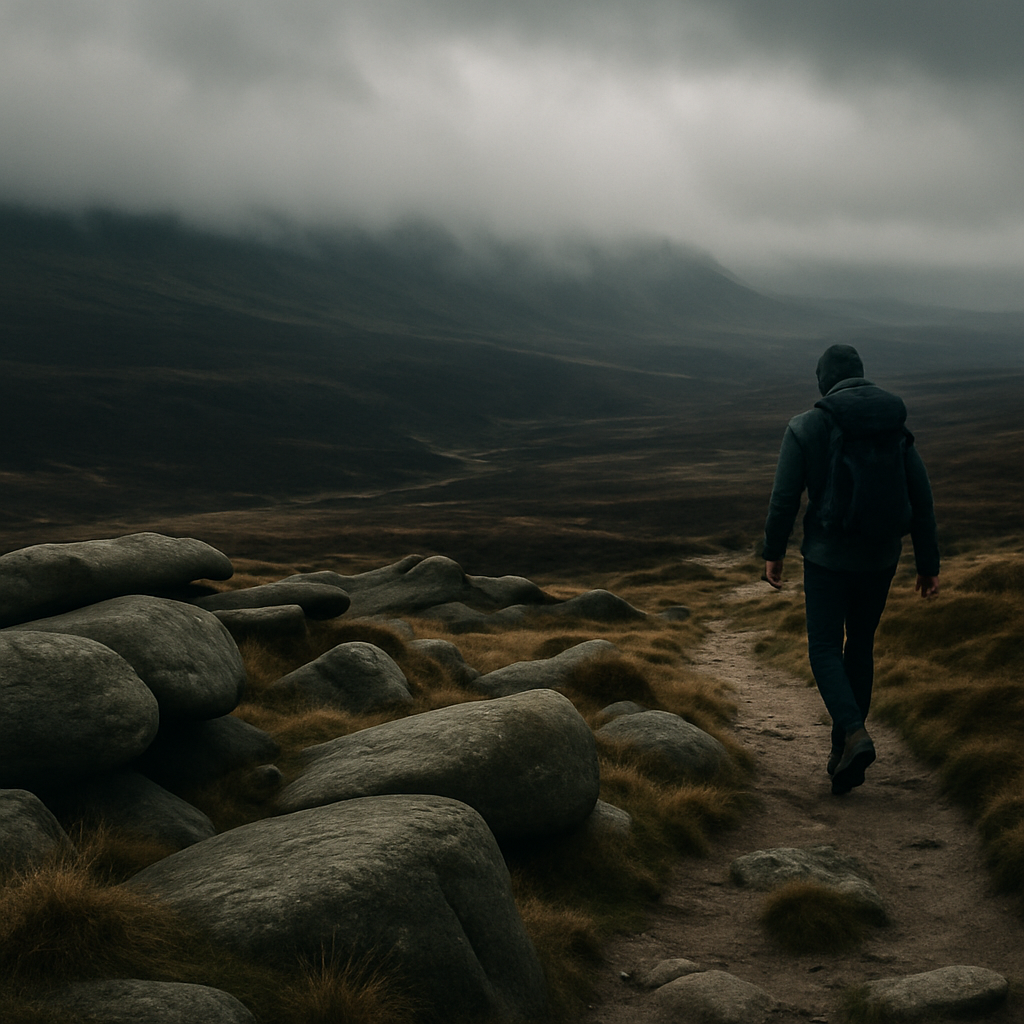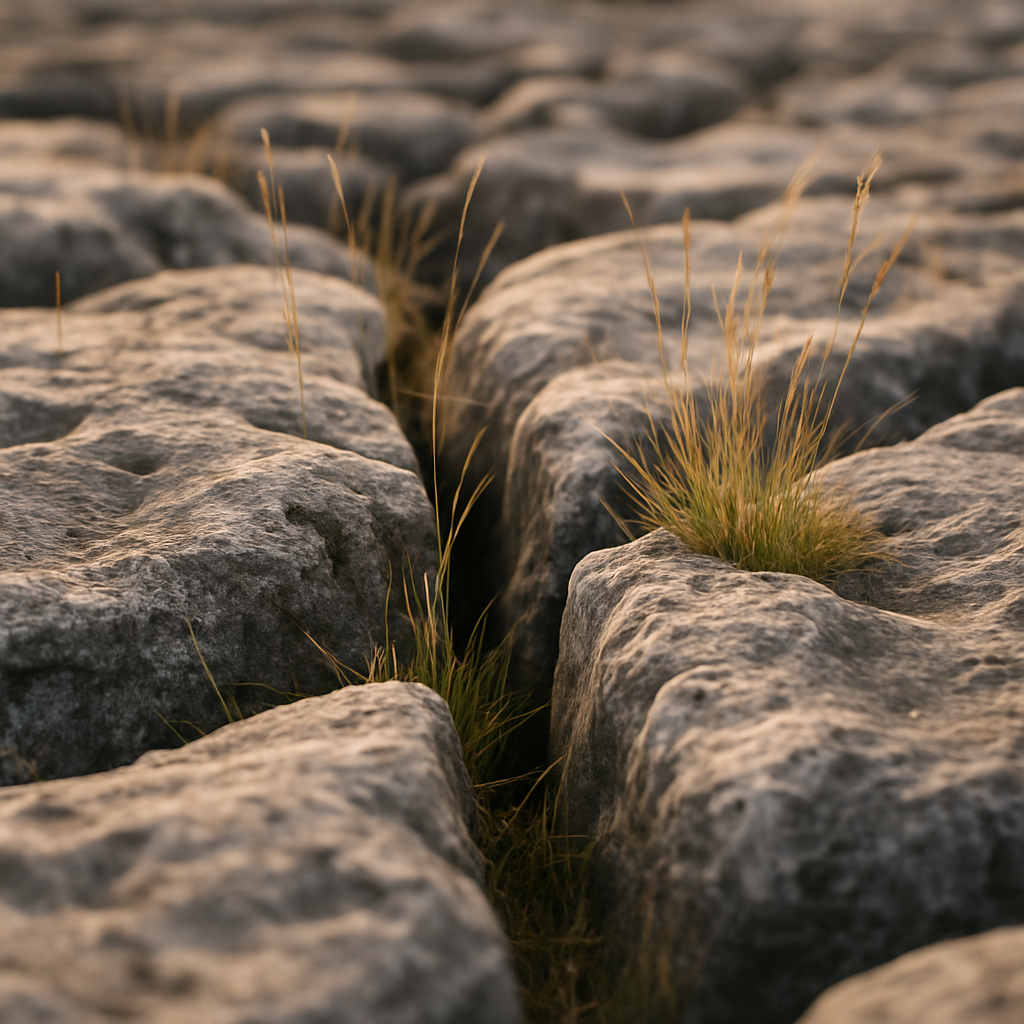
Category: Mother Nature

  • Bivvying in England and Wales: The Legal Reality and How to Do It Without Upsetting Anyone

    Bivvying in England and Wales: The Legal Reality and How to Do It Without Upsetting Anyone

    Scotland gets all the headlines on this one, and rightly so. The Land Reform (Scotland) Act 2003 gives walkers and campers a remarkably clear legal right to wild camp on most land north of the border. But in England and Wales, the picture is murkier, and that murk is exactly where most people get confused. I’ve had plenty of conversations on ridgelines with fellow hikers who are convinced that bivvying is either totally fine everywhere or flatly illegal. Neither is true.

    This guide is specifically about England and Wales. If you’re heading to Scotland, the rules are different enough that they deserve separate treatment entirely. Here we’re focusing on what bivvying and wild camping actually means legally, which upland areas have a long history of tolerating it, and how to behave so that access remains available for everyone who comes after you.
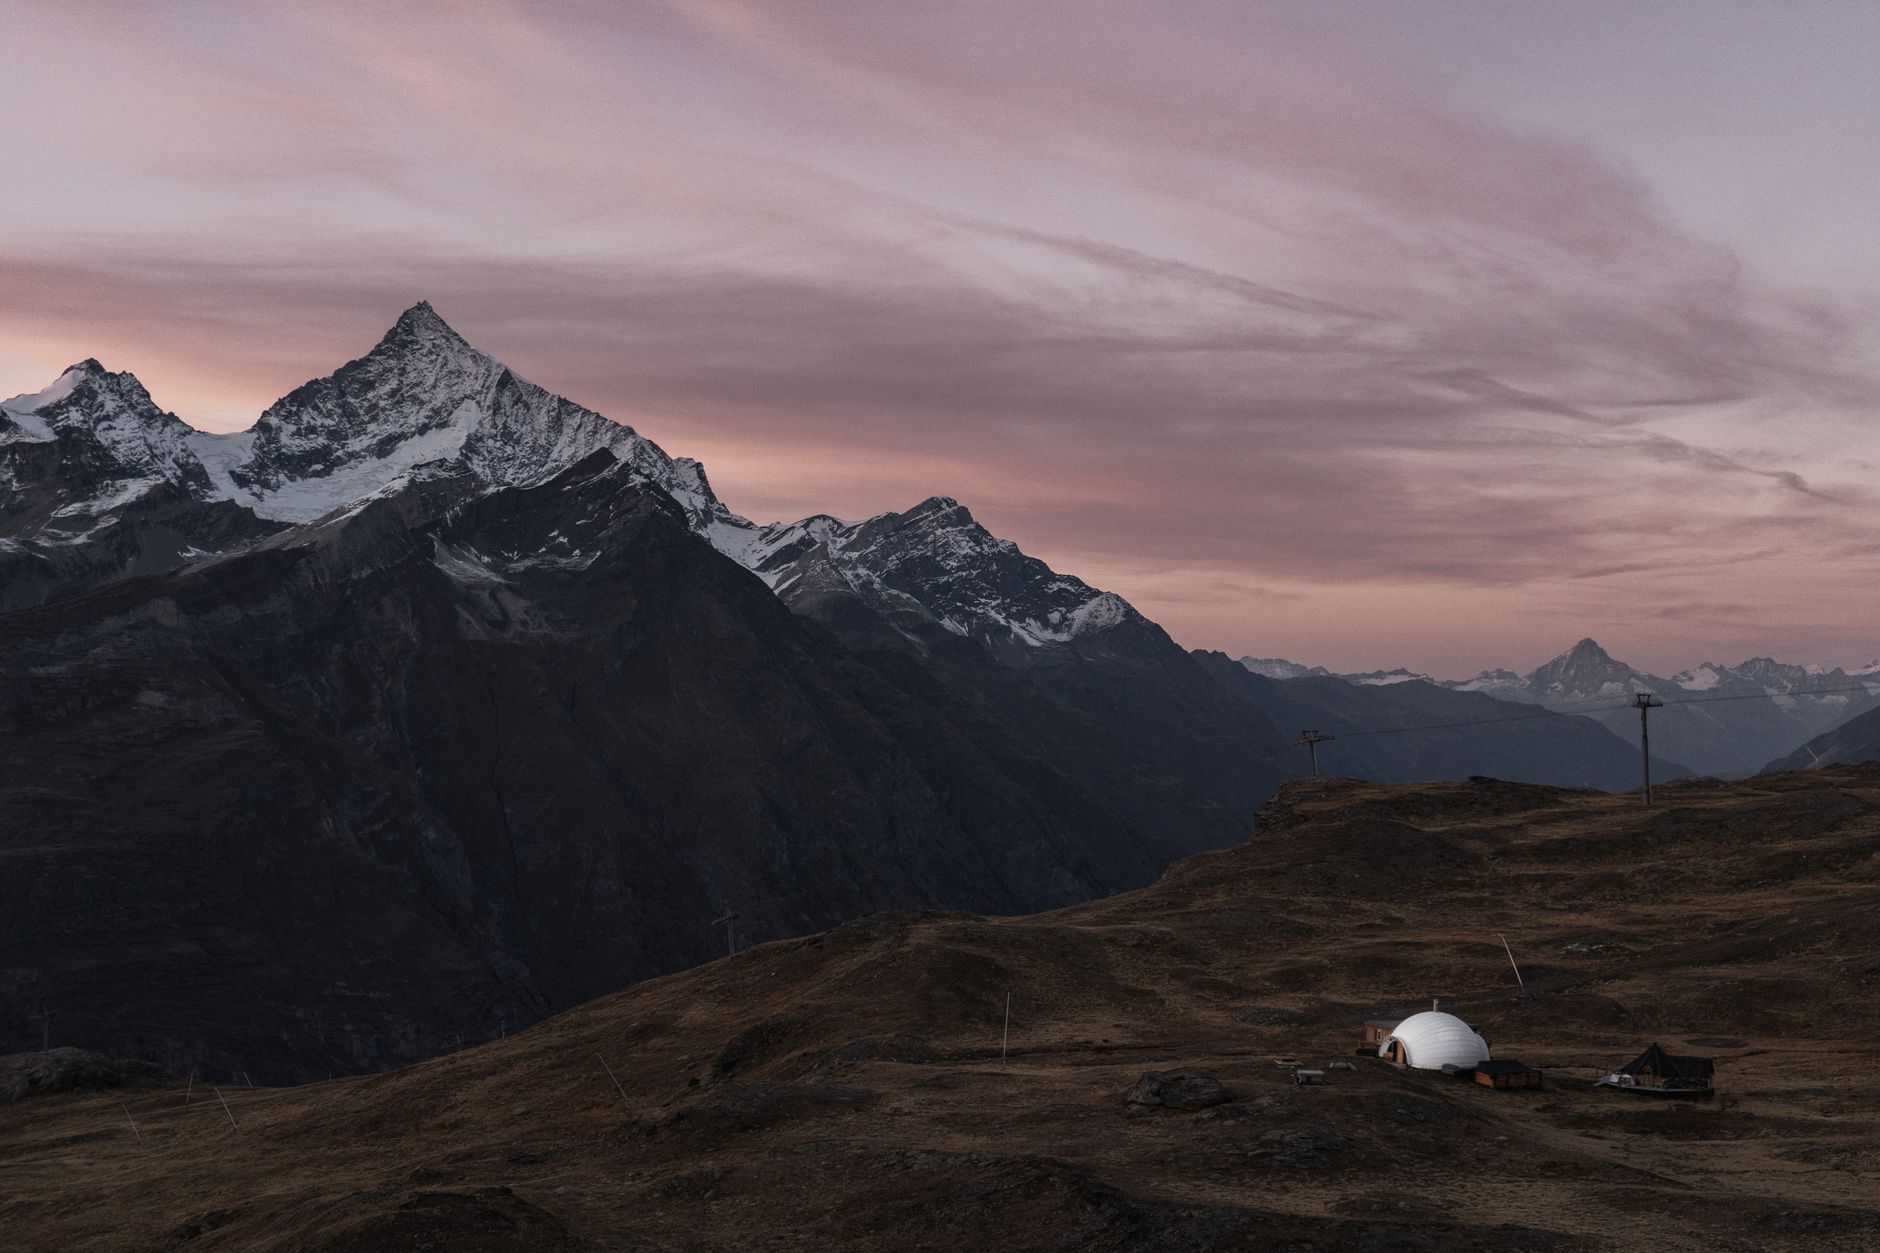
    Hiker in a bivvy bag on a fell summit at sunrise, illustrating bivvying in England Wales legal wild camping
    Photo by Ilia Bronskiy on Pexels

    Wild camping and bivvying: what’s the legal position in England and Wales?

    The blunt answer is that there is no general legal right to wild camp or bivvy on open land in England and Wales. Camping without the landowner’s permission is technically trespass. Trespass in England and Wales is a civil matter, not a criminal one, which means the landowner can ask you to leave and pursue civil remedies, but the police cannot arrest you simply for sleeping under the stars. That said, if you refuse to leave when asked, you’re on thin ice.

    There are two main exceptions worth knowing. First, the Dartmoor Commons. Dartmoor National Park is the only place in England with a statutory right to wild camp, enshrined in the Dartmoor Commons Act 1985. A legal challenge in 2023 threatened that right briefly, but the Court of Appeal restored it firmly, and Dartmoor’s camping access remains protected. Second, some areas of open access land (designated under the Countryside and Rights of Way Act 2000) are managed by organisations like the National Trust or National Park authorities that give informal permission, or at least turn a blind eye to low-impact overnight stays. The gov.uk guidance on open access land is worth reading if you want the formal picture on CRoW Act rights, though it makes clear that the default access right does not include overnight camping.

    Where is bivvying typically tolerated in upland England and Wales?

    Tolerance is not the same as a legal right, but it is the practical reality for most experienced wild campers. Certain upland areas have a culture of quiet acceptance, particularly where hikers stay one night, leave before 9am, and leave no trace whatsoever.

    The Lake District is probably the most well-known. Fells above the intake walls (roughly above 600 metres) are where most people pitch up, and the Lake District National Park Authority has long taken an informal stance that low-impact, high-altitude camping is accepted provided you follow the principles they promote. The Brecon Beacons (now Bannau Brycheiniog) have a similar tradition on the higher ground. The Dark Peak in the Peak District, the Howgills, and parts of the Yorkshire Dales above enclosed land all see regular bivvying with little friction.

    That said, none of this is guaranteed. Landowner attitudes vary. During dry summers, fire risk changes everything, and some estates have become stricter in recent years. I’d always check recent reports from the relevant national park before assuming the unwritten rules still apply.

    Bivvying versus wild camping: is there a meaningful difference?

    In practical terms, a bivvy bag (a waterproof shell you sleep in rather than under) is a lighter, lower-profile option than a tent. You’re lying on the ground with minimal visual impact, and you can be packed and gone in minutes. Some land managers and walkers regard this as meaningfully different from pitching a full tent, partly because of the reduced footprint and partly because a bivvy is clearly a single-night, lightweight affair rather than a campsite setup.

    I’d be cautious about leaning too hard on this distinction legally. The law doesn’t differentiate. But in terms of landowner tolerance and minimising your visual and physical impact on a place, bivvying does tend to sit at the lower-friction end of the spectrum. A single person wrapped in a dull-coloured bivvy on a high ridge is very different to a group of four with bright orange tents pitched in a valley bottom near a footpath.

    If you’re thinking about the kit side, understanding how to plan a multi-day backpacking trip on a budget covers the basics of keeping your pack light and your overnight setup simple, which is exactly the mindset you want for a legal and low-impact bivvy.

    How to leave no trace when bivvying in England and Wales

    This is where it really counts. The reason bivvying and wild camping have survived in upland England and Wales without being formally banned is largely because most people who do it do it quietly and cleanly. The moment that changes, access erodes.

    A few firm habits to build:

    • Arrive late, leave early. Get to your spot in the evening, pack up before mid-morning. The longer you stay, the more impact you have and the more likely you are to be noticed.
    • No fires. Full stop. Open fires on open moorland are a serious risk and a quick way to lose access for everyone. Use a small stove if you need hot food.
    • Pack out everything. Food scraps, wrappers, any human waste if there’s any possibility of contamination near water. Bury solid waste at least 200 metres from any water source if you must go.
    • Pick bare ground or rocky areas rather than fragile vegetation. Sphagnum moss and heather take years to recover from compression.
    • Keep groups small. Solo or pairs cause far less impact than groups of six or more. Large groups also attract more attention and tend to generate more waste.

    The Leave No Trace ethic isn’t just an abstract principle. On sensitive upland habitats, it’s the difference between access being maintained or closed.

    What if someone tells you to move on?

    Stay calm and be cooperative. If a landowner or their representative asks you to leave, you’re legally required to do so within a reasonable time. Arguing the toss doesn’t help the situation and definitely doesn’t help wild camping access as a whole. Pack up, thank them, move on. In my experience, the vast majority of encounters on the hill are resolved politely when you’re clearly low-impact and clearly respectful of the land.

    The bigger picture here is that access in England and Wales is genuinely fragile. Understanding the right of way rules that every UK walker should actually understand is a good grounding in how access law works here, and it makes you a more confident and credible presence on the land. Being informed matters.

    If you’re new to spending nights out in the hills and want to work up to full bivvying on remote ground, some routes lend themselves well to experimenting with the format. Plenty of hikers do their first overnight on a long-distance route where bothies are available as a backup option. Understanding how to use a mountain bothy properly is a natural companion to knowing when a bivvy makes more sense.

    Bivvying in England and Wales sits in a legal grey area that requires a bit of knowledge, a lot of common sense, and genuine respect for the land. It’s not a right, but it’s a reasonable practice when done properly. Get those habits right from the start and you’ll have years of good nights under the stars ahead of you.

    Frequently Asked Questions

    Is bivvying legal in England and Wales?

    There is no general legal right to bivvy or wild camp in England and Wales without landowner permission. Doing so is technically civil trespass, though Dartmoor is the one statutory exception where a right to camp on the commons exists. In practice, many upland areas tolerate low-impact overnight stays if you arrive late, leave early, and leave no trace.

    Can you bivvy on open access land in England?

    Not automatically. The Countryside and Rights of Way Act 2000 gives a right of access on foot to designated open land, but that right does not extend to overnight camping. Some national park authorities have informal tolerant policies for high-altitude, low-impact stays, but this varies by area and is not a legal guarantee.

    Where is wild camping tolerated in England and Wales?

    The Lake District (particularly above the fell walls), Dartmoor (which has a statutory right), the Brecon Beacons on higher ground, and parts of the Peak District’s Dark Peak have long traditions of tolerating quiet, low-impact overnight stays. Tolerance is not the same as permission, and attitudes can vary by landowner and season.
  • Hiking the Yorkshire Three Peaks: What First-Timers Get Wrong About the Route

    Hiking the Yorkshire Three Peaks: What First-Timers Get Wrong About the Route

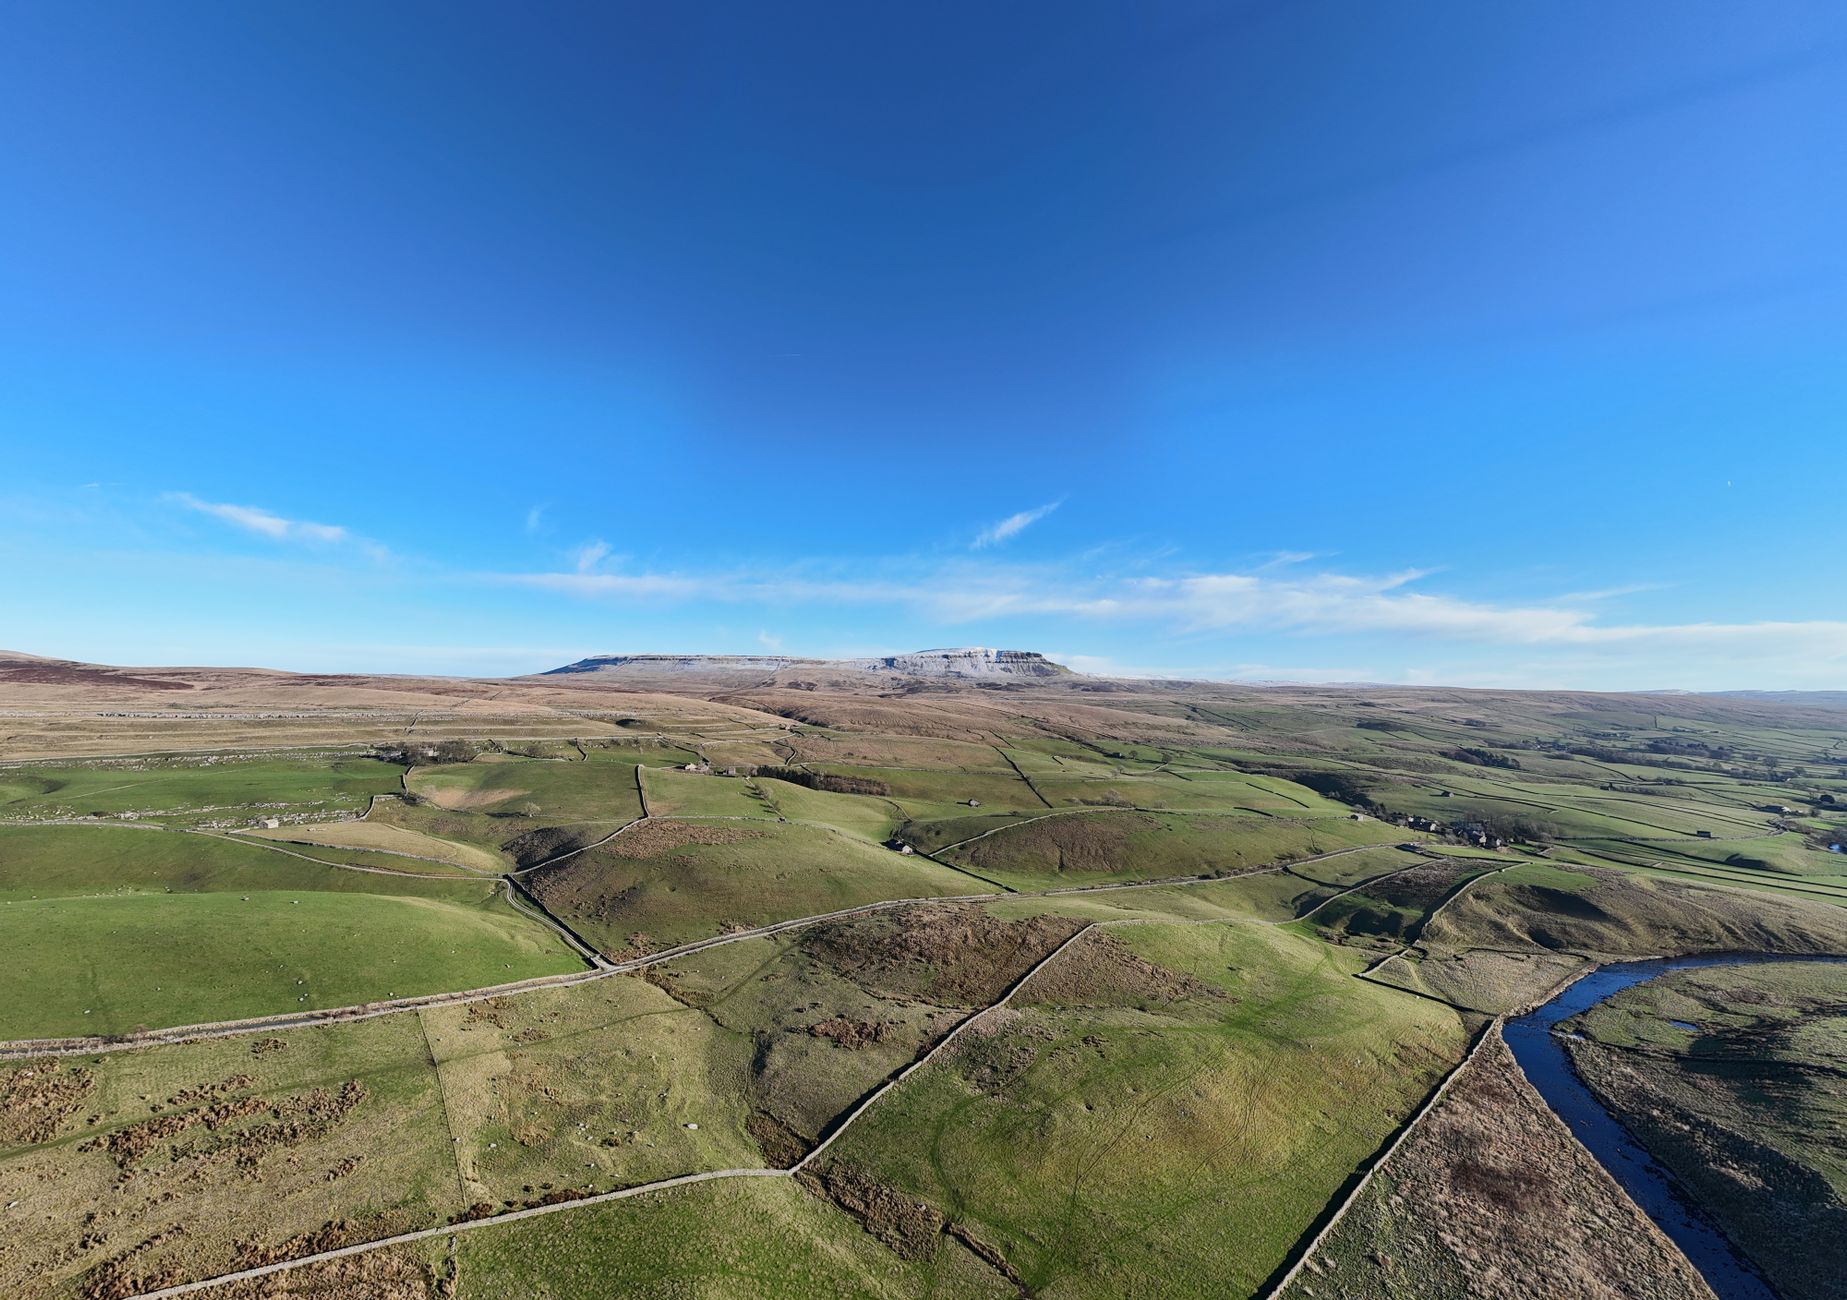
    The Yorkshire Three Peaks has a reputation for being a classic UK challenge. Twenty-five miles, three summits, around 1,600 metres of total ascent, all crammed into a single day if you’re doing it properly. On paper it sounds like a manageable adventure. And for a lot of people it is, once they’ve done it. But the first time? I’ve seen walkers set off from Horton-in-Ribblesdale looking confident and come back looking like they’d aged five years. The route catches people out in specific, predictable ways, and most of them are entirely avoidable.

    Walkers crossing boggy moorland on the Yorkshire Three Peaks first time route
    Photo by David Pickup | Advertising & Marketing 🇬🇧 on Pexels

    Underestimating the bog on Pen-y-Ghent and Ingleborough

    Pen-y-Ghent tends to be the first summit on the traditional anticlockwise route, and it’s a fine way to start. The ascent is satisfying, with a short scramble near the top that wakes you up. But the ground around the base, and across the moorland section towards Ribblehead, is genuinely boggy for much of the year. I’ve walked it in May and sunk to my shin in what looked like solid grass. The limestone pavements near Ingleborough give false confidence too: you expect dry rock, and then the approach across the plateau absolutely isn’t.

    The fix is simple but non-negotiable. Waterproof boots, and not trainers that are described as water-resistant on the box. Gaiters are worth their weight on this route, especially after any rain in the fortnight beforehand. Check the Met Office mountain forecast for the Dales before you go, not just the local town forecast, which will almost certainly be sunnier and drier than what you’ll actually encounter on the tops.

    Getting the start time badly wrong

    For a Yorkshire Three Peaks first time, this is probably the most common mistake of all. People arrive at the Horton-in-Ribblesdale car park at half nine or ten in the morning, thinking that gives them plenty of day. It doesn’t, unless you’re a quick walker in good conditions with everything dialled in. Most first-timers take between ten and twelve hours. If you start at half nine, you’re finishing in the dark in autumn or winter, with tired legs on the final descent off Ingleborough into Horton, which is rough and uneven and not what you want to be navigating by head torch.

    A 7am start is more sensible for beginners. Earlier if you’re cautious or have a group with mixed fitness levels. The Pen-y-Ghent Café in Horton operates a clock-in, clock-out system for walkers doing the challenge, which is a useful safety net and worth using. The Yorkshire Dales National Park Authority also has practical route information and conditions updates worth checking before any trip out here.

    Not accounting for Whernside’s ridge

    Whernside is the highest of the three at 736 metres, and the ridge walk along its spine is one of the finest sections of the whole route. But it also fools people. The ascent from Ribblehead Viaduct feels relentless, the ridge is exposed to any wind coming in from the west, and the descent towards Ribblehead on the far side has some badly eroded sections that require real care on wet stone. I’ve watched people practically sprint the ridge because they’re already tired and think the summit means it’s nearly over. It isn’t. There’s still Ingleborough to come.

    Knowing how far you can realistically cover in a day on UK mountain terrain matters here. Pace yourself on Whernside. Eat something at the summit. The ridge is exposed, so if there’s any wind, layer up before you reach it rather than stopping on the exposed crest trying to wrestle a jacket on with numb fingers.

    The footwear problem runs deeper than most people admit

    Trail runners are fine if you’re experienced and know exactly what you’re getting into. But I’d strongly push back against anyone doing the Yorkshire Three Peaks for the first time in anything less than a proper waterproof walking boot with ankle support. The descent off Ingleborough is relentlessly rocky and goes on longer than you expect after eight or nine hours on your feet. Ankles that feel fine at mile five are a different matter at mile twenty-two on loose stone.

    Make sure whatever you’re wearing is broken in. This sounds obvious and yet it remains the most commonly ignored piece of advice. Blisters have ended more Yorkshire Three Peaks attempts than bad weather. A fresh pair of boots on challenge day is a genuine emergency.

    Skipping proper navigation practice

    The route is well-trodden and well-waymarked for most of its length. But visibility on the tops can drop fast, and the moorland sections between summits have caught people out when low cloud rolls in. If you’ve never used a map and compass, the Three Peaks might feel fine right up until the moment it isn’t. GPS on your phone is helpful but not a substitute, particularly when batteries drain faster in cold weather.

    If you’re building your navigation confidence, it’s worth reading up on how access and right of way works across UK walking routes as well, particularly on farmland sections around Horton. The Three Peaks crosses a lot of private land with permissive paths, and staying on the marked route matters.

    Packing for the wrong conditions

    People look at the elevation figures and think this is a hill walk, which it is, but the Yorkshire Dales weather is genuinely fickle. I’ve done the Three Peaks in October sunshine and I’ve seen a July attempt abandoned due to horizontal rain and near-zero visibility on Whernside. Pack a full waterproof shell, not just a softshell. Bring extra layers. Carry more food and water than you think you’ll need. The Ribblehead Viaduct café stop is a tempting resupply point mid-route, but don’t rely on it being open or being able to carry you through the rest of the day on a coffee and a flapjack.

    The same layering principles that apply to a big Scottish day out apply here. A base layer that wicks, an insulating mid layer, and a waterproof shell you can actually move in. The Three Peaks isn’t technical, but it is long, and long days in the UK hills punish inadequate kit reliably.

    Treating it as a race when you haven’t earned that yet

    There’s a sub-12-hour challenge culture around the Yorkshire Three Peaks, and it’s great fun once you know the route. The first time, though, the goal should simply be finishing safely and actually enjoying the experience. Ingleborough in late afternoon light with the Ribble Valley spread out below is genuinely beautiful. Ribblehead Viaduct from the Whernside ridge is one of my favourite views in the Dales. If you’re grinding through it with your head down watching your watch, you’ll miss what makes the walk worthwhile in the first place.

    If mountain challenge days interest you, it’s also worth knowing there are multi-day alternatives to single big challenge days that are often more rewarding and less punishing. But for the Three Peaks, a well-prepared day out in the Yorkshire Dales is hard to beat. Just give it the respect it deserves on that first attempt, and it’ll give you a walk you’ll talk about for years.

  • Why Bothy Culture Matters and How to Use a Mountain Bothy Properly

    Why Bothy Culture Matters and How to Use a Mountain Bothy Properly

    There is something genuinely humbling about pushing open the door of a remote bothy after a long day on the hill. No electricity, no running water, no phone signal. Just four stone walls, a fireplace if you’re lucky, and the sound of wind hammering the roof. I’ve spent nights in a handful of these places over the years, and every single time I leave feeling like I understand the hills a little better. But bothies only work because of an unspoken agreement among walkers. Break that agreement, and these shelters disappear. It really is that simple.

    This mountain bothy UK guide covers what the Mountain Bothies Association actually does, how to behave when you’re using one, what to bring, and how to leave the place in better shape than you found it. If you’re planning your first bothy stay, or you’ve used them before and want to brush up on the culture, read on.

    Remote stone mountain bothy in the Scottish Highlands, central to any mountain bothy UK guide
    Photo by Phil Evenden on Pexels

    What is the Mountain Bothies Association?

    The Mountain Bothies Association (MBA) is a UK charity that maintains around 100 open shelters across remote parts of Scotland, northern England, Wales, and Ireland. Most of the buildings are owned by private landowners or estates who allow the MBA to maintain and manage them in exchange for their upkeep. The MBA relies almost entirely on volunteers who trudge out to these places carrying tools, materials, and timber to do repairs. No walkers pay to stay. No one books in advance. The whole thing runs on goodwill and mutual respect.

    These shelters exist to provide basic refuge for people travelling on foot or by bike through remote terrain. They are not campsites, hostels, or holiday cottages. The MBA is clear on this: bothies are for short stays, generally no more than two or three nights in one place. Treat them accordingly.

    Bothy etiquette: the basics every visitor should know

    The rules around bothies are unwritten, which is part of their charm, but that can also catch first-timers out. Here is what good bothy behaviour actually looks like in practice.

    Share the space

    If someone else is already in the bothy when you arrive, you don’t turn around and leave. You come in, say hello, and make room. Bothies are communal shelters. I’ve shared a tiny stone room with five strangers and ended up having one of the best evenings I can remember on the hill. If you want guaranteed privacy, wild camp instead. The bothy isn’t yours to claim.

    Leave the firewood

    If there is a wood store and you use the fire, replace what you’ve burnt. This is the single most common point of friction in bothy culture. Arriving cold and wet to an empty wood store when the last group used everything and left nothing is genuinely demoralising. Carry a small saw or a Silky folding saw and cut whatever fallen timber you can find nearby. Don’t burn structural timber, furniture, or anything that belongs to the bothy itself.

    Clean up properly

    Pack out every piece of rubbish you bring in. Every bit. Don’t leave food scraps, don’t bury waste near the bothy, and don’t use the surrounding area as a toilet within sight of the building or near any water source. Human waste should be buried at least 50 metres from the bothy and 30 metres from any stream or loch. The MBA provides guidance on this, and it’s worth reading before your first visit. A spade and a small trowel weigh almost nothing.

    Sign the visitor book

    Most bothies have a book inside. Write in it. Leave the date, where you came from, where you’re going, and anything useful about the conditions out there. This record is genuinely valuable to the MBA volunteers who visit, and it adds to the sense of community that makes bothy culture feel special. Reading back through months of entries from strangers who’ve sat in the same chair by the same fireplace is one of the small joys of the experience.

    What to bring to a mountain bothy in the UK

    A bothy provides shelter and usually nothing else. Everything you need for warmth, food, and safety comes with you. I treat a bothy night like a wild camp in terms of kit, with a few adjustments.

    A sleeping bag rated to at least -5°C is sensible for any UK mountain bothy stay, regardless of the season. Stone walls hold the cold, and overnight temperatures in the Scottish Highlands or the Pennines can drop sharply even in summer. A foam sleeping mat or inflatable mat is essential; the floor is hard and will drain your warmth through the night if you’re sleeping directly on it.

    Bring your own food and a stove. Don’t assume there will be cooking equipment left behind. Carry enough water or a reliable filter because the water from streams near bothies can carry Giardia and other pathogens. A head torch, a first aid kit, waterproofs, and a spare layer should be on your list regardless of the forecast. If you haven’t already sorted your navigation skills for remote terrain, our guide to staying safe on a mountain in a sudden storm is worth a read before you head out.

    Some people bring small contributions to the bothy itself: a bag of coal, a box of firelighters, candles, or a simple repair like replacing a broken door latch. None of this is required, but all of it is appreciated. It’s the spirit of the thing.

    How to leave a bothy better than you found it

    This phrase gets used a lot in bothy circles, and it’s the right standard to hold yourself to. Sweep the floor before you go. Fold any blankets that were left out. Stack firewood if there’s any left. Check the drainage channel outside if it’s been raining hard, as blocked drains accelerate the decay of these old buildings faster than almost anything else.

    If you notice structural damage, a broken window, a failing roof section, or a damaged door, report it to the MBA through their website. Volunteers can only fix problems they know about.

    Large groups are where things go wrong most often. The MBA recommends that groups of six or more should not use bothies unless the shelter is specifically listed as suitable for larger parties. A group of twelve people descending on a two-room bothy, consuming all the firewood, leaving rubbish, and making a mess of the surrounding area is exactly the kind of incident that causes landowners to withdraw permission for a bothy to operate at all. It has happened before. The network is smaller than it used to be because of incidents like this.

    Why the bothy network depends entirely on you

    There is no government funding keeping these places open. There is no commercial operation behind them. The MBA runs on membership fees, donations, and the volunteer hours of people who genuinely care about keeping remote shelters available to walkers. If you use a bothy and value the experience, joining the MBA costs around £20 per year and directly funds maintenance work. That’s a reasonable exchange for free accommodation in some of the most remote and beautiful corners of the UK.

    For those of us who spend real time in the hills, bothies are part of the infrastructure of a life outdoors. They make longer routes possible, they make winter travel safer, and they create moments of connection with other walkers that you simply don’t get anywhere else. Knowing how to use them properly is part of what it means to move responsibly through the landscape. If you’re building up to longer multi-day routes, our piece on planning a multi-day backpacking trip on a budget has practical advice that pairs well with bothy planning. And for understanding what terrain you might be crossing to reach some of these shelters, the guide on how far you can realistically hike in a day in UK mountain terrain is a useful reality check.

    Bothy culture is worth protecting. Go in with respect, leave with everything you brought in, and contribute something if you can. The hills don’t owe us these shelters. We earn the privilege of using them by looking after them.

    Frequently Asked Questions

    Do you need to book a mountain bothy in the UK?

    No, mountain bothies in the UK operate on a first-come, first-served basis with no booking system. You simply turn up and share the space with whoever else is there. Because of this, it’s always sensible to carry camping gear in case the bothy is full or unusable when you arrive.

    Is it free to stay in a mountain bothy?

    Yes, staying in an MBA bothy is free of charge. There are no fees to pay on arrival. However, the MBA does encourage walkers to become members (around £20 per year) to help fund the maintenance work that keeps these shelters open.

    Are mountain bothies safe to stay in overnight?

    Generally yes, though comfort varies enormously between shelters. Some have functioning fireplaces and dry floors; others are fairly rough. Always bring a sleeping bag, mat, food, water filtration, and full hill-walking kit, as you can’t rely on any facilities being available inside.

  • The Cairngorms in Spring: Which Walks Are Safe Before the Snow Fully Clears

    April in the Cairngorms is a strange, beautiful contradiction. The lower glens are waking up, birch trees pushing out pale green leaves, red squirrels back on the move, the smell of wet peat drifting across the tracks. But lift your eyes to the plateau and you’re looking at a scene that could belong to January. The snowpack up there doesn’t read a calendar. I’ve been caught out by this more than once, setting off from Aviemore in a fleece and light trousers, only to find the upper approaches glazed in wind-hardened névé that proper winter kit would struggle with, let alone a spring layering system.

    This guide is specifically about the weeks between early April and late May, that shoulder period when Cairngorms spring walking can be glorious at the right altitude and genuinely dangerous at the wrong one. I’ll walk through the main risk factors, and then point you at the routes that actually pay off at this time of year.

    Why the Cairngorm plateau stays dangerous long into spring

    The Cairngorm plateau sits at around 1,200 metres at its high points, and it holds snow longer than almost anywhere else in Britain. The Scottish Avalanche Information Service (SAIS) typically publishes forecasts through to late April, and in a year with significant winter snowfall, hard-packed snow and ice on north and east-facing aspects can persist well into May. Wind slabs form on lee slopes, cornice edges remain on ridgelines above Coire an t-Sneachda and Coire an Lochain, and the plateau itself can be featureless whiteout with no visual markers in poor visibility.

    That last point is the one that catches people. The plateau is vast and relatively flat, which makes it disorienting in cloud or snow. Navigation skills matter enormously up there even in summer. In April, with potential ice underfoot and limited daylight compared to midsummer, the margin for error shrinks considerably. If you’re not carrying an ice axe, crampons, and knowing how to use them, the high tops are simply not your terrain yet. Check the SAIS forecast before any trip above 900 metres, even if it looks sunny from the car park.

    River crossing risks in the glens during April and May

    The snowmelt adds another variable that’s easy to underestimate. Rivers across the Cairngorms catchment, the Druie, the Feshie, the Avon, the upper Dee, can rise sharply and fast during warm spells or sustained rain. A path that crosses a burn confidently marked on the OS map may be uncrossable after two days of mild weather in late April. The River Feshie in particular is notorious for this; the flats of Glen Feshie are spectacular walking, but the river braids and floods unpredictably, and several informal crossing points that work in summer simply don’t exist as safe options in spring.

    My rule is to check the Scottish Environment Protection Agency’s river level gauges the morning of any route that involves a crossing without a bridge. If levels are elevated and rising, I pick a different plan. No view is worth a cold-water emergency. Speaking of which, if you’re driving into the glens to reach trailheads, be aware that some of the forest and estate tracks flood in spring, and Diesel 4x4s are still the go-to transport for many gamekeepers and rangers working these routes for good reason.

    The lower Glen Feshie circuit: one of the best spring walks in Britain

    Here’s where the season actually rewards you. Glen Feshie south of Achlean farm is extraordinary in April and May. Ancient Scots pines, remnants of the Caledonian forest, frame the river flats. Capercaillie are active (keep your distance and your dog on a lead; this species is critically endangered in the UK). Ospreys return to nest around Loch Insh from mid-April. The light at this time of year, low and golden even at midday, makes the whole glen glow in a way that high summer can’t match.

    The standard lower circuit from Achlean stays well below 500 metres, avoids all serious snowpack, and covers around 10 to 12 miles depending on how far you push south. It’s a long day but never a technical one. You’ll want waterproof boots; the tracks are soft and, yes, muddy in places, because this is the Cairngorms in spring and that’s exactly how it should be.

    Rothiemurchus forest and the Lairig Ghru approach (lower section only)

    The Lairig Ghru is one of Scotland’s great mountain passes, cutting straight through the Cairngorms massif. In April, the upper section through the pass itself, particularly above Pools of Dee, is very much winter territory with lingering snow and potential cornices. But the approach from Coylumbridge through Rothiemurchus forest is a genuinely lovely spring walk, staying low enough to be safe and interesting enough to be worth the drive.

    From Coylumbridge, a well-marked path heads south into the trees, passing Loch Morlich and heading into the ancient forest. Red squirrels are active in the pines, crested tits flit between branches, and the light through the canopy on a clear April morning is something I keep coming back for. Turn around at the Chalamain Gap or just short of it if there’s snow on the boulders. This section, roughly 8 miles return, is excellent for most walkers and safe throughout the spring period.

    Glenmore and the lower Cairngorm trails

    The network of lower trails around Glenmore and the Cairngorm ski area car park offers good options in April, with one important caveat: the mountain road up to the car park at around 650 metres is itself exposed and can be icy or closed in early April after overnight frost. Check with Cairngorm Mountain before you drive up. Once there, the green and blue waymarked trails in the forest below stay clear of serious snowpack and give good views back across Strathspey.

    If you’re building towards a summer Munro attempt on Cairn Gorm itself, these lower routes are good training ground. I’d point anyone new to the area at our guide on how far you can hike in a day in UK mountain terrain before committing to anything longer, and if the high tops are calling later in the season, the Cairngorms in autumn is an entirely different but equally rewarding experience to plan ahead for.

    What kit you actually need for spring walking in the Cairngorms

    For lower glen routes in April and May: waterproof boots (not trail shoes), waterproof trousers, a proper midlayer, and a wind-and-waterproof shell. The weather here changes fast. I’ve had four seasons in a single afternoon in this range. A map and compass are non-negotiable even on lower routes; mobile signal is poor across much of the area. Carry a headtorch, a small first aid kit, and more food than you think you need.

    For anything above 800 metres before mid-May: add crampons and an ice axe, and only go if you know how to use them. If you’re unsure, consider booking a day with a qualified mountain leader. Glenmore Lodge, Scotland’s national outdoor centre, is based here and runs skills courses throughout the spring season. That’s not a throwaway suggestion; this mountain environment demands respect, and the skills you build will open up far more of the Cairngorms than any guidebook can.

    If you’re already comfortable on exposed terrain and want to understand more about moving on steep ground, our guide to scrambling grades in the UK is worth a read before you push higher in the range. The Cairngorms don’t have much classic scrambling, but understanding what technical terrain actually means will sharpen your judgment on the plateau.

    April and May in the Cairngorms is a reward for the patient walker. Stay low, read the conditions, and let the season do the work. The plateau will still be there in June, clearer and safer. Right now, the glens are extraordinary enough.

    Frequently Asked Questions

    Is it safe to walk on the Cairngorm plateau in April?

    For most walkers, the Cairngorm plateau is not safe in April without winter skills and equipment including an ice axe and crampons. Hard-packed snow, ice, and potential cornice collapse on north and east-facing slopes remain serious hazards. Check the Scottish Avalanche Information Service forecast before any trip above 900 metres.

    Which Cairngorms walks are suitable for spring before the snow clears?

    The lower Glen Feshie circuit from Achlean, the Rothiemurchus forest approach to the Lairig Ghru, and the Glenmore forest trails are all excellent in April and May. These routes stay well below the snowline and are generally safe for walkers with appropriate waterproof footwear and clothing.

    When does the snow clear from the Cairngorms high tops?

    On north and east-facing aspects, significant snowpack can persist until late May or even early June after a heavy winter. South-facing slopes at lower altitude typically clear by mid-April. The SAIS avalanche forecast (sais.gov.uk) is the most reliable daily indicator of current conditions on the high tops.

    Are Cairngorms river crossings dangerous in spring?

    Yes, river levels in the Cairngorms catchment, including the Feshie, Druie, and upper Dee, can rise very quickly during snowmelt or heavy rain in April and May. Check the Scottish Environment Protection Agency river level gauges on the morning of any walk involving an unbridged crossing, and have a backup plan if levels are elevated.

    What wildlife can you see in the Cairngorms in April and May?

    Spring is one of the best times for wildlife in the Cairngorms. Ospreys return to Loch Insh from mid-April, capercaillie are active in the ancient Scots pine forest, red squirrels are highly visible, and crested tits, goldeneye ducks, and red kites are all possible. Keep dogs on leads in forested areas where capercaillie may be nesting.

  • The Best Autumn Walks in the Cairngorms for Colour, Quiet, and Deer Rut Season

    The Best Autumn Walks in the Cairngorms for Colour, Quiet, and Deer Rut Season

    September and October are, in my opinion, the finest months to be walking in the Cairngorms. The summer crowds have thinned out, the midges are mostly done, and the birch woodland turns into something genuinely spectacular. Amber, copper, gold, the occasional flash of russet where a rowan is heavy with berries. If you’ve only ever visited in summer or winter, autumn walks in the Cairngorms will feel like discovering the place all over again.

    There’s also the rut. From mid-September through to late October, red deer stags are in full voice across the glens, and if you’ve never heard a stag roar from a ridge above the treeline at first light, it’s one of those sounds that stays with you for a long time.

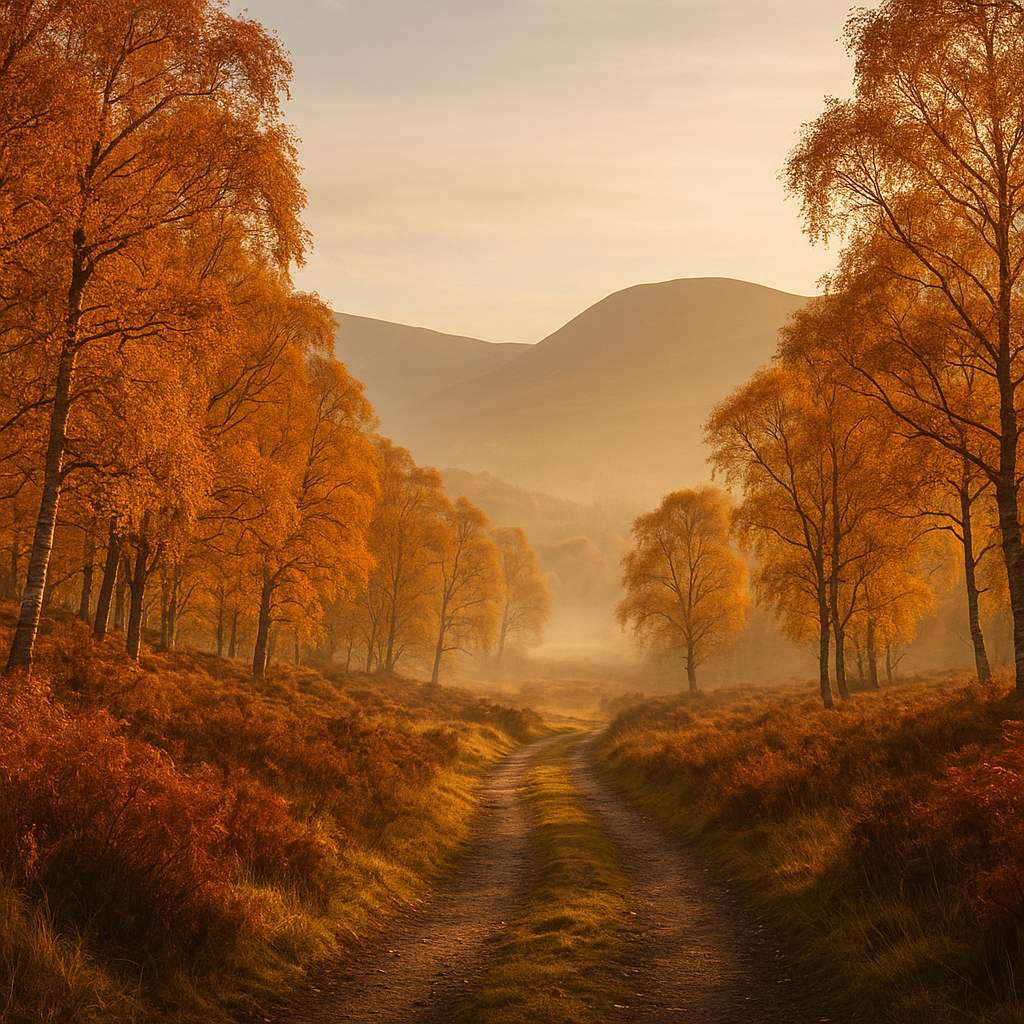
    Golden birch woodland path in the Cairngorms during autumn walks in October morning light

    Why September and October Are the Sweet Spot

    The Cairngorms in September still hold some warmth in the middle of the day, but the light is completely different from summer. It sits lower, rakes across the heather at a golden angle in the mornings and evenings, and makes every photograph look like someone’s applied a filter they haven’t. The bracken is going brown and the birches are starting their turn by mid-September, peak colour usually landing somewhere in the first two weeks of October depending on the year.

    Daylight does shorten noticeably. By the end of October you’ve got roughly nine hours between sunrise and sunset, so planning your start time matters. I’d always aim to be walking by 8am at the latest on any serious route. Headtorches in the pack from September onwards is just sensible, not paranoid.

    Temperatures can drop fast once the sun drops below the ridgeline, and the Cairngorm plateau in particular can see conditions that feel genuinely wintry even in September. Layers remain essential, and don’t underestimate how quickly weather moves across the high ground. The Met Office mountain forecast for the Cairngorms is worth checking every morning before you head out.

    The Best Birch Woodland Routes for Autumn Colour

    The birch woodland around Rothiemurchus and Glen Feshie is where you want to be for colour. These aren’t tame park walks. They’re proper ancient woodland with uneven ground, tree roots everywhere, boggy sections, and the feeling that not many people have come this way recently even when they have.

    Rothiemurchus Forest Circuit

    Starting from the visitor centre at Inverdruie near Aviemore, a loop through Rothiemurchus forest taking in Loch an Eilein gives you some of the most photogenic birch and Scots pine in the national park. The loch itself, with its ruined island castle, looks extraordinary reflected in still October water beneath orange canopy. It’s around 8 miles for a full loop with minimal elevation gain, which makes it a good choice if you want to move slowly and actually take photographs rather than just tick off summits.

    Glen Feshie to Achlean

    Glen Feshie is wilder, quieter, and in October it’s extraordinary. Walking south along the river from the Feshiebridge car park, the birch woodland thins as the glen opens out, but the views back north with colour on the lower slopes are something else entirely. Rewilding efforts in Glen Feshie led by Wildland Limited have dramatically reduced deer grazing pressure, and the natural regeneration of birch and Scots pine here is visible and remarkable. You can see young trees growing where there were none fifteen years ago.

    Abernethy Forest and Loch Garten

    On the eastern side of the national park, Abernethy Forest is an RSPB reserve with easy trails through ancient Scots pine and birch. The pine here are massive, gnarled, genuinely old. It’s less dramatic than the high glen walks but deeply atmospheric in autumn mist, and the birdwatching is exceptional. Crested tit, crossbill, capercaillie if you’re very quiet and very lucky.

    Watching the Red Deer Rut Safely

    The red deer rut in the Cairngorms runs roughly from mid-September through to late October, peaking around early to mid-October. Stags roar, clash, and herd their hinds across the open hillsides and glens. It’s spectacular, and it’s one of those wildlife experiences that genuinely doesn’t need you to travel abroad to find.

    Safe distance is crucial. The general rule is a minimum of 50 metres, but honestly 100 metres or more is better, particularly with stags actively in rut. During this period, stags are stressed, exhausted, and can be unpredictable. This is not the moment to try and get a closer shot for your phone. Binoculars and patience get you far more than closing the gap.

    Some practical points: move slowly on the hillside when deer are visible. Crouching behind natural features rather than standing on the skyline keeps you less intrusive to the animals. Early morning is the most active period. The glens around Glen Clunie, the Cairnwell, and the open hillsides above Braemar consistently offer good rut viewing from the road or from a discreet distance on the hill. Dogs must be kept on leads during this period around deer.

    NatureScot, the Scottish nature agency, has clear guidance on watching deer during the rut without causing disturbance, and it’s worth reading before your visit if you’re new to this kind of wildlife watching.

    Navigating Shorter Days on Autumn Walks in the Cairngorms

    Losing the light is the most common way autumn walks in the Cairngorms catch people out. You leave in daylight, spend longer on the hill than planned, and suddenly the descent is happening in the dark on terrain you only half-remember from the ascent.

    A few habits that help: always calculate your turnaround time before you set out rather than on the hill. For October, assume you need to be descending by 3:30pm at the latest on any route with rough terrain. Tell someone your plan. The Cairngorm Mountain Rescue Team covers a huge area and they’re volunteers; the best thing you can do for them is not need them.

    A map and compass as backup to your phone GPS is not optional on the plateau or in the high glens. Autumn mist and low cloud can reduce visibility substantially, and there are sections of the Cairngorm plateau where the plateau edge is invisible until you’re very close to it.

    Getting There and Where to Base Yourself

    Aviemore is the obvious base, with good links by Scotrail from Inverness and further afield. Braemar gives you access to the eastern and southern glens and is worth considering if you want quieter, less-visited ground. Kingussie and Newtonmore are good options for Glen Feshie and the southern approaches to the massif.

    Accommodation in October is easier to find than in peak summer, though weekends during the rut are busier than you might expect, wildlife watching has grown considerably as an activity in Scotland over the past decade. Book ahead if you’re planning a Friday to Sunday trip.

    Autumn in the Cairngorms rewards patience and early starts. Go when the light is low, move quietly through the birch, listen for the stags, and give yourself enough time to get off the hill before dark. It’s the best version of this landscape, and it’s right there.

    Frequently Asked Questions

    When is the best time for autumn walks in the Cairngorms?

    Mid-September through to late October offers the best combination of autumn colour and red deer rut activity. October is typically peak colour for the birch woodland, while the rut is most intense in early to mid-October. Weekdays are noticeably quieter than weekends.

    How close can you get to red deer during the rut in the Cairngorms?

    A minimum of 50 metres is the general guideline, though 100 metres or more is safer and less disruptive to the animals. Stags during the rut can be unpredictable, so binoculars are far more useful than trying to close the gap for a photograph.

    Are the Cairngorm birch woodland walks suitable for beginners?

    Routes like the Loch an Eilein circuit in Rothiemurchus are accessible to most walkers with reasonable fitness and decent footwear. Glen Feshie and more open terrain require more experience, particularly once you move beyond the lower woodland onto open hillside.

  • How Far Can You Hike in a Day in UK Mountain Terrain? A Practical Guide

    How Far Can You Hike in a Day in UK Mountain Terrain? A Practical Guide

    Most people who’ve had a rough day on the hills can tell you exactly where the planning went wrong. It wasn’t the weather, the kit, or even the route itself. It was the mileage. Somebody looked at a map, counted the distance, and assumed a 20-mile day in the Cairngorms works the same as a 20-mile day on a towpath. It doesn’t. Not even close. Understanding how far you can hike in a day in UK mountain terrain is genuinely one of the most useful skills you can develop, and it involves a lot more than staring at the total distance on an OS map.

    This guide pulls together the maths, the real-world variables, and the honest stuff nobody tells you when you’re sitting at home with a highlighter and a Landranger sheet.

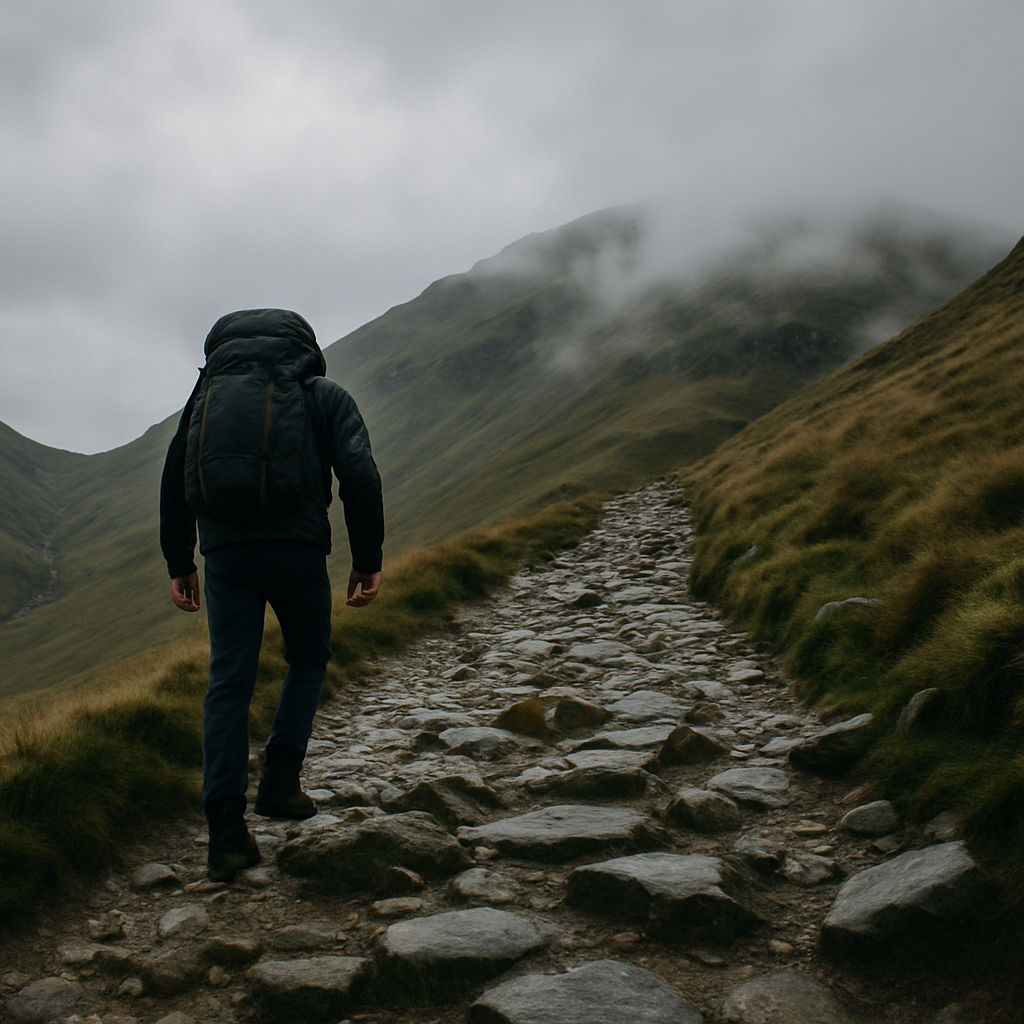
    Hiker with heavy pack ascending a steep Lake District fell, illustrating how far can you hike in a day UK mountain terrain

    Why Flat-Distance Mileage Is Meaningless in the Mountains

    A kilometre on a map is a kilometre. But a kilometre up the flanks of Helvellyn in February, carrying a 15kg pack through ankle-deep peat bog, is an entirely different proposition. The map tells you horizontal distance. It tells you nothing about what your legs, lungs, and knees are actually going to experience.

    This is where Naismith’s Rule becomes your friend. Developed by Scottish mountaineer William Naismith in 1892, it’s beautifully simple: allow one hour for every 5 kilometres of forward distance, then add one hour for every 600 metres of ascent. It’s a starting point, not gospel, but it gives you a far more honest picture than raw mileage ever will.

    For a typical fit adult, a day that shows 16 kilometres on a map might carry a Naismith time of seven or eight hours once you factor in 900 metres of climbing. That’s before stops, navigation fumbles, or a boggy section that halves your pace. Suddenly your “16km walk” becomes a full day in the hills, and one worth respecting.

    Naismith’s Rule: How to Actually Apply It

    Take a route like the Fairfield Horseshoe in the Lake District. The circular route runs to roughly 15 kilometres with around 900 metres of total ascent. Naismith gives you three hours for the distance, plus one and a half hours for the climb. You’re looking at four and a half hours of moving time before you’ve factored in anything else.

    Most walkers add what’s called the Tranter correction on top of that, which adjusts the estimate based on your fitness level. Someone who can comfortably run 5 kilometres in under 25 minutes might shave 20 percent off; someone who hasn’t walked much beyond their local park in months might add 50 percent or more. Be honest with yourself here. The mountain doesn’t care about your ambitions.

    One thing Naismith doesn’t handle well is descent, particularly steep or rough descent. That’s where Tobler’s Hiking Function comes in. Tobler’s formula calculates walking speed as a curve that peaks at a slight downhill gradient of around 5 degrees and drops off sharply on steep ascents or descents. On a rough fell descent of 30 degrees or more, you might be moving at less than half the speed you’d manage on the flat. Factor that in and those “easy” kilometres off the summit suddenly look a lot more demanding.

    The Real Cost of Carrying a Pack

    Here’s the part that catches people out most often: the energy cost of carrying weight. Even a modest daypack of 8 to 10 kilograms noticeably increases your oxygen consumption and fatigue rate. Research published in fields of exercise physiology suggests that carrying around 10 percent of your body weight increases your energy expenditure by roughly 10 percent. Scale that up to a multi-day pack of 18 to 22 kilograms and you’re working considerably harder for every single metre of forward progress.

    A practical rule many experienced hill walkers use is to subtract roughly one kilometre per hour from your expected pace for every 5 kilograms of pack weight beyond a light daypack. It’s rough, but it keeps you honest. That confident 4km/h pace on flat ground drops to something closer to 2.5km/h when you’re loaded up and tackling an uneven fell path.

    Ground Conditions Change Everything

    UK mountain terrain is its own category. Paths in Snowdonia after prolonged rain, boggy moorland on the South Pennines, loose scree on the Scafell ridge, tussock grass on the Scottish Highlands – each one eats time and energy in ways that no formula fully accounts for. The Mountain Training Association recommends building in a 20 to 30 percent buffer on any route estimate when ground conditions are poor, and I’d say that’s actually conservative for serious bog or post-storm conditions.

    Snow and ice add another layer entirely. What looks like a 6km ridge walk in summer might take twice the time in January when you’re moving carefully on icy ground and the short daylight window is already ticking away. In the UK, particularly in Scotland and the northern fells, winter daylight can be as little as seven to eight hours. Your turnaround time needs to be planned before you leave the car park, not decided on the fly when you’re tired on the hill.

    So What’s a Realistic Daily Mileage for UK Mountain Days?

    For a reasonably fit, experienced hill walker with moderate pack weight and decent trail conditions, something in the range of 15 to 22 kilometres with 700 to 1,000 metres of ascent is a solid full day. That’s not a ceiling; some walkers comfortably push well beyond that. But it’s a range that doesn’t leave you limping back to the car in the dark on a regular basis.

    Beginners or those returning after time off should be thinking more like 10 to 14 kilometres with 400 to 600 metres of ascent. Build up gradually. There’s no prize for overcooking your first big day back.

    The honest answer to how far can you hike in a day in UK mountain terrain is: far less than you think if you’re planning by map distance alone, and far more if you’ve done the maths properly. Naismith gives you the skeleton. Tobler, pack weight, ground conditions, weather, and your own fitness fill in the rest.

    Building Your Buffer and Knowing When to Turn Back

    Every route plan should have a turnaround time baked in. Decide it before you set off, write it on your route card if you’re using one, and stick to it. The summit will be there another day. An emergency call-out in failing light, on a winter hillside, is not an experience anyone comes away from thinking was worth it.

    A simple rule: if you’re not at your halfway point by your halfway time, you need to reassess the route. That might mean cutting across to a lower path, shortening the loop, or simply reversing the way you came. Pride has no place in this calculation. The best walkers I’ve ever been out with are the ones who turn back without drama when the numbers stop adding up.

    Plan the route, do the maths, build in the buffer, and then get out there and enjoy it. The hills are brilliant. They’re just considerably more enjoyable when you get home before dark.

    Frequently Asked Questions

    How far can you hike in a day in UK mountain terrain as a beginner?

    For beginners, a realistic target is 10 to 14 kilometres with 400 to 600 metres of ascent. This gives you enough of a challenge to feel the accomplishment without the risk of exhaustion or being caught out after dark. Build mileage gradually over several months.

    What is Naismith's Rule and how do I use it for hiking in the UK?

    Naismith’s Rule estimates walking time by allowing one hour for every 5 kilometres of distance, plus one additional hour for every 600 metres of ascent. It was developed for Scottish terrain and gives a solid base estimate, though you should adjust for fitness level, pack weight, and ground conditions.

    Does carrying a heavy pack significantly reduce how far you can hike?

    Yes, significantly. A pack weighing around 10 percent of your body weight increases your energy expenditure by roughly the same percentage. Many experienced walkers subtract approximately one kilometre per hour from their expected pace for every 5 kilograms of pack weight beyond a light daypack.

    How does boggy or rough terrain affect daily hiking distance in the UK?

    Boggy, rocky, or snow-covered terrain can reduce your speed by 30 to 50 percent compared to a good path. Most hill walking guides recommend adding a 20 to 30 percent time buffer when conditions are poor, and even more on winter routes with icy ground or short daylight hours.

    What is a good turnaround rule for big mountain days?

    A widely used rule is to turn back if you haven’t reached your halfway point by your planned halfway time. Decide on your turnaround time before leaving, not on the hill when you’re tired and tempted to push on. This approach significantly reduces the risk of being caught out after dark.

  • Scrambling Grades Explained: What Grade 1, 2, and 3 Actually Means for UK Hikers

    Scrambling Grades Explained: What Grade 1, 2, and 3 Actually Means for UK Hikers

    At some point, most keen walkers reach a ridge or a rocky step and think: right, this is more than walking. Your hands come out. You’re reading the rock, picking lines, feeling the exposure beneath you. That moment is usually your first taste of scrambling, and it’s addictive. But once you start looking into it properly, you’ll quickly run into the grading system, and if nobody’s ever broken it down for you, it can feel a bit baffling. So here’s a plain-English guide to scrambling grades UK explained, with real routes thrown in so you can match the theory to the terrain.

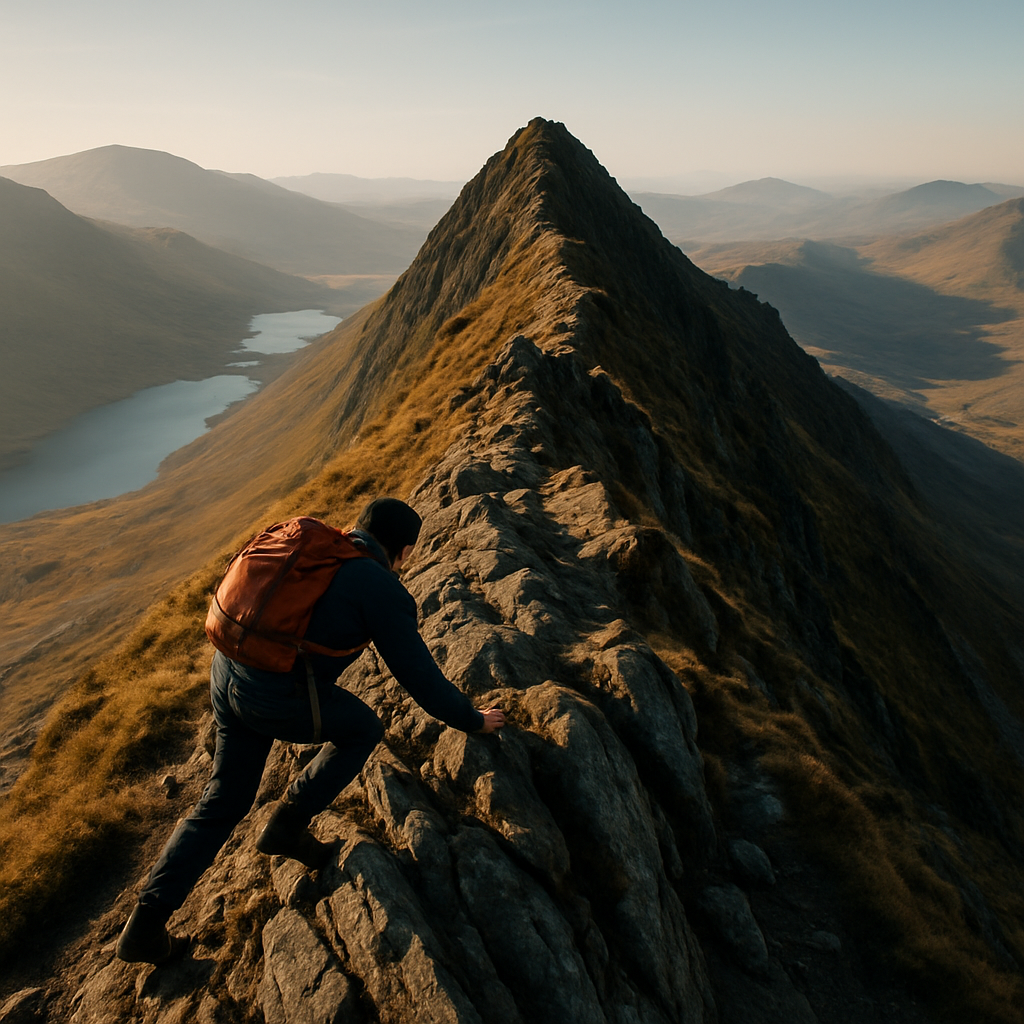
    Hiker scrambling up a rocky ridge in Snowdonia, illustrating scrambling grades UK explained
    Hiker scrambling up a rocky ridge in Snowdonia, illustrating scrambling grades UK explained

    What Is Scrambling, Exactly?

    Scrambling sits in the gap between hillwalking and technical rock climbing. You’re using your hands as much as your feet, the terrain is steep and rocky, and there’s genuine exposure on harder ground. It doesn’t require a rope on the lower grades, but it absolutely rewards good footwork, a calm head, and some basic route-finding ability. In the UK, we’re lucky to have world-class scrambling terrain scattered across Snowdonia, the Lake District, and the Cuillin Ridge on Skye. Each of those areas has routes at every grade, which makes them brilliant places to progress.

    The grading system used in the UK runs from Grade 1 up to Grade 3, with some guidebooks adding a Grade 3S (or “Severe”) to flag routes that are pushing into roped climbing territory. It’s worth knowing that these grades are subjective and can vary slightly between guidebooks, but the broad descriptions hold up well across the board. The British Mountaineering Council has solid guidance on scrambling safety and what to expect at each level if you want further reading alongside this.

    Grade 1: A Confident Walker’s Natural Next Step

    Grade 1 scrambling is where most hillwalkers end up without even realising they’ve crossed a line. The terrain is steep and rocky, your hands touch the rock regularly, but you’re rarely in a position where a slip would be catastrophic. The exposure is real but manageable, and most confident walkers with good hill fitness will handle Grade 1 routes without needing any specialist skills or equipment.

    A brilliant example is Tryfan’s North Ridge in Snowdonia. It’s one of the most popular mountain days in Wales, and the lower sections of the ridge are classic Grade 1, with some short stretches nudging Grade 2 near the top. The route rewards anyone who’s comfortable on rough ground and doesn’t mind using their hands. It’s not a walk, but it’s not intimidating either. In the Lake District, the ascent of Helm Crag above Grasmere via the ridge has scrambling sections that give a good feel for Grade 1 terrain without committing to anything serious.

    If you’re moving from walking to scrambling, Grade 1 is the right place to start. Pick a dry day, wear grippy boots rather than trail shoes, and go with someone who’s done it before if you can. Confidence on rock comes quickly once you’ve had a few outings at this level.

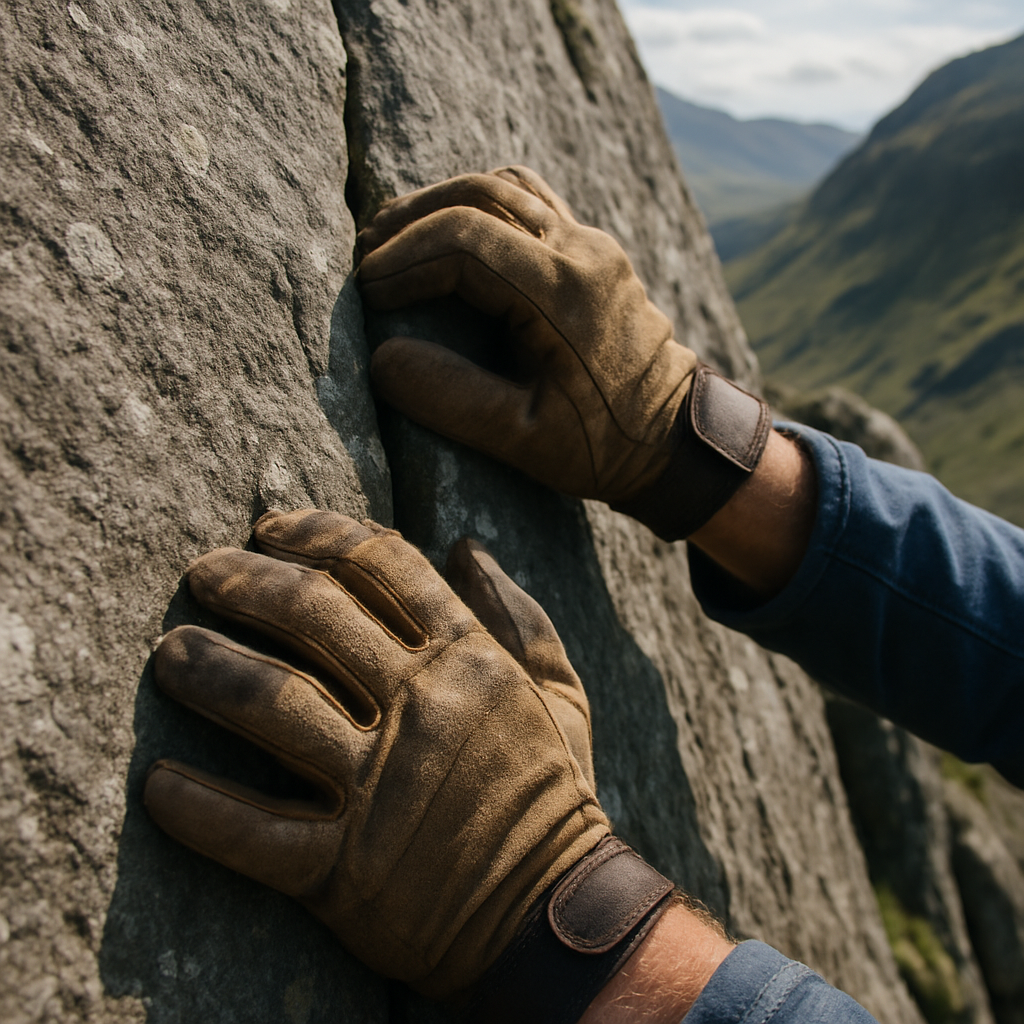
    Close-up of hands gripping rock on a UK scrambling route, relevant to scrambling grades UK explained
    Close-up of hands gripping rock on a UK scrambling route, relevant to scrambling grades UK explained

    Grade 2: Where It Gets Serious

    Step up to Grade 2 and the character of the terrain shifts noticeably. The moves are more sustained, the route-finding demands more thought, and the consequence of a slip becomes something you can’t ignore. Most experienced scramblers carry a short rope on Grade 2 routes, not because you’ll necessarily need it, but because there are sections where you’d want to protect a nervous or less experienced partner. Solo Grade 2 in poor conditions is a different beast entirely from the same route on a calm, dry day.

    In Snowdonia, Bristly Ridge on Glyder Fach is a textbook Grade 2 outing. It’s direct, the rock is generally solid, and the ridge itself is spectacular. The moves require commitment and good balance, and there are sections where the wrong line could leave you exposed and uncomfortable. In the Lake District, Sharp Edge on Blencathra is perhaps the most famous Grade 2 scramble in England. It’s narrow, airy, and demands respect. People do come unstuck on it, especially in wet conditions when the polished rock becomes treacherous.

    On Skye, the Cuillin begins throwing Grade 2 terrain at you from the moment you leave the path. The approach to Sgurr na Banachdich via the south ridge involves sustained Grade 2 scrambling, and the Cuillin’s gabbro rock, whilst grippy when dry, demands a completely different mindset to the softer rock of Snowdonia or the Lakes. If you’re taking your scrambling north to Skye, do your groundwork elsewhere first.

    Grade 3: Roped Territory for Most People

    Grade 3 scrambling is effectively the boundary between scrambling and climbing. The moves can be genuinely hard, protection is necessary in most cases, and you’ll benefit from knowing how to place gear or at least how to use a rope safely. Most people who regularly do Grade 3 routes carry a rack and know how to use it. These routes are not for someone who’s done a handful of Grade 1 days and fancies a jump.

    Crib Goch in Snowdonia is frequently cited as a Grade 1 scramble in some guides and Grade 3 in others, which illustrates how subjective grading can be. The classic traverse in good conditions sits at the lower end, but the descent to the Pyg Track in poor visibility is a very different proposition. What’s consistent is that the exposure is significant throughout. In the Cuillin, Curved Ridge on Buachaille Etive Mor (technically in Glencoe rather than Skye, but part of the same scrambling conversation) is a Grade 3 in places and a rite of passage for many aspiring mountaineers.

    The Inaccessible Pinnacle on Skye, the only Munro summit that requires actual climbing to reach the top, sits beyond even Grade 3 and into genuine rock climbing, which shows how the grading ladder keeps extending for those who want to push further.

    Practical Tips for Moving Through the Grades

    Getting the scrambling grades UK explained in theory is one thing. Putting it into practice is another. A few things I’ve found genuinely useful over the years:

    • Don’t rush the grades. Spend proper time at Grade 1 before moving up. Confidence on easy terrain translates directly to calmer thinking on harder ground.
    • Dry rock is a different material from wet rock. Routes that feel manageable in summer can be genuinely dangerous in rain or frost. Grade them up in your head when conditions deteriorate.
    • A short rope and a few slings go a long way on Grade 2. You don’t need a full climbing rack, but having the ability to protect a step or lower someone down a section is worth the small extra weight.
    • Guidebooks matter. Mark Glaister’s scrambling guides for the Lake District and Snowdonia are well-regarded and give detailed route descriptions with honest grade assessments.
    • Consider a course. A single day with a qualified mountain leader or guide on Tryfan or Sharp Edge will teach you more about footwork and route-finding than a dozen solo outings.

    Where Do You Actually Sit?

    The honest answer is: get out and find out. If you’ve walked the Three Peaks, done a few Munros, and you’re comfortable on rough ground in wind and rain, Grade 1 scrambling is well within reach right now. Grade 2 is a season or two away with the right progression. Grade 3 is a project, something to work towards over a few years with proper technique behind you.

    The mountains aren’t going anywhere. Take your time with the grades, enjoy each level for what it offers, and the scrambling will reward you handsomely.

    Frequently Asked Questions

    What is the difference between Grade 1 and Grade 2 scrambling in the UK?

    Grade 1 scrambling involves frequent hand use on steep rocky terrain but is generally manageable without a rope for confident walkers. Grade 2 is more sustained and exposed, with sections where a slip could have serious consequences, so most scramblers carry a short rope for protection.

    Do I need a rope for UK scrambling?

    On Grade 1 routes, a rope is rarely necessary for experienced hillwalkers in good conditions. For Grade 2 and above, carrying a short rope and knowing how to use it is strongly recommended, particularly if you’re with less experienced partners or tackling the route in poor weather.

    What are the best beginner scrambling routes in the UK?

    Tryfan’s North Ridge in Snowdonia and Helm Crag above Grasmere in the Lake District are excellent Grade 1 introductions. Both are well-documented, relatively forgiving in dry conditions, and popular enough that you’ll rarely be alone on the mountain.

    Is Sharp Edge on Blencathra suitable for beginners?

    Sharp Edge is generally graded as Grade 2 and is not ideal for complete beginners. It’s a narrow, exposed ridge with polished rock that becomes genuinely treacherous in wet or icy conditions. Building confidence on easier Grade 1 routes first is the sensible approach before attempting it.

    How do UK scrambling grades compare to rock climbing grades?

    UK scrambling grades sit below the rock climbing grading systems such as the British adjectival system (Moderate, Diff, VS, etc.). Grade 3 scrambling is roughly equivalent to the easiest roped climbing, around Moderate or Difficult grade, meaning some Grade 3 routes genuinely benefit from a climbing rack and rope work.

  • What I Learned Walking the South Downs Way in February: Cold, Mud, and Why It Was Worth It

    What I Learned Walking the South Downs Way in February: Cold, Mud, and Why It Was Worth It

    Nobody tells you about the mud. Not properly. You read about the chalk paths, the sweeping views across the Weald, the gentle undulations between Winchester and Eastbourne, and you picture something quite pleasant. What the guidebooks tend to gloss over is that in February, those chalk paths turn into something resembling the floor of a cattle shed after a fortnight of rain. I know, because I spent six days on the South Downs Way this past winter, and I came back with boots I nearly binned, a head full of memories I wouldn’t trade, and a genuine new appreciation for what this trail is like when almost nobody else is walking it.

    Lone hiker on a muddy South Downs Way winter walking route in early morning frost
    Lone hiker on a muddy South Downs Way winter walking route in early morning frost

    What Are Trail Conditions Like on the South Downs Way in Winter?

    The honest answer is: deeply variable, and often quite brutal underfoot. The South Downs Way is 160 kilometres long, running from Winchester in Hampshire to Eastbourne in East Sussex. It’s a National Trail, which means the surface is generally well-maintained, but chalk and clay do not behave politely in wet weather. After rain, the chalky sections become genuinely slippery, and the clay-heavy stretches near Petersfield and around the Cuckmere Valley turn into proper bog. I was using gaiters from the second day onwards and I was grateful for every centimetre of them.

    That said, winter does have an odd advantage here. The ground is firmer in the stretches that freeze overnight, which can actually make for better walking in the early morning hours before things thaw. I found myself setting off at 08:00 on some days specifically to catch that window. The paths are also far less churned up by horses and mountain bikes, which batter the softer sections considerably during busier months. In February, I crossed maybe a dozen other walkers across the full route. On some days, none at all.

    Daylight: The Biggest Practical Challenge for Winter Walking

    In February, you’re working with roughly 09:00 to 17:00 of usable daylight, which sounds like eight hours but really isn’t once you factor in the time it takes to get moving in the morning. On South Downs Way winter walking trips, daylight discipline matters more than almost anything else. I planned each section to finish well before dark, which meant shorter daily distances than I’d normally cover, averaging around 22 to 26 kilometres per day rather than the 30-plus I might push for in summer.

    The upside? Sunrise on the Downs in February is something else. The light comes in low and golden, and when the weather is clear, the views northward across the Weald are genuinely cinematic. I caught a spectacular frost-heavy morning on the ridge above Ditchling Beacon that I still think about. The kind of moment that reminds you exactly why you bother getting cold and tired in the first place.

    Muddy hiking boots on a chalk path during South Downs Way winter walking
    Muddy hiking boots on a chalk path during South Downs Way winter walking

    Accommodation Out of Season: What’s Actually Open?

    This is where winter walking on the South Downs Way gets logistically interesting. The trail is well-served with accommodation in summer, from bunkhouses to B&Bs to a scattering of YHA hostels. In winter, a significant chunk of that provision closes or reduces its hours. The YHA at Truleigh Hill, for instance, has limited winter availability and is worth booking weeks in advance if you’re planning to use it.

    I relied heavily on a combination of farm B&Bs and village pubs with rooms, and found that most of the pubs along the route were genuinely welcoming to lone muddy walkers. The Queen’s Head at Lickfold doesn’t sit directly on the trail, but it’s close enough to be worth a small detour. More practically, calling ahead is essential. Several places I’d earmarked online turned out to be closed mid-week in February, something their websites hadn’t made obvious. Do your ringing a week before you set off, not the night before.

    Wild camping isn’t legally straightforward in England, and the South Downs National Park doesn’t have the same access rights as Scotland, so I didn’t rely on it. If you’re considering a camping option, check the South Downs National Park Authority website for guidance on permitted sites, since the position on wild camping in the park is nuanced and worth understanding properly before you pack a tent.

    What to Pack for the South Downs Way in Winter

    The South Downs aren’t the Cairngorms. The elevation rarely exceeds 270 metres, and you’re never far from a village or road. But in February, exposed ridge walking in a 40 mph wind with horizontal rain is no joke, even at that altitude. I dressed for the conditions rather than the map, and I’d recommend everyone doing South Downs Way winter walking does the same.

    A few things that earned their place in my pack: waterproof gaiters (non-negotiable), a spare dry set of socks in a dry bag, trekking poles for the slippery chalk descents, a decent head torch for dawn starts, and far more snacks than I thought I’d need. Cold weather burns through energy at a surprising rate. I was going through roughly 3,500 to 4,000 calories a day and still felt hungry at night.

    The wind chill on the open ridgeline sections deserves particular respect. Between Firle Beacon and Alfriston, I walked into a headwind for nearly three hours that made it feel closer to the Scottish highlands than East Sussex. A windproof layer over your midlayer is not optional kit in winter; it’s essential.

    The Unexpected Rewards of a Quieter Crossing

    Here’s what I didn’t expect: how much better certain sections of the route feel with no one else on them. The South Downs Way in summer is lovely, but it’s also busy. Car parks fill up, popular viewpoints get crowded, and you spend a fair bit of time stepping aside on narrow paths. In February, none of that applies.

    The wildlife was also genuinely surprising. Red kites circled over the ridge above Butser Hill most mornings. I watched a barn owl quartering a field edge near Cocking in the late afternoon light, something I’ve never seen on this trail in warmer months. The landscape has a rawness to it in winter, stripped of foliage, that makes the contours and the ancient earthworks along the route far more visible. The hill forts and long barrows scattered along the Downs read completely differently when the vegetation dies back. It’s almost like walking a different path.

    South Downs Way winter walking is not for everyone, and I’d be dishonest if I pretended the harder days were anything other than hard. But if you’re a reasonably experienced walker who doesn’t mind mud on your face and cold fingers at breakfast, February on the Downs offers something rare: a long-distance trail almost entirely to yourself, with skies and light and silence that the summer crowds never get to see.

    Book your accommodation early, sort your waterproofs, and embrace the mud. It washes off.

    Frequently Asked Questions

    Is the South Downs Way suitable for walking in winter?

    Yes, for experienced walkers with the right kit. The trail is well-marked and never reaches dangerous altitudes, but chalk paths become very slippery in wet weather and daylight is limited to around eight hours. Good waterproofs, gaiters, and trekking poles make a significant difference.

    How long does it take to walk the full South Downs Way?

    Most walkers complete the 160-kilometre route in six to nine days depending on fitness and daily distances. In winter, shorter daylight hours typically mean lower daily mileage, so budgeting eight to ten days is sensible for a relaxed winter crossing.

    What accommodation is open on the South Downs Way in February?

    Some B&Bs, farm stays, and pub rooms remain open year-round, but several hostels and guesthouses reduce availability or close entirely mid-week in winter. Always ring ahead to confirm, ideally a week before your trip, rather than relying on online listings alone.

    What are the worst sections for mud on the South Downs Way in winter?

    Clay-heavy sections near Petersfield and the Cuckmere Valley area can become genuinely boggy after prolonged rain. The chalk ridgeline sections are slippery rather than muddy, particularly on descents. Gaiters and trekking poles help considerably on both types of terrain.

    Is wild camping allowed on the South Downs Way?

    Wild camping is not a legal right in England as it is in Scotland, and the South Downs National Park has specific guidance on where camping is permitted. Check the South Downs National Park Authority website before planning to camp, and stick to designated or landowner-approved sites.

  • The Pennine Way in Sections: Which Stretches Are Worth Doing as Day Walks

    The Pennine Way in Sections: Which Stretches Are Worth Doing as Day Walks

    The Pennine Way is 268 miles of British backbone. It runs from Edale in Derbyshire all the way to Kirk Yetholm just across the Scottish border, threading through some of the most dramatic, boggy, and genuinely wild landscape this island has to offer. Most people who know it think of it as a multi-week thru-hike for the dedicated and the slightly unhinged. But that framing does it a disservice. Some of the best Pennine Way day walks sections are accessible to anyone with decent boots, a map, and a reasonable level of fitness. You don’t need to commit to the whole thing to get the best of it.

    Breaking it into day sections also means you can be selective. The Pennine Way has its dull patches, stretches of gravel track or monotonous moorland where the scenery flatlines for a while. Going section by section means you get to cherry-pick the highlights, return home each evening, and leave the blister-management drama to the thru-hikers.

    Hiker walking across Kinder Scout plateau on one of the most iconic Pennine Way day walks sections
    Hiker walking across Kinder Scout plateau on one of the most iconic Pennine Way day walks sections

    Kinder Scout and the Bleaklow: Where the Pennine Way Begins

    The opening section from Edale to Crowden, roughly 25 miles in total, is split nicely into two solid days if you’re walking out and back or using local transport. The climb up onto Kinder Scout via Grindsbrook Clough is properly atmospheric, especially on a grey morning when cloud sits low over the plateau. The gritstone edges, the peat hags, the strange rock formations at Kinder Downfall; it feels like a different country up there compared to the valley below.

    From Kinder, the route drops and climbs again onto Bleaklow, which is rawer and more exposed. This is one of the most iconic Pennine Way day walks sections, and it’s not easy. Navigation on the plateau can be genuinely tricky in poor visibility. But on a clear day, the views across to Stanage Edge and beyond are worth every step of the boggy approach. The Snake Pass road gives you a logical cut-off point for a day section from Edale.

    Malham to Horton-in-Ribblesdale: Limestone Country

    If you only do one stretch of the Pennine Way as a day walk, make it this one. The section from Malham village, through Malham Cove, across the limestone pavement, up to Malham Tarn, and then onward towards Pen-y-ghent is genuinely world-class walking. The cove itself is a 70-metre limestone cliff formed by glacial meltwater. Stand at the top of the pavement and look back down the valley and it’s hard to believe you’re still in England.

    Pen-y-ghent, one of the Yorkshire Three Peaks, sits at 694 metres and has a pleasingly abrupt summit. The final scramble to the top along the gritstone and limestone ridge gives the day a proper climax. Horton-in-Ribblesdale has a pub, a car park, and a railway station on the Settle-Carlisle line, making it an excellent finishing point. Public transport back to Malham is awkward, so check the Dales Bus timetable or arrange a pick-up in advance.

    Limestone pavement above Malham Cove on the Pennine Way day walks sections through the Yorkshire Dales
    Limestone pavement above Malham Cove on the Pennine Way day walks sections through the Yorkshire Dales

    High Cup Nick and the Approach to Cross Fell

    This is one of those places that stops you mid-stride. High Cup Nick, reached from Dufton in Cumbria, is a U-shaped glacial valley with sheer dolerite columns dropping away on both sides. It appears suddenly as you crest the moor, and the drop into the valley below is vertiginous. There’s nothing quite like it on the route.

    From Dufton you can extend the walk northwards to Cross Fell, the highest point on the entire Pennine Way at 893 metres. This is serious upland walking. The summit plateau is vast and featureless, the weather changes quickly, and the Helm Wind that funnels off these fells is notorious locally. But standing on the highest point in the Pennines on a fine day, with views stretching from the Lake District to the North York Moors, feels like a genuine reward. The return to Dufton makes for a long day, around 20 miles with significant ascent, so start early and take warm layers regardless of the morning forecast.

    Hadrian’s Wall Country: Vindolanda to Greenhead

    The Pennine Way briefly runs alongside Hadrian’s Wall in Northumberland, and this section is extraordinary for entirely different reasons. You’re walking through 2,000 years of history, along the whinstone ridge where the Romans built their frontier. The crags of Cawfield and Walltown give the landscape a muscular, dramatic quality quite unlike the peat moors further south.

    The English Heritage managed sites along Hadrian’s Wall include Vindolanda and Housesteads, both worth factoring into a day walk in this section. The walking itself is undulating and relatively short in mileage, but absorbing in a way that few stretches of the route manage. It’s also one of the more accessible Pennine Way day walks sections for families or those who prefer history with their hiking.

    The Northumberland Moorland: Bellingham to the Border

    The final miles of the Pennine Way through Northumberland feel genuinely remote. This is England’s emptiest county, and the moorland between Bellingham and Kirk Yetholm has a bleakness that feels earned. The Cheviot Hills roll in wave after wave, and the path over The Cheviot itself at 815 metres is often boggy even in summer.

    The last day into Kirk Yetholm via the Schil is one of the best of the lot. There’s a quiet satisfaction to walking the final ridge knowing the border is close, even if you haven’t done the 267 miles before it. As a standalone day section from Byrness into the Cheviots, it gives you a taste of proper border country without requiring a fortnight of preparation.

    Practical Notes for Walking Individual Sections

    Public transport is patchy but workable along most of the route. The Settle-Carlisle railway is invaluable for the Yorkshire Dales sections, and the Northern Rail network serves Edale well. For Northumberland, you’ll need to plan more carefully; Hadrian’s Wall Country Bus (AD122) runs seasonally and covers the central section well. Always check current timetables before you go.

    The official National Trails website has GPX files and detailed maps for every section of the route. Download the relevant stretch before you head out rather than relying on mobile signal on the moors. Navigation on the Pennine Way varies enormously; some sections are heavily waymarked, others require proper compass and map work, particularly on the high plateau sections around Kinder and Cross Fell.

    Parking at trailheads is limited in many places. Malham and Edale get extremely busy on summer weekends. Arriving early or using the train genuinely improves the experience. And carry more water than you think you need. The moorland sections have very few reliable sources, and the ones that look clean on a map can be stagnant by August.

    The Pennine Way doesn’t have to be a full-commitment expedition. Walk the sections that draw you, come back for more when they do, and let the route reveal itself at your own pace. That’s not the lesser version of the experience. It might actually be the better one.

    Frequently Asked Questions

    What are the easiest Pennine Way day walks sections for beginners?

    The Malham Cove and limestone pavement section from Malham village is one of the most accessible, with well-marked paths and manageable terrain. The Hadrian’s Wall stretch near Housesteads is also relatively short and very well waymarked, making it a good starting point for those new to upland walking.

    Can you walk individual sections of the Pennine Way as out-and-back day hikes?

    Yes, many sections work well as out-and-back walks, particularly those starting from car parks or villages with good facilities. However, using public transport or arranging a car shuttle between two trailheads gives you more flexibility and avoids retracing your steps on long sections.

    How long does a typical Pennine Way day walk section take?

    Most standalone sections cover between 10 and 20 miles and take anywhere from 4 to 8 hours depending on pace, fitness, and conditions underfoot. Sections like Kinder Scout to Snake Pass or Dufton to Cross Fell are full day outings; Malham Cove to Horton-in-Ribblesdale can be done comfortably in around 6 hours.

    Do I need a permit or permission to walk sections of the Pennine Way?

    No permit is required. The Pennine Way is a designated National Trail with public right of way along its entire length, so you are free to walk any section without permission. It passes through national parks including the Peak District, Yorkshire Dales, and Northumberland, all of which are publicly accessible.

    What is the toughest day section on the Pennine Way?

    The crossing from Edale to Crowden via Kinder Scout and Bleaklow is widely regarded as one of the hardest, combining significant ascent with notoriously difficult navigation across peat moorland. The Cross Fell section from Dufton is also demanding due to its length, elevation, and exposure to rapid weather changes.

  • The Right of Way Rules Every UK Walker Should Actually Understand

    The Right of Way Rules Every UK Walker Should Actually Understand

    There’s a particular frustration known to anyone who walks regularly in the British countryside: the locked gate where there shouldn’t be one, the footpath sign buried under brambles, or the hand-painted “PRIVATE, KEEP OUT” board blocking a route that has existed for centuries. Knowing your public right of way rules as a UK walker doesn’t just help you argue your corner. It helps you walk with confidence, plan better routes, and understand what the countryside is actually open to you.

    The rules differ depending on where you are in the country, and the terminology matters more than most people realise. Let’s break it down properly.

    Walker following a public right of way footpath through English farmland with a waymarker post
    Walker following a public right of way footpath through English farmland with a waymarker post

    What Is a Public Right of Way?

    A public right of way is a route over which the public has a legal right to pass. It exists independently of who owns the land beneath it. The landowner retains ownership, but cannot lawfully prevent the public from using a properly recorded right of way. These routes are recorded on something called the Definitive Map, maintained by local highway authorities in England and Wales. If a path is on that map, it’s legal. Simple as that.

    In England and Wales, rights of way fall into four main categories. In Scotland, the situation is rather different, and we’ll come to that shortly.

    Footpaths, Bridleways, and Byways: What’s the Difference?

    Footpaths

    These are for walkers only. You have the right to walk on a footpath, but not to cycle, ride a horse, or drive a vehicle along one. Most of the paths you’ll follow across fields, through woodland, and over stiles in England and Wales will be footpaths. They’re the most common type by a considerable margin.

    Bridleways

    Bridleways permit walkers, horse riders, and cyclists (though cyclists must give way to walkers and horse riders). If you’re planning a route and the map shows a bridleway, it generally means a wider, more robust track than a footpath. They’re often more reliable underfoot in wet conditions, though not always.

    Byways Open to All Traffic (BOATs)

    These are the broadest category. BOATs can legally be used by walkers, cyclists, horse riders, and motorised vehicles. In practice, they’re often old lanes and green roads, and while they can be used by 4x4s and trail bikes, many are so narrow or rutted that only walkers and horses get much practical use from them. They’re relatively rare compared to footpaths and bridleways.

    Restricted Byways

    A more recent category, created in 2006. Restricted byways allow walkers, cyclists, horse riders, and horse-drawn vehicles, but not motorised traffic. Think of them as byways with the noisy stuff removed.

    Close-up of a weathered public right of way sign on a footpath in the UK countryside
    Close-up of a weathered public right of way sign on a footpath in the UK countryside

    How Scotland Handles Things Differently

    Scotland operates under a fundamentally different system. The Land Reform (Scotland) Act 2003 gives everyone the right to access most land and inland water for recreational purposes, as long as that access is exercised responsibly. This is known as the Scottish Outdoor Access Code, and it’s a more permissive framework than England and Wales.

    In practical terms, this means you can walk across open hillside, farmland, and forest in Scotland without needing a defined footpath. The responsibility falls on you to behave considerately: keeping dogs under control, avoiding damage to crops, not camping near buildings without permission. The code is published by NatureScot and is well worth reading if you’re heading north of the border for any serious walking.

    Scotland does have some traditional rights of way too, but the access rights created by the 2003 Act largely supersede them for most walkers.

    What Landowners Can and Cannot Do

    This is where things get heated. Landowners in England and Wales cannot plough up a footpath without reinstating it within 14 days (or 24 hours if it’s a field-edge path). They cannot erect a locked gate across a footpath unless a local authority has approved a temporary closure. They cannot allow crops to make a path effectively impassable. And they absolutely cannot legally threaten walkers using a recorded right of way.

    What they can do is request you stay on the defined path rather than wandering across their fields. A public right of way is exactly that: a defined corridor, not a licence to roam freely across someone’s private land. Sticking to the path is both the legal requirement and the decent thing to do.

    Landowners can apply to divert or extinguish paths through the local council, but this is a formal legal process. An informal sign or a padlocked gate doesn’t make a path disappear from the Definitive Map.

    How to Challenge a Blocked Path

    If you find a public right of way that’s been obstructed, your first step is to check whether the path is genuinely recorded. The most reliable way is to use the official OS map or check your local council’s online mapping. The gov.uk guidance on public rights of way is also clear on what landowners are responsible for maintaining.

    If the path is on the map and it’s blocked, you can report it to your local highway authority, which is usually the county council. They have a legal duty to assert and protect the rights of the public to use rights of way. Reports can be made online through most council websites, and the more detail you can provide (grid reference, photographs, date of obstruction) the more likely you are to see action.

    Ramblers, the UK’s largest walking charity, also runs a tool called Don’t Lose Your Way and campaigns actively to keep paths open and recorded. If you’re serious about rights of way, they’re worth knowing about.

    Practical Tips for Walkers Navigating Rights of Way

    Understanding public right of way rules as a UK walker is one thing. Using that knowledge effectively on the ground is another. A few things I’ve found genuinely useful over the years:

    • Download your route offline before you go. OS Maps and similar apps let you see the Definitive Map overlaid on the terrain, which makes it much easier to spot where a path should be even when signage has gone missing.
    • If a waymarker post is there but the arrow has weathered off, look for the next one rather than guessing. Rights of way tend to follow field edges and obvious natural lines.
    • When in doubt about whether a path is on the map, you’re within your rights to turn back rather than trespass. Trespass in England and Wales is a civil matter (not a criminal one, unless you cause damage), but it’s still worth avoiding the aggravation.
    • Keep a record if you find a blocked or obstructed path. A photo with a timestamp and grid reference takes 30 seconds and makes your council report far more effective.

    The countryside is ours to enjoy, but it’s also shared with the people who work it and live in it. Knowing your rights and exercising them with common sense tends to go a long way.

    Why This Matters Beyond the Walk

    Rights of way are part of the fabric of rural Britain. Many of these paths are ancient, following routes that predate the enclosure of land by centuries. Some have been walked so long that they’ve worn themselves into the landscape. Losing them, whether through neglect, obstruction, or failure to register them, means losing access to the countryside in a very real and permanent way. That matters to every walker, hill runner, horse rider, and cyclist who relies on that access for their physical and mental wellbeing.

    Knowing the rules isn’t just useful when something goes wrong. It’s part of taking the outdoors seriously.

    Frequently Asked Questions

    What is the difference between a footpath and a bridleway in the UK?

    A footpath is reserved for walkers only, whereas a bridleway can also be used by horse riders and cyclists. Cyclists on bridleways must give way to walkers and horse riders. Both are recorded on the Definitive Map maintained by local highway authorities in England and Wales.

    Can a landowner block a public right of way in England?

    No. A landowner cannot lawfully obstruct a recorded public right of way, whether with a locked gate, overgrown vegetation, or ploughed-up ground without reinstatement. Obstructions can be reported to the local highway authority, usually the county council, which has a legal duty to keep rights of way accessible.

    Do public right of way rules apply the same way in Scotland?

    No, Scotland is different. The Land Reform (Scotland) Act 2003 gives the public a general right to access most land for recreational purposes under the Scottish Outdoor Access Code. You don’t need a defined footpath in most cases, but you must behave responsibly under the code.

    What should I do if a footpath is blocked or obstructed on my walk?

    First, confirm the path is recorded on the Definitive Map using OS Maps or your local council’s online mapping. Then report the obstruction to your local highway authority with as much detail as possible: date, grid reference, and photographs. You can also report via the Ramblers’ campaigning tools.

    Is trespassing a criminal offence in England and Wales?

    In most circumstances, trespass in England and Wales is a civil matter, not a criminal one. However, it can become criminal if you cause damage, refuse to leave when asked, or trespass on railway land or certain protected sites. It’s always better to stay on recorded rights of way to avoid any dispute.