Category: Mother Nature

  • The Ultimate Beginner’s Guide to Munro Bagging in Scotland

    The Ultimate Beginner’s Guide to Munro Bagging in Scotland

    There is something quietly life-changing about standing on a Scottish summit for the first time. The wind, the view, the sense that you have earned every single metre of elevation. Munro bagging has drawn walkers to Scotland’s hills for well over a century, and every year thousands of people add their first tick to the official list. If you have been wondering where to start, this guide covers everything you need before you pull on your boots.

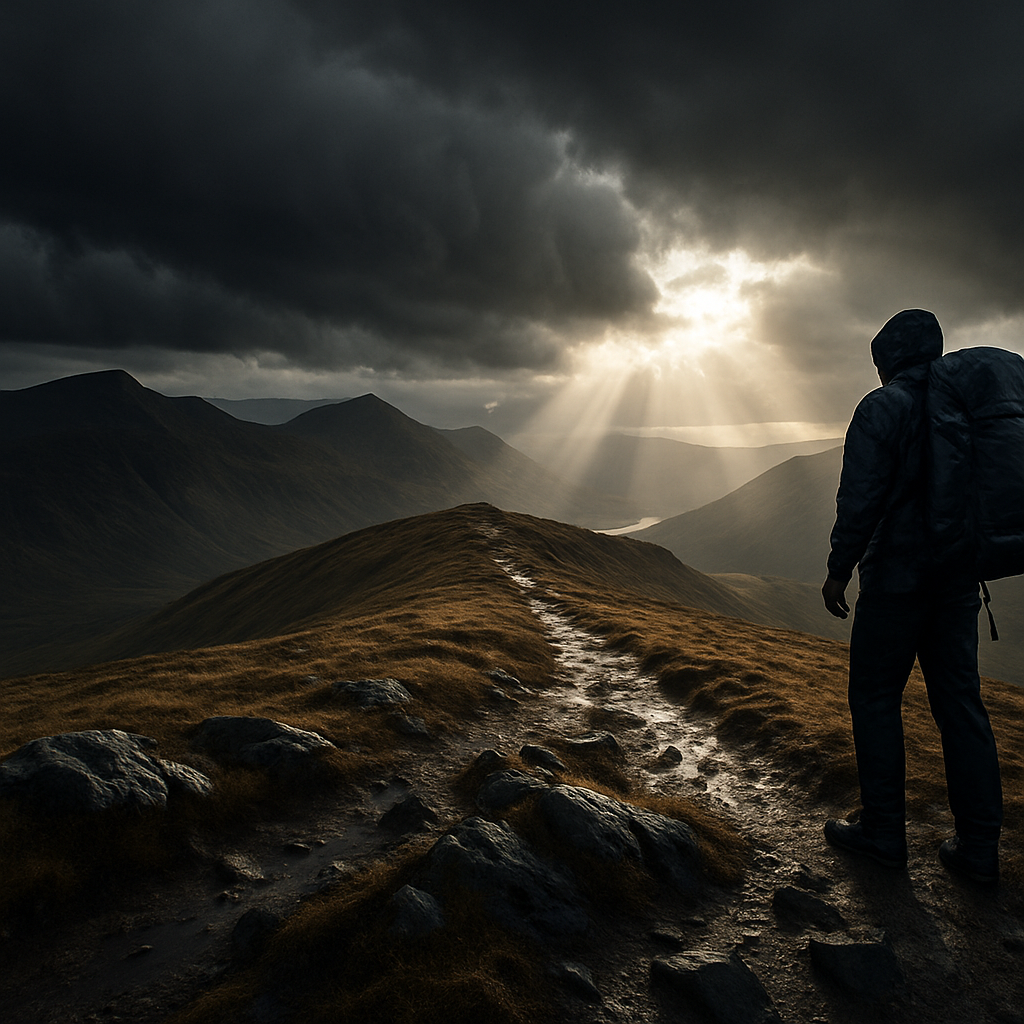
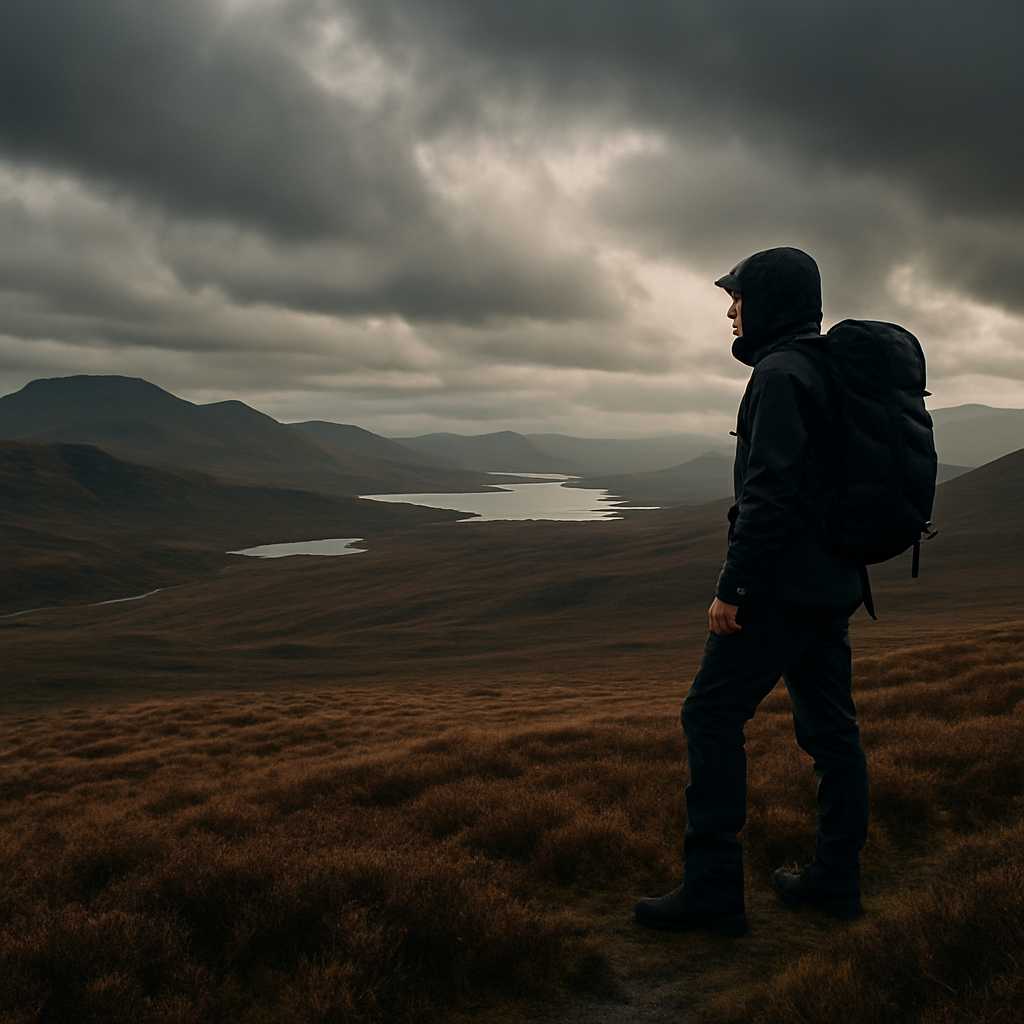
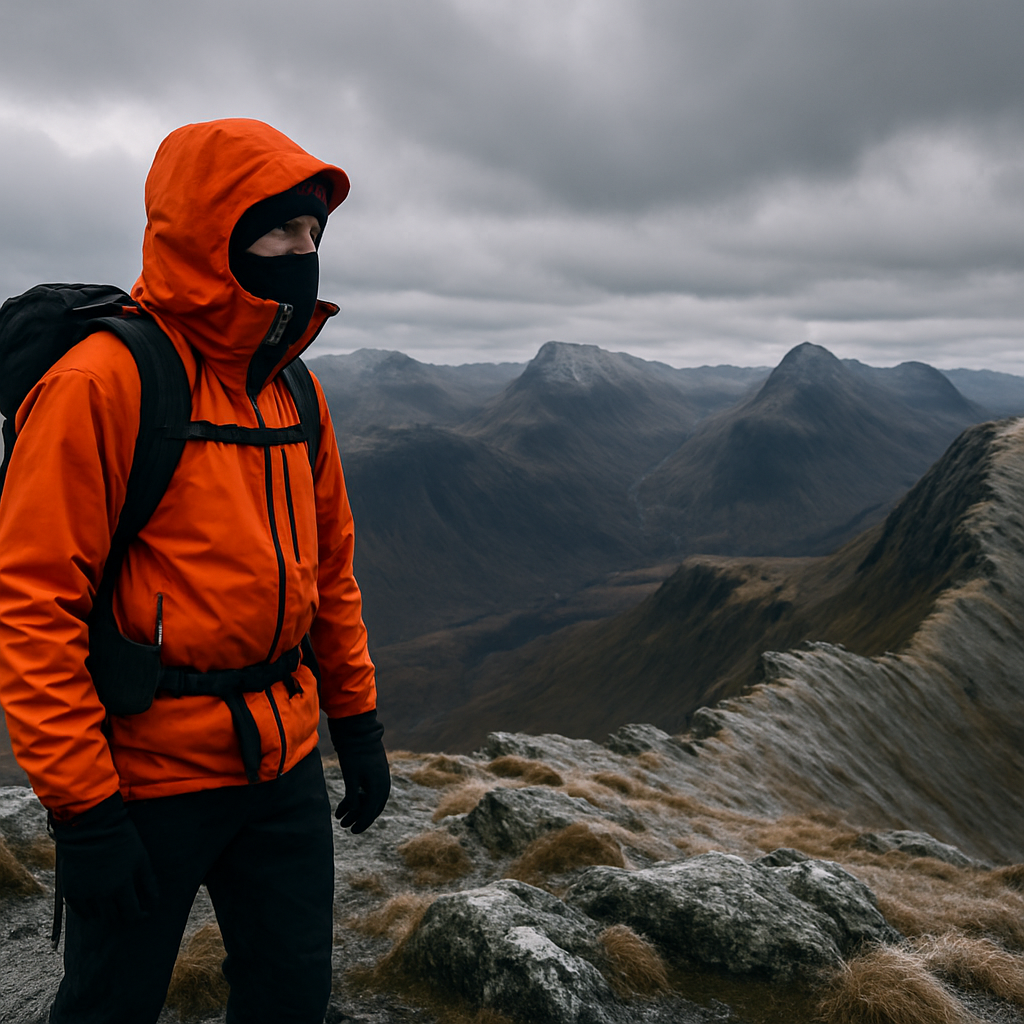
    Hiker standing on a Scottish mountain summit during Munro bagging, dramatic Highland landscape behind
    Hiker standing on a Scottish mountain summit during Munro bagging, dramatic Highland landscape behind

    What Actually Qualifies as a Munro?

    A Munro is any Scottish mountain with a summit height of 914 metres (3,000 feet) or above. The list was first compiled by Sir Hugh Munro in 1891 and published by the Scottish Mountaineering Club, which still maintains the official record today. The current count sits at 282 Munros, though the number has shifted over the years as surveying technology improved and the committee reviewed certain summits.

    It is worth knowing the distinction between a Munro and a Munro Top. A Top is a subsidiary summit over 914 metres that is connected to a higher Munro but does not have enough topographic separation to be classed as a mountain in its own right. Many people complete just the 282 Munros. Some go further and bag the Tops as well. For beginners, focus on the main list first.

    Why Munro Bagging Matters: The Culture Behind the Challenge

    Munro bagging is not just a personal fitness goal. It is a community. The Scottish Mountaineering Club keeps an official register of Compleaters (those who have summited all 282), and being added to that list carries genuine weight among hillwalkers. Around 7,500 people have completed the full round since records began, and each one remembers their last summit with striking clarity.

    Beyond the personal achievement, Munro bagging pulls you into Scotland’s wild landscape repeatedly, across every season. You learn how a hill behaves in January fog versus August sunshine. You learn your own limits. That gradual accumulation of mountain experience is part of what makes the pursuit so rewarding.

    The Best Munros for Beginners: Where to Start

    Choosing your first Munro well makes a real difference to your confidence. These are four excellent starting points, each offering a manageable route without technical scrambling.

    Ben Lomond, Loch Lomondside

    At 974 metres, Ben Lomond is the most southerly Munro and one of the most accessible from central Scotland. The tourist path from Rowardennan is well-maintained and clearly signed throughout. Return distance is roughly 11 kilometres with around 870 metres of ascent. Expect a full day out, but nothing that requires specialist kit.

    Schiehallion, Perthshire

    Schiehallion’s distinctive conical shape makes it immediately recognisable, and the eastern ridge route from Braes of Foss car park is straightforward in decent weather. At 1,083 metres, the summit offers panoramic views across Rannoch Moor. The path can be boggy in places, so waterproof boots are non-negotiable.

    The Cobbler (Ben Arthur), Arrochar Alps

    Technically The Cobbler does not qualify as a Munro, sitting at 884 metres, but it is frequently recommended as a training hill before your first proper summit. It builds confidence, teaches route-reading, and the scramble to the true summit is a brilliant introduction to exposed terrain.

    Cairn Gorm, Cairngorms National Park

    The funicular railway at CairnGorm Mountain gives less experienced walkers a head start, though purists will prefer to ascend on foot from Coire Cas. At 1,245 metres it is one of Scotland’s highest peaks, but the plateau approach from the ski centre is relatively straightforward in summer conditions.

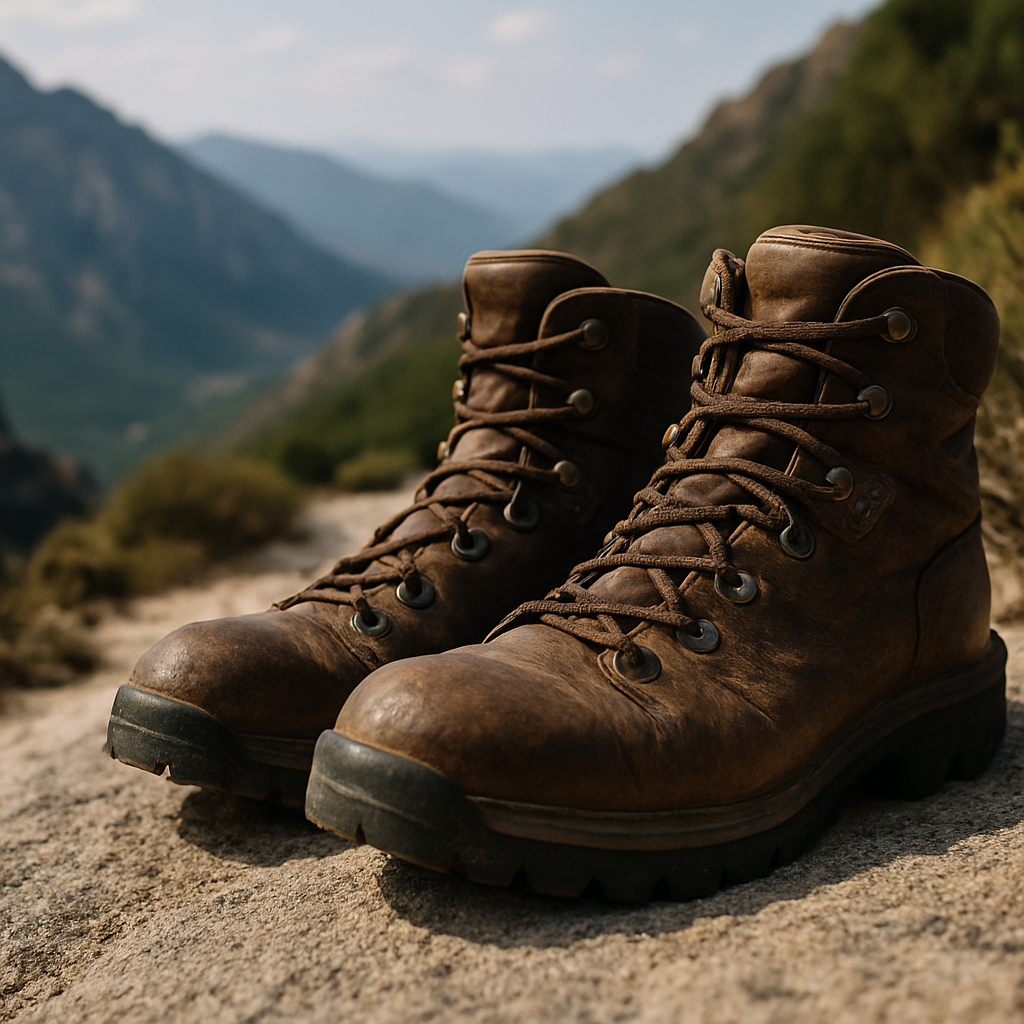
    Waterproof hiking boot on wet Scottish moorland during a Munro bagging walk
    Waterproof hiking boot on wet Scottish moorland during a Munro bagging walk

    Planning Your First Munro: Logistics That Matter

    Good planning is the difference between a brilliant day out and a very cold, wet, miserable one. Here is what to sort before you go.

    Maps and Navigation

    Download Ordnance Survey maps for your route via the OS Maps app, and carry a physical 1:25,000 paper backup. Scotland’s mountain weather changes fast. Do not rely solely on a mobile signal that may not exist above 600 metres.

    Weather

    Check the Mountain Weather Information Service (MWIS) forecast specific to your range, not just the general Met Office outlook for the nearest town. Summit temperatures can sit 10°C or more below valley readings even in summer.

    What to Carry

    The basics: waterproof jacket and trousers, warm mid-layer, hat and gloves (even in July), food and at least 1.5 litres of water, first aid kit, head torch, whistle, and a fully charged mobile. A good pair of walking poles takes real pressure off the knees on descent, particularly on steep ground.

    Getting There

    Many Munro starting points are remote. Public transport options exist for some hills, but most walkers drive. If you are planning extended trips across the Highlands, a reliable 4WD vehicle helps enormously on single-track roads and rough car park surfaces. Owners of capable off-roaders often source quality components for Toyota 4x4s to keep their vehicles properly maintained for exactly this kind of terrain.

    Recording Your Progress: The Official Munro List

    Keeping track of completed Munros is part of the fun. Many walkers use a printed copy of the full list with dates and notes scribbled next to each summit. Others use dedicated apps like Walkhighlands or Munro Society trackers, which let you log each ascent with photos and notes.

    When you eventually complete all 282, you can submit your Compleation to the Scottish Mountaineering Club for inclusion in the official register. You will need details of your final summit, the date, and a couple of supporting notes. The SMC publishes updated Compleater lists in their journal and online.

    Respecting Scotland’s Mountains and the Environment

    Scotland’s Land Reform (Scotland) Act 2003 gives walkers the right to access most land responsibly, under the Scottish Outdoor Access Code. With that freedom comes responsibility. Stick to the path where it exists to reduce erosion. Pack out everything you bring in. If you are wild camping near summits, choose a spot at least 30 metres from any water source and leave no trace of your visit. The mountains belong to everyone who comes after you.

    Setting Realistic Expectations for Your Munro Bagging Journey

    The 282 Munros span the entirety of the Scottish Highlands and Islands, from Arran in the south to the remote Fisherfield range in the north-west. A committed hillwalker completing one or two weekends of Munro walking per month might finish the full list in seven to ten years. Some do it in a continuous round in a single season. Most people fall somewhere in the middle, fitting it around work, family, and the unpredictable British weather.

    The pace does not matter. What matters is that each summit feels earned. Start with accessible hills, build your fitness and navigation skills progressively, and let the list grow at its own rate. Scotland’s mountains are patient. They have been waiting for you long enough already.

    Frequently Asked Questions

    How many Munros are there in Scotland?

    There are currently 282 Munros on the official list maintained by the Scottish Mountaineering Club. The number has changed slightly over the years as survey technology improved and the committee revised certain summits.

    What is the easiest Munro for a complete beginner?

    Ben Lomond in Loch Lomondside is widely considered the most beginner-friendly Munro, with a well-maintained tourist path and straightforward navigation. Schiehallion in Perthshire is another excellent first choice with a clear ridge route.

    Do I need any special equipment to start Munro bagging?

    You do not need technical climbing gear for most Munros, but waterproof clothing, sturdy ankle-supporting boots, a map and compass, food, and sufficient water are essential. A head torch and first aid kit should always be in your pack.

    How do I record my completed Munros officially?

    Many walkers track progress privately using apps like Walkhighlands or a printed list. Once you have climbed all 282, you can submit your Compleation to the Scottish Mountaineering Club for inclusion in their official register.

    Is it safe to climb Munros alone as a beginner?

    Solo hillwalking carries greater risk, particularly in poor weather or on unfamiliar terrain. If you are new to the hills, it is strongly advisable to go with a more experienced companion or join a hillwalking club until you have built solid navigation and mountain skills.

  • Essential Navigation Skills Every Hiker Should Master Before Hitting Remote Trails

    Essential Navigation Skills Every Hiker Should Master Before Hitting Remote Trails

    There is a particular kind of confidence that comes from standing on a featureless moorland in poor visibility and knowing exactly where you are. No signal, no battery, no fuss. Just you, a map, a compass, and the ground beneath your boots. That confidence does not arrive by accident. It is built through practice, and it is the single most important thing separating a hiker who is comfortable in remote terrain from one who is not. These are the hiking navigation skills every person heading into the hills should own before they go anywhere truly wild.

    Hiker reading an OS map on open moorland, practising hiking navigation skills in remote UK terrain
    Hiker reading an OS map on open moorland, practising hiking navigation skills in remote UK terrain

    Why Map Reading Still Matters More Than Your Phone

    Mobile maps are brilliant as a backup. I use them myself. But relying on a phone as your primary navigation tool in remote country is a gamble you do not want to lose. Batteries drain faster in cold weather, screens become impossible to read in rain, and signal disappears the moment you need it most. The 1:25,000 Ordnance Survey Explorer maps remain the gold standard for UK hillwalking. Every contour, every crag, every footpath, every stream crossing is there in precise detail. Buy the paper version. Carry it in a map case clipped to your chest. Know how to use it before you leave the car park.

    Start by understanding the scale. On a 1:25,000 map, 4 cm equals 1 km on the ground. That is the map most walkers use in the hills. The 1:50,000 Landranger series covers larger areas but sacrifices detail. For Dartmoor, the Cairngorms, the Brecon Beacons, or anywhere with complex terrain, always go for the more detailed sheet. Ordnance Survey’s own guidance on navigating with a map is a solid starting point if you want to sharpen the basics further.

    Understanding Contour Lines: Reading the Shape of the Land

    Contour lines are the heartbeat of a topographic map. Once you can read them fluently, the map stops being a flat sheet of paper and becomes a three-dimensional model of the landscape you are about to walk through. On a 1:25,000 OS map, contour lines are drawn at 10-metre vertical intervals. The closer together the lines, the steeper the slope. Widely spaced lines mean gentle, easy ground.

    Learning to spot a ridge versus a valley on paper is one of the most useful hiking navigation skills you can develop. A ridge shows as contours curving away from the high ground (the V points downhill). A valley shows contours curving towards the high ground (the V points uphill). Cirques, cols, spurs and re-entrants all have their own signatures. Spend time matching map symbols to real terrain. Pick a familiar hill first. Study the map at home, then walk it and see how the ground matches what you expected.

    How to Use a Compass Properly

    A baseplate compass such as the Silva Expedition 4 or the Suunto A-10 is what you want. They are affordable, robust, and entirely reliable. Learn three fundamental techniques.

    Taking a Bearing from the Map

    Place the edge of your compass along the line between your current position and your destination. Rotate the bezel until the orienting lines align with the north-south grid lines on the map (red to north). Add the magnetic declination for the UK, which in most of mainland Britain is currently around 1-2 degrees west. Then hold the compass level, rotate your body until the red needle sits in the orienting arrow, and walk in the direction of travel arrow. That is it. Simple, reliable, and it works in zero visibility.

    Taking a Bearing from the Ground

    Point the compass direction-of-travel arrow at a distant landmark. Rotate the bezel to box the needle. Read the bearing. Transfer it to your map to confirm your position or check your heading. This is called a resection when you use two or more bearings to fix your location, and it is enormously useful on open hillsides where features are sparse.

    Walking on a Bearing

    In mist or darkness, pick an intermediate object in the direction of travel, walk to it, then repeat. Do not try to stare at the compass the entire way. You will veer off course. Pick a tussock, a fence post, a boulder. Reach it. Re-check. Carry on.

    Compass on an OS map showing contour lines, a core hiking navigation skill for remote trails
    Compass on an OS map showing contour lines, a core hiking navigation skill for remote trails

    Pacing and Timing: Knowing How Far You Have Walked

    Two simple tools help you measure distance on the ground without a GPS. The first is pacing. Count your double paces (every time your right foot hits the ground) over a measured 100 metres on flat terrain. Most people take around 62-65 double paces per 100 metres. Adjust for uphill, downhill, and boggy ground. Pace beads (available from most outdoor shops for a couple of pounds) help you track distance over longer legs.

    The second is Naismith’s Rule. Allow one hour for every 5 km of horizontal distance, plus one additional minute for every 10 metres of ascent. It is a rough formula but a surprisingly accurate one on most British terrain. On Dartmoor in good conditions you might move faster. In deep heather on the Cairngorms plateau, you might move slower. Adjust accordingly, and always build buffer time into remote routes.

    Route Finding in Featureless Terrain

    High plateaux, fog-bound moorland, and snow-covered hillsides strip away the visual cues most walkers unconsciously rely on. This is where your hiking navigation skills are truly tested. The key is to break the route into short, measurable legs between clearly identifiable features. Attack points (a distinctive boulder, a stream junction, the edge of a plantation) let you confirm position before committing to the next leg.

    Catching features are equally important. These are lines or landmarks that tell you when you have gone too far. A wall running east-west, a stream, a forest boundary. If you hit your catching feature without reaching your target, you know to stop and reassess. Plan these into every section of a remote route, not just the tricky bits.

    When to Use Digital Backup Methods

    A GPS device or a phone running OS Maps with an offline download is genuinely useful as a secondary tool. The key word is secondary. I keep my phone in an inside chest pocket (warmer, battery lasts longer), switched on flight mode to conserve charge, and drop a waypoint at the start of every walk. The Harvey Maps app and OS Maps both allow pre-downloaded maps that work offline. That is worth doing before any remote outing.

    What you should avoid is treating a digital fix as a substitute for knowing where you are. A GPS tells you a grid reference. Understanding what that grid reference means on the ground, which slope you are on, which valley is below you, which way the safe descent lies, requires you to read the map. The two work together, not in isolation.

    Practical Ways to Build Confidence

    The fastest way to improve is to navigate somewhere familiar without following a path. Take a map to your local common, park, or low-level forest, turn off your phone, and navigate purely by map and compass for an hour. It feels strange at first. That strangeness fades quickly with repetition. Mountain training courses run by the Mountain Training Association give structured, assessed learning if you want to progress to winter navigation or leadership.

    Good kit matters too, but it does not need to be expensive. A decent compass, an OS map, a pencil for marking your route, and a waterproof map case are the essentials. Everything else is bonus. Interestingly, the impulse to prepare your kit properly extends beyond the hills. Whether you are prepping a rucksack for a remote route or sorting out a building project that requires specialist work like asbestos floor removal before renovating an old property you use as a base, doing things properly and safely from the outset always saves trouble later.

    The Bigger Picture: Why These Skills Protect Wild Places

    Hikers who navigate well tend to stick to planned routes, avoid causing erosion through shortcuts taken in confusion, and respond calmly to unexpected conditions. They also need rescuing less often. Mountain Rescue teams in England and Wales carry out thousands of call-outs each year, and a meaningful proportion involve walkers who were poorly equipped and unprepared for the terrain. Building strong hiking navigation skills is not just about personal safety. It is about respecting the mountain, the environment, and the volunteers who give up their time when things go wrong.

    Get out on the map. Practise in low-stakes places. Then take those skills somewhere that genuinely demands them. The hills will reward you for it.

    Frequently Asked Questions

    What is the best compass for hiking in the UK?

    A baseplate compass such as the Silva Expedition 4 or Suunto A-10 is ideal for most UK hillwalking. They are lightweight, accurate, and cost between £15 and £35 at most outdoor retailers. Avoid purely digital compasses as a primary tool in remote terrain.

    Which OS map scale is best for hiking in remote UK terrain?

    The 1:25,000 Ordnance Survey Explorer series is the preferred choice for remote hillwalking, as it shows 10-metre contour intervals and fine detail such as field boundaries, crags, and bridleways. The 1:50,000 Landranger maps cover larger areas but lack the same level of ground detail.

    How do I read contour lines on a walking map?

    Contour lines join points of equal height, drawn at 10-metre intervals on 1:25,000 OS maps. Closely spaced lines indicate steep ground; widely spaced lines indicate gentle slopes. V-shapes pointing uphill indicate valleys; V-shapes pointing downhill indicate ridges or spurs.

    Can I navigate in the hills using only my phone?

    A phone running an offline map app such as OS Maps or Harvey Maps is a useful backup but should never be your only navigation tool in remote terrain. Cold weather drains batteries quickly, screens can be difficult to read in rain, and there is no substitute for knowing how to read a paper map and compass.

    How can I improve my hiking navigation skills quickly?

    The most effective practice is to navigate on familiar low-level ground without following a path, using only a map and compass. Start on a local common or forest. Mountain Training Association courses also offer structured progression into more advanced navigation, including night and winter techniques.

  • How to Train for a Long Distance Hike: A 12-Week Programme

    How to Train for a Long Distance Hike: A 12-Week Programme

    So you’ve booked it. Maybe it’s the Pennine Way, the West Highland Way, or a week crossing Dartmoor with everything you need on your back. The excitement is real. But somewhere between clicking confirm and lacing up your boots on day one, you’ll need to do the work. A solid long distance hike training plan is the difference between arriving at camp feeling wrecked on day two, and striding into the final stretch with something left in the tank.

    This 12-week programme is built around real trail demands. Not a gym transformation. Not a weight loss challenge. Just getting your body and mind ready to cover big miles, day after day, with a pack on your back and whatever the British weather decides to throw at you.

    Hiker with loaded pack following a long distance hike training plan on a misty moorland trail
    Hiker with loaded pack following a long distance hike training plan on a misty moorland trail

    Why a Structured Training Plan Actually Matters

    People underestimate multi-day hiking all the time. They’ve done a few weekend walks and figure their legs are ready. Then the third consecutive morning hits, the quads are burning, the pack feels twice as heavy, and everything below the knee is blisters. The issue isn’t fitness exactly. It’s cumulative load. Your body needs to learn how to recover overnight and go again the next morning. That only happens with progressive, specific preparation.

    The NHS physical activity guidelines recommend 150 minutes of moderate aerobic activity per week as a baseline for adults. This plan builds well beyond that, but it does so gradually. Injury prevention is baked in from the start.

    The Three Pillars of Long Distance Hike Training

    Before getting into the weekly breakdown, it’s worth understanding what you’re actually training. There are three areas that matter most.

    1. Cardiovascular Conditioning

    Sustained aerobic output is the engine of any multi-day route. You don’t need to be a runner, but you do need to be able to walk uphill at pace for hours without your heart rate going into the red. Long walks, cycling, rowing, and swimming all contribute. Consistency beats intensity here.

    2. Muscular Strength and Endurance

    Descents hammer your quads. River crossings and rocky scrambles demand ankle stability. Carrying a pack shifts the load onto your lower back, shoulders and core. Strength work, particularly single-leg exercises, hip stability drills, and posterior chain strengthening, pays dividends out on trail.

    3. Loaded Pack Walking (the One People Skip)

    This is the specific adaptation most people neglect. Walking with weight is biomechanically different from walking light. Your gait changes, your joints absorb more, your feet work harder. You need to train with your pack. Full stop. This is also where your boot fit gets tested properly, before day one on the trail.

    The 12-Week Programme: Week by Week

    Weeks 1 to 3: Build the Base

    Start at a volume your body can handle comfortably. Three to four sessions per week, each between 45 and 75 minutes. Mix flat walks with easy cycling or swimming. Add two short strength sessions focusing on bodyweight squats, lunges, glute bridges, and calf raises. Pack walks at this stage should be short, around 5 to 8 miles with just 5 to 8 kg. The goal is getting your feet and joints used to load, not punishing yourself.

    Weeks 4 to 6: Add Elevation and Load

    Now you introduce hill work. Seek out local trails with a decent climb; if you’re inland and flat, use a treadmill on incline or find a multi-storey car park staircase. Yes, really. Strength sessions progress to single-leg work: Bulgarian split squats, step-ups with weight, and Romanian deadlifts. Pack weight increases to 10 to 12 kg. One session per fortnight should be a longer pack walk of 10 to 14 miles.

    Muddy hiking boots on rocky ascent during long distance hike training in UK uplands
    Muddy hiking boots on rocky ascent during long distance hike training in UK uplands

    Weeks 7 to 9: Simulate Trail Conditions

    This is where the plan gets specific. One of your weekly walks should now be on rough or uneven terrain, proper footpaths, moorland, or riverside trails. If you’re tackling a named route, try to replicate the surface type. Back-to-back days become a feature now: a 12-mile walk on Saturday followed by a 10-mile recovery walk on Sunday. This teaches your body to go again when tired, which is exactly what multi-day hiking demands. Strength sessions shift towards maintenance: two sessions per week, lower volume, moderate load.

    Weeks 10 to 11: Peak Load and Back-to-Back Long Days

    You’re at peak training volume. One weekend in this block should include a two or three day mini-trip. Camp out or book a bunkhouse, carry a full pack, cover 15 to 20 miles each day. This is the real test. You’ll learn what chafes, what needs adjusting, and where your nutrition strategy needs work. Everything gets shaken out here, before it matters. This is also a good moment to sort any kit you might still be missing. Even something as simple as decent trekking poles can be hand-crafted from seasoned ash by skilled craftspeople using the best woodworking machines, though most of us are happier picking up a pair of Black Diamond or Leki poles from a walking shop.

    Week 12: Taper and Prepare

    Drop volume by around 40%. Short easy walks, light movement, no heavy strength sessions. Your body is consolidating the adaptations from the past 11 weeks. Sleep well, eat properly, sort your kit, study your route. Don’t panic and try to cram in extra miles. The training is done. Trust it.

    Nutrition and Recovery on the Plan

    Training adaptation happens during rest, not during the session itself. That means sleep, protein intake, and active recovery all matter. Aim for 7 to 9 hours of sleep throughout the programme. On long walk days, eat enough. Bonking (running out of fuel mid-walk) on a training day is avoidable and counterproductive. Carry snacks. Eat real food when you get home.

    Hydration on training walks should mirror what you plan to do on trail. Get used to drinking from your reservoir or bottles at regular intervals rather than waiting until you’re thirsty.

    Mental Preparation Matters Too

    A long distance hike training plan isn’t just about the physical side. Multi-day routes have low moments, usually around day three or when the weather turns hostile and the path is a featureless bog for six miles. Learning to keep moving when you’re uncomfortable is a skill. The back-to-back training weekends in weeks 9 and 10 are partly about this. So is deliberately choosing rough weather for a training walk at least once. Knowing you’ve walked in horizontal rain and got to the other side of it builds genuine confidence.

    A Few Extra Bits Worth Knowing

    Feet deserve specific attention throughout the 12 weeks. Trim nails short, keep skin supple with a good foot balm, and address any hotspot blisters immediately in training rather than ignoring them. Your socks matter as much as your boots; Darn Tough and Bridgedale are both solid choices widely available in the UK.

    Finally, adapt the plan to your life. Miss a session? Move on. Had a long week at work? A 30-minute evening walk still counts. The programme is a framework, not a contract. The best long distance hike training plan is the one you actually stick to.

    Put in the weeks. Respect the process. Then get out there and walk.

    Frequently Asked Questions

    How many miles a week should I walk when training for a long distance hike?

    In the early weeks of a 12-week plan, aim for 20 to 30 miles per week across multiple sessions. By weeks 7 to 10, build toward 35 to 50 miles per week including your back-to-back long days. Increase distance gradually, no more than 10% per week, to avoid injury.

    How heavy should my training pack be before a multi-day hike?

    Start with 5 to 8 kg in the first month, then build toward your expected trail pack weight of 12 to 16 kg by weeks 8 to 10. Training with your actual loaded pack is important because it reveals fit issues with your rucksack and tests your boots under real conditions.

    Can I follow this training plan if I'm a complete beginner?

    Yes, but extend the timeline. If you’re starting from very low fitness or have not hiked regularly before, consider stretching the 12-week plan to 16 weeks by repeating the base-building phase for an extra month. The key is gradual progression rather than rushing the early stages.

    Do I need to join a gym to train for a long distance hike?

    No. The majority of useful training for hiking happens outdoors: walking, hill repeats, and loaded pack walks. A few bodyweight strength exercises like lunges, split squats and step-ups can be done at home. A gym is helpful but not essential.

    How long before a long distance hike should I stop training and taper?

    Begin your taper one week before your start date. Reduce mileage by around 40%, stick to easy short walks, and avoid any new or heavy strength sessions. Your body uses the taper week to consolidate fitness gains, so rest is genuinely productive at this stage.

  • The Best Wild Swimming Spots in the Lake District: A Hiker’s Guide

    The Best Wild Swimming Spots in the Lake District: A Hiker’s Guide

    There is something almost indescribably good about earning a swim. You pick your route, you climb, you sweat, your boots fill with that familiar damp, and then you round a corner and there it is: cold, clear water sitting in a valley like it has been waiting for you. Wild swimming in the Lake District has become genuinely popular over the last few years, and honestly, it deserves every bit of the attention. Few places in England give you this combination of dramatic fells, quiet tarns, and river pools that feel entirely off the beaten track, even when they are not.

    This guide is for hikers who want to fold a swim into their day. Not beach-bag tourists. People who have already got their boots on and want to know which routes give the best payoff in the water.

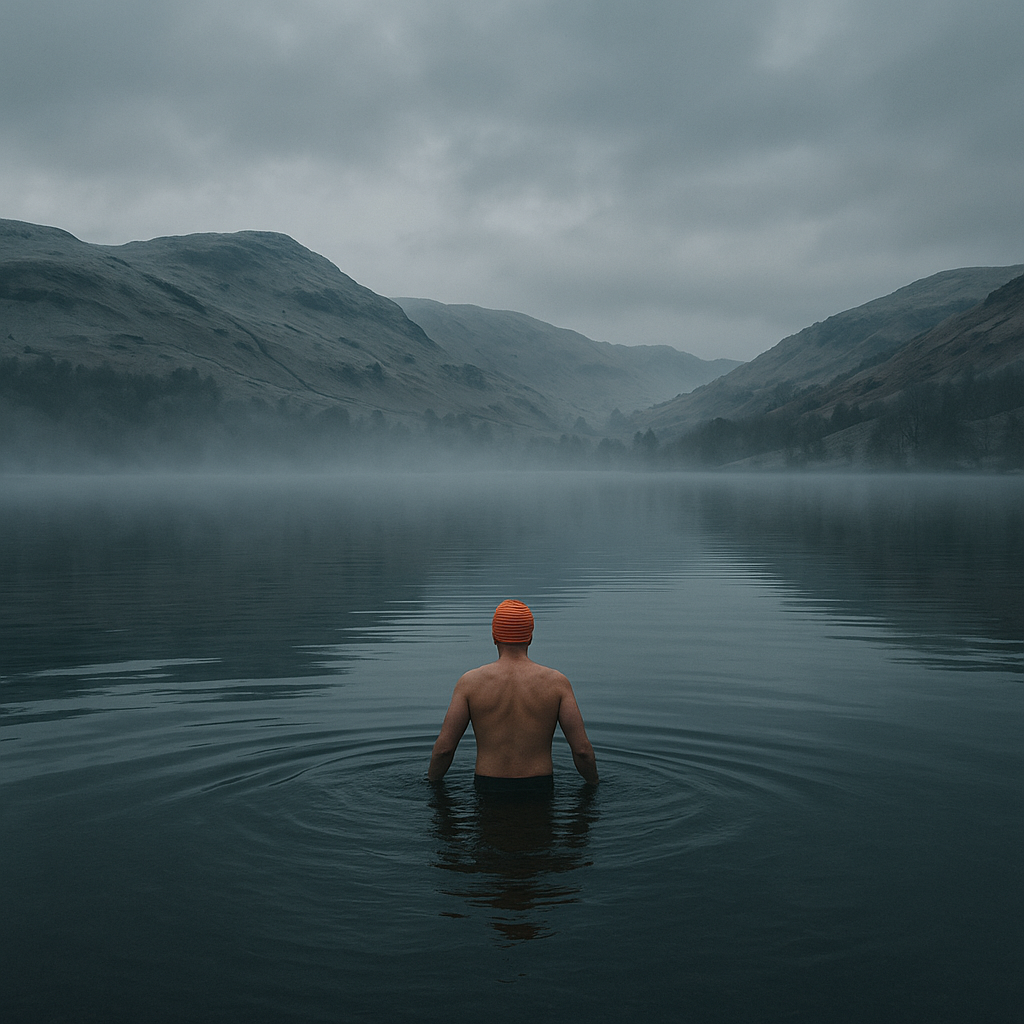
    Hiker at the edge of a mountain tarn during wild swimming Lake District adventure
    Hiker at the edge of a mountain tarn during wild swimming Lake District adventure

    Why the Lake District Works So Well for Wild Swimming

    The Lakeland geography does most of the hard work for you. The fells funnel water down into long valleys and high-altitude tarns, and the rock beneath your feet is largely slate and granite, which means the water stays genuinely clear. Unlike lowland rivers, you are not fighting agricultural runoff on most routes here. That said, the Environment Agency does monitor water quality across Cumbrian rivers and lakes, so it is always worth checking before you go if there has been heavy rainfall or any reported pollution events.

    The other thing the Lakes has going for it is scale. You can pair an ambitious summit with a high tarn swim, or you can keep it flat and gentle with a river dip after a valley walk. Both are valid. Both are brilliant.

    The Best Wild Swimming Lake District Spots Worth Hiking To

    Wastwater

    England’s deepest lake, and one of its most dramatic. The screes tumble directly into the water on the southern shore, and there is a particular spot near the head of the lake, beyond the campsite, where you can slip in off a flat shelf of rock with the Wasdale fells sitting right above you. The water is cold even in August. Pair this with the Wasdale Head circuit for a full day out.

    Angle Tarn, above Patterdale

    This one has to be earned. You are looking at around 400 metres of climbing from Patterdale up through Boredale Hause and then across to the tarn. But Angle Tarn is one of those places that stops you mid-stride. It sits in a natural bowl, surrounded by rough moorland, and when the weather is still the reflections are extraordinary. The tarn is shallow near the edges and drops away quickly, so wade in slowly. Best visited on a weekday in June or early September when the crowds thin out.

    Loughrigg Tarn

    The gentlest option on this list, and none the worse for it. Loughrigg Tarn sits just below Loughrigg Fell near Ambleside, and the circular fell walk above it is one of the best short routes in the Lakes. The tarn is open and accessible, with soft grassy banks. It is shallow enough to warm up a little in July and August, which is a genuine rarity in Cumbria. Good for those who are newer to cold water.

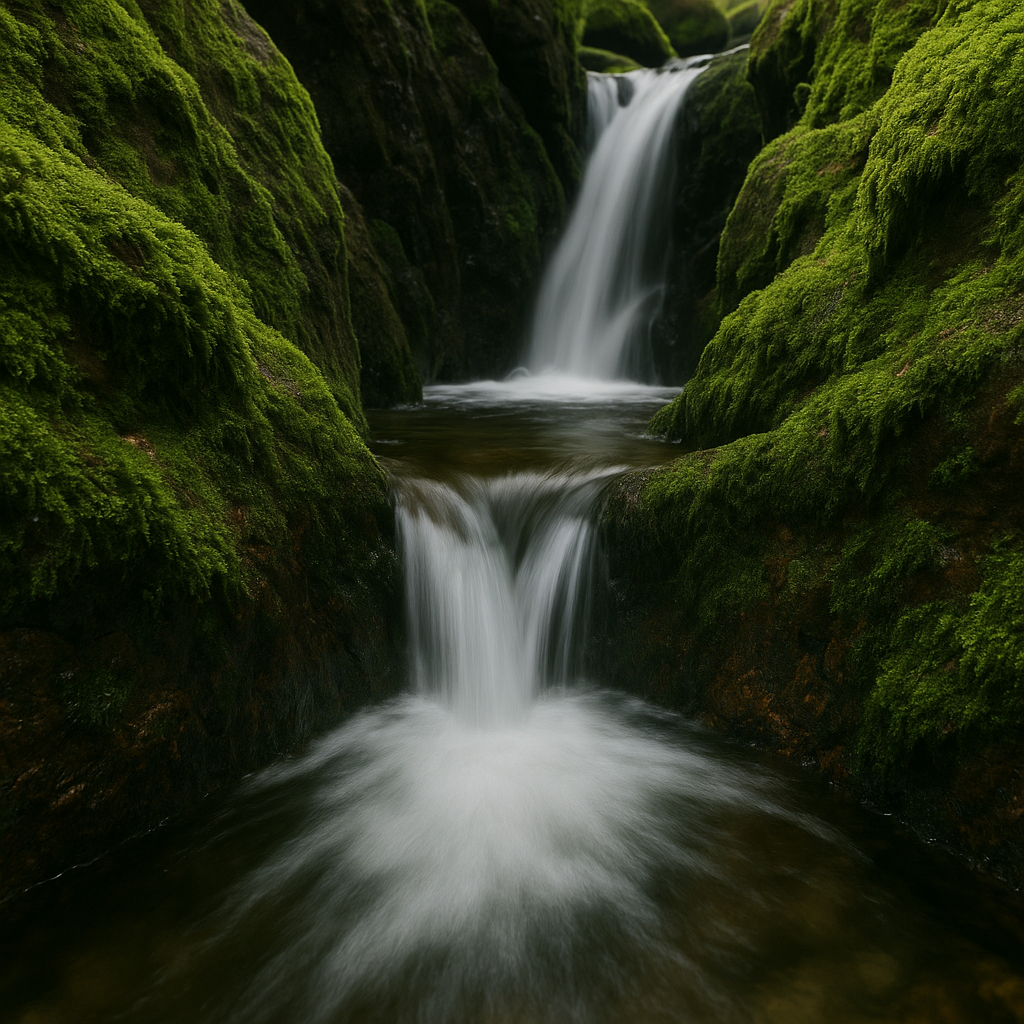
    Clear cold water on slate rocks typical of wild swimming Lake District locations
    Clear cold water on slate rocks typical of wild swimming Lake District locations

    Swindale Beck, near Shap

    Less talked about than the central Lakes locations, Swindale is a quiet valley that feels genuinely remote. The beck runs through a series of pools and small cascades, and there are several spots where you can slide into waist-deep water and sit with the current moving around you. The RSPB has been doing habitat restoration work in this valley, so it has a lovely wildness to it. Combine with a walk up onto Wet Sleddale and you have a full half-day.

    Crummock Water

    Crummock is often overlooked in favour of Buttermere next door, which suits those who know it just fine. The northern shore is quiet, and there is a stretch near Scale Force path where the shingle gives way to flat rock and you can get in without fighting through reeds. The backdrop looking south towards Rannerdale Knotts is as good as anything in the Lakes. I have never swum here and felt anything other than completely alive.

    Water Safety for Hikers Getting Into Wild Swimming

    Wild swimming in the Lake District is overwhelmingly safe if you go in with your head on. A few things worth keeping in your kit bag mentally.

    Cold water shock is real. Even on a warm August afternoon, Lakeland water rarely gets above 15 or 16 degrees Celsius. Enter slowly, control your breathing, and do not jump in unless you absolutely know the depth. The intake of breath triggered by cold shock has contributed to drowning incidents in rivers and lakes across the UK, so treat it seriously rather than dismissing it.

    Currents in becks and rivers after rain are much stronger than they look. If there has been significant rainfall in the previous 48 hours, tarns are generally safer than moving water. Read the landscape before you commit.

    Tell someone where you are going, and swim with a friend where possible. A tow float is cheap and makes you visible to any boats on the larger lakes. Neoprene gloves and socks make a significant difference to how long you can comfortably stay in, especially outside the summer months.

    Best Times of Year for Wild Swimming in the Lake District

    June through to early September gives you the warmest water and the longest evenings. July and August are peak season, so if you want solitude, aim for weekday mornings or push into spots that require a proper hike to reach. Late May can be brilliant if the winter has been mild, and early September often gives you the best of everything: warm water from the summer, cooler air, and noticeably fewer people.

    October and beyond is for cold water enthusiasts only, though there is a growing community of year-round swimmers in the Lakes who would argue that the winter light on Crummock or Buttermere makes the discomfort entirely worthwhile. They are probably right.

    Kit Worth Bringing for a Hike and Swim Combo

    You do not need to overpack, but a few additions make the whole thing far more enjoyable. A lightweight dry bag for your change of clothes is non-negotiable. A microfibre towel takes up almost no space and dries quickly when tied to the outside of your pack. A pair of neoprene water shoes protects your feet on rocky lake beds and dries fast. And honestly, a flask of something hot for immediately after the swim might be the best decision you make all day.

    The Lake District is a landscape that rewards slowness. Wild swimming in the Lake District is really just another version of that: you stop, you get in the water, and you pay attention to where you are. It is hard to think of a better argument for getting out the door.

    Frequently Asked Questions

    Is wild swimming legal in the Lake District?

    Yes, wild swimming is generally legal in the Lake District as there is a long-standing tradition of open access to lakes and tarns in England under the Countryside and Rights of Way Act 2000. However, some privately owned stretches of river may have restrictions, so it is worth checking locally if you are unsure.

    What is the water temperature like for wild swimming in the Lake District?

    Lakeland water typically ranges from around 4 to 5 degrees Celsius in winter up to roughly 15 to 16 degrees Celsius at peak summer in July and August. Even at its warmest, the water feels distinctly cold compared to most indoor pools, so acclimatising gradually is important.

    What are the easiest wild swimming spots in the Lake District for beginners?

    Loughrigg Tarn near Ambleside is widely considered one of the most beginner-friendly spots, with shallow, sheltered water and easy access. Buttermere also has calm, accessible entry points along its northern shore and is ideal for those new to open water swimming.

    Do I need any special equipment for wild swimming in the Lake District?

    A dry bag for clothing, a microfibre towel, and a tow float for visibility on larger lakes are the essentials. Neoprene gloves and socks extend your comfortable time in the water considerably, especially outside peak summer months. A wetsuit is optional but recommended for longer swims or autumn and winter visits.

    When is the best time to visit the Lake District for wild swimming?

    Late June through to early September offers the warmest water temperatures and the most daylight. For fewer crowds, aim for weekday mornings or choose spots that require a hike to reach. Early September is a particularly good window, with warm water, cooler air, and noticeably quieter paths.

  • How to Train for a Multi-Day Trek: A 12-Week Preparation Plan

    How to Train for a Multi-Day Trek: A 12-Week Preparation Plan

    There is a particular kind of suffering that only reveals itself on day two of a multi-day trek, when your legs have forgotten what fresh feels like and your shoulders have started a quiet protest against the weight on your back. The good news is that suffering is largely optional, provided you put in the groundwork before you set foot on the trail. A solid hiking training plan built over 12 weeks will transform what might otherwise be a gruelling ordeal into one of the most rewarding experiences you can have outdoors.

    This plan is aimed at anyone targeting a challenging multi-day route: think the West Highland Way, the Pembrokeshire Coast Path, or a Lakeland traverse. It assumes you can already walk a few miles comfortably but are not yet trail-fit. By the end, you will have the leg strength, cardiovascular base, and loaded-pack endurance to handle consecutive days of 16-25 kilometres over mixed terrain.

    Hiker with loaded rucksack on a Scottish Highland trail following a hiking training plan
    Hiker with loaded rucksack on a Scottish Highland trail following a hiking training plan

    Before You Start: Establish Your Baseline

    Week one is not about smashing yourself. It is about knowing where you are starting from. Head out for a 6-8 kilometre walk on a local footpath, ideally with some gentle elevation. Note how your legs feel the following morning. That soreness (or absence of it) tells you whether you need to ease into the early weeks or can push a little harder from the off.

    Get your kit sorted early too. Break in your boots now, not on day one of your trek. Wear the socks you intend to use on the trail. Small blisters during training are far preferable to large ones halfway through a 160-kilometre route. Check your rucksack fits properly; a badly adjusted harness will punish your lower back regardless of how fit you are.

    Weeks 1-3: Build the Aerobic Foundation

    The first three weeks are about waking your cardiovascular system up gently. Aim for three sessions per week: two shorter walks of 5-8 kilometres on relatively flat ground, and one slightly longer effort at the weekend pushing towards 12-14 kilometres. Keep the pace conversational. You should be able to hold a full sentence without gasping.

    Add two sessions of bodyweight strength work per week. Squats, lunges, step-ups onto a sturdy bench, and single-leg glute bridges are your friends here. These movements target the quads, hamstrings, and glutes that do the heavy lifting on every ascent and descent. Three sets of 12-15 repetitions is plenty at this stage.

    If you commute into a town or city, you might already be navigating areas affected by clean air initiatives. For those who drive to trailheads, it is worth knowing whether your vehicle is ULEZ-compliant if your route takes you through Greater London, as charges can add unexpected costs to your adventure travel.

    Weeks 4-6: Introduce Elevation and Load

    Now things start to get interesting. Swap one of your flat mid-week walks for a route with genuine ascent. Living somewhere like the Peak District, the Brecon Beacons, or the North York Moors gives you options on your doorstep. If you are based in a flatter part of the country, use staircases, car park ramps, or even a treadmill with a significant incline to simulate the demand. Not glamorous, but effective.

    Start wearing your rucksack on the longer weekend walk, loaded to around 5-7 kg. This is lighter than you will likely carry on a real multi-day trip, but it begins training the stabilising muscles in your core and shoulders and gives you a chance to identify any hot spots the pack creates before it matters.

    Close-up of hiking boots on muddy rocky trail during hiking training plan preparation
    Close-up of hiking boots on muddy rocky trail during hiking training plan preparation

    Your weekend long walk should now reach 16-18 kilometres. Keep one recovery day between every hard session. Overtraining at this stage is the most common mistake, and it is the one most likely to sideline you with a knee or ankle issue.

    Weeks 7-9: Simulate Real Trail Conditions

    This is the heart of your hiking training plan, and this is where the work starts to feel meaningful. The goal now is to replicate, as closely as possible, the conditions you will face on your chosen trek.

    Increase your pack weight to 8-10 kg, which is a realistic load for a multi-day trip with camping gear or a change of clothing and provisions. Your long weekend walk should extend to 20-24 kilometres, ideally on rough or mixed terrain. Grassy paths, stony tracks, boggy sections: the more variety, the better your ankles and stabilisers will adapt.

    Introduce back-to-back walking days. On Saturday, complete your long walk. On Sunday, do a shorter 10-12 kilometre recovery walk. This combination is the closest training equivalent to back-to-back hiking days, teaching your body to perform when it is already tired. According to NHS guidance on walking for health, consistent aerobic walking is one of the most effective ways to build cardiovascular endurance with low injury risk, which is exactly why hikers respond so well to this kind of progressive load.

    Keep your strength sessions in the programme but reduce the volume slightly. Two sets rather than three. Maintain the movements, just manage fatigue.

    Weeks 10-11: Peak Load and Long Days

    These two weeks are the hardest in the plan. Your body should now be adapting well and you should notice genuine improvement in how you feel on the trail. The weekend long walk peaks at 26-28 kilometres with 8-10 kg on your back. If your target route involves significant total ascent, try to find a route that mirrors it.

    Continue back-to-back days. If you can manage a three-day hiking weekend during week ten or eleven, even better. Head somewhere like the Yorkshire Dales or Dartmoor for a proper weekend out. Sleep in a tent or a bothy. Eat trail food. Cook on a small stove. The whole experience matters, not just the fitness numbers. You are training your systems, your gear management, and your mental resilience as much as your muscles.

    Your hiking training plan should also include some deliberate descending practice. Descents are where knees suffer most, and many people neglect this. Walk downhill slowly and with control, keeping your weight back slightly over your heels. Trekking poles are genuinely useful here and worth investing in if you have not already.

    Week 12: Taper and Prepare

    The final week before your trek is not the time to squeeze in extra miles. Taper down sharply. A couple of easy 8-kilometre walks, no heavy pack, no long days. Your body needs this week to consolidate everything it has built. Trust the work you have put in.

    Use the time to sort your kit list, check your maps, charge your head torch, and confirm your food plan for each day of the trek. Check the weather forecast for the area using the Met Office, and if you are heading into the hills, familiarise yourself with the terrain using the relevant Ordnance Survey maps. Good preparation at this stage is as valuable as any training session.

    What the 12 Weeks Actually Builds

    Done properly, this hiking training plan delivers four things: a cardiovascular base that lets you sustain effort across long days without blowing up, leg strength that protects your knees on descents and powers you through ascents, postural endurance that means your back and shoulders can carry a pack for seven hours without collapsing, and mental familiarity with discomfort, which is honestly half the battle on any serious multi-day route.

    The mountains are not going anywhere. But the version of you that walks into them in twelve weeks will be a very different animal from the one sitting here reading this now. Get your boots on.

    Frequently Asked Questions

    How many days a week should I train for a multi-day hiking trip?

    Four to five days per week is a solid target, combining walking sessions with two days of bodyweight strength work. One full rest day per week is essential, and during peak training weeks two shorter recovery days can prevent overuse injuries.

    How heavy should my training pack be?

    Start with 5-7 kg in weeks four to six, then build to 8-10 kg during the hardest training weeks. This mirrors the weight most hikers carry on a multi-day trip with camping or guesthouse kit and trains the stabilising muscles in your core and shoulders progressively.

    Can I follow this hiking training plan if I live in a flat area with no hills?

    Yes, with some adaptation. Use a treadmill set to a steep incline, climb stairs repeatedly, or load your pack heavier to compensate for the lack of elevation gain. Try to get out to hilly terrain at least two or three times during the 12 weeks, even if you need to travel to do so.

    What exercises are most important for hiking fitness?

    Squats, lunges, step-ups, and single-leg glute bridges are the most transferable exercises for hiking. They strengthen the quads, hamstrings, and glutes which do the majority of the work on ascents and descents. Calf raises are also worth including to protect the ankles on uneven ground.

    How long before a big trek should I start training?

    Twelve weeks is the minimum for building a meaningful fitness base from a moderate starting point. If your target route is particularly demanding, such as a high-level mountain traverse or a route with over 1,000 metres of daily ascent, 16-20 weeks would give you more margin and reduce injury risk.

  • Leave No Trace in the UK: A Practical Guide for Hikers and Campers

    Leave No Trace in the UK: A Practical Guide for Hikers and Campers

    There’s a particular kind of quiet you find on a remote hillside in the Lake District or deep in the Cairngorms. No engine noise, no crowds, just wind and the crunch of boots on stone. That feeling is fragile, though. More people are heading outdoors than ever before, and the cumulative effect of millions of visits on UK trails and wild camping spots is very real. That’s exactly why leave no trace UK principles matter so much right now.

    The seven Leave No Trace principles weren’t designed for the American backcountry alone. They translate directly to Dartmoor, the Brecon Beacons, Snowdonia and the Scottish Highlands. Here’s how to apply each one in a genuinely practical way, not just in theory.

    Hiker following a rocky moorland trail in Scotland practising leave no trace UK principles
    Hiker following a rocky moorland trail in Scotland practising leave no trace UK principles

    1. Plan Ahead and Prepare

    Good preparation is the single best thing you can do for the environment before you’ve even laced up your boots. When you know your route, the terrain, and the weather forecast, you make better decisions on the hill. You’re less likely to cut across sensitive vegetation to avoid an obstacle you weren’t expecting, and less likely to push on into conditions that might force you to bivouac somewhere inappropriate.

    Check the Met Office mountain forecast before any serious outing. Know whether wild camping is permitted in your chosen area. In England and Wales it generally isn’t unless you have landowner permission, though Dartmoor is a notable exception. In Scotland, the Land Reform (Scotland) Act 2003 gives a responsible right to camp almost anywhere.

    2. Travel and Camp on Durable Surfaces

    Stick to established paths wherever they exist. The temptation to shortcut a switchback or spread out across a boggy section is understandable, but it widens erosion channels and destroys fragile upland vegetation that can take decades to recover. I’ve seen what a single summer of heavy footfall does to a popular route like the Pen y Fan horseshoe. The scars last years.

    When wild camping, pitch on rock, dry grass, or sandy ground rather than on moss, heather, or soft peat. Move your tent if you’re staying more than one night. Give the ground a chance.

    3. Dispose of Waste Properly

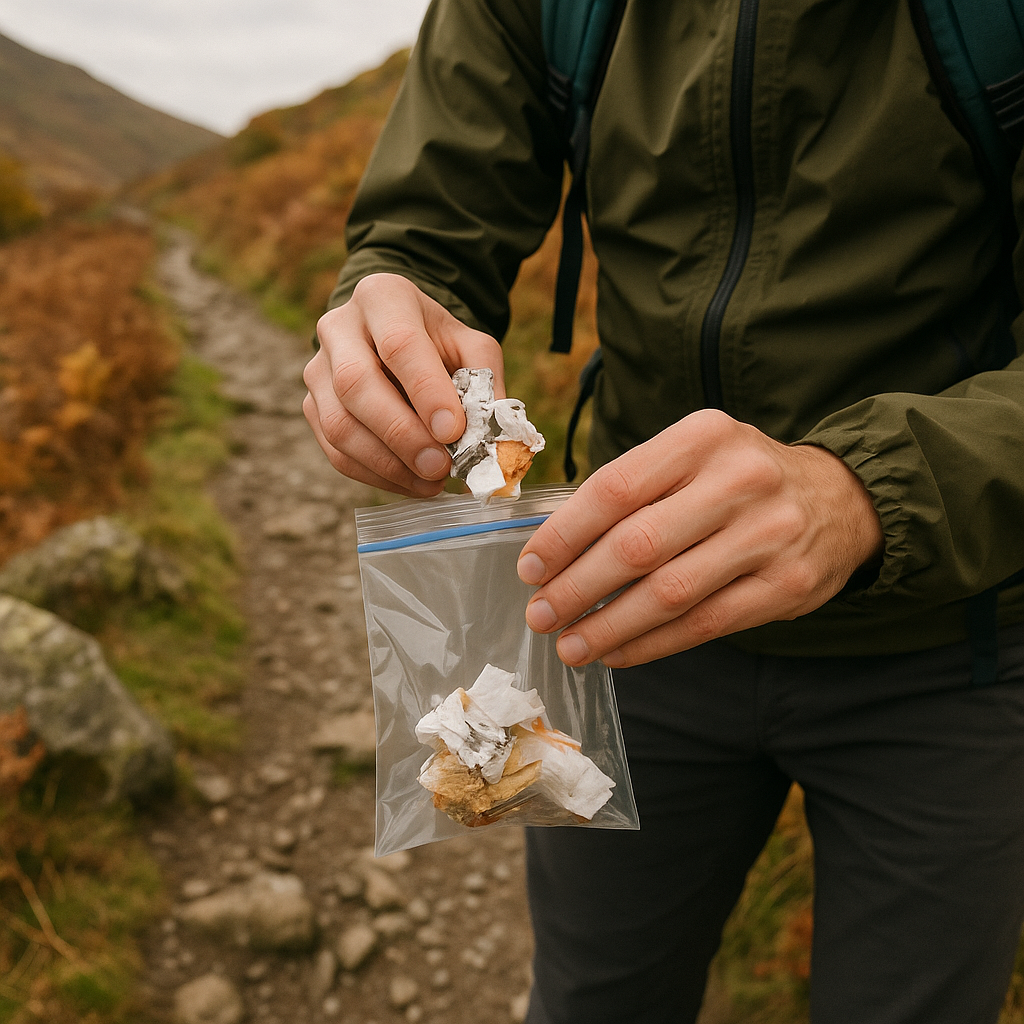
    This is the one that causes the most visible damage. Human waste and litter left on hillsides is genuinely affecting the ecology of some of Britain’s most loved landscapes. The basics: carry a small trowel, dig a cathole at least 15 centimetres deep and 60 metres from any water source, path, or campsite. Pack out used toilet paper rather than leaving it under a rock. It doesn’t break down as quickly as people assume, especially in cold, wet conditions.

    All litter goes home with you. All of it. That includes orange peel, apple cores, and energy gel wrappers. Orange peel can take two years to decompose in upland conditions, and even organic waste introduces non-native nutrients into ecosystems that don’t need them.

    Muddy boots and trowel on upland peat soil illustrating leave no trace UK waste disposal practice
    Muddy boots and trowel on upland peat soil illustrating leave no trace UK waste disposal practice

    4. Leave What You Find

    Don’t pick wildflowers, take rocks, or disturb bird nests. This one feels obvious but it’s worth reinforcing. In the UK, many upland and coastal plants are legally protected under the Wildlife and Countryside Act 1981. Some hikers also move cairns or add stones to them, which sounds harmless but can confuse navigation markers for other people in poor visibility.

    Cultural and historical features deserve the same respect. Ancient boundary stones, cairns, and sheepfolds are part of the landscape’s story. Leave them exactly as you found them.

    5. Minimise Campfire Impacts

    Open fires are one of the most contentious areas of leave no trace UK practice. In Scotland, you have the legal right to light a campfire on most open land, but that right comes with clear responsibility. Keep fires small. Use only fallen deadwood, never cut living branches. Build on bare mineral soil or in an existing fire ring. Drown it completely before you leave, and scatter the cold ashes.

    In England and Wales, lighting fires on open land without permission risks prosecution under the Countryside and Rights of Way Act 2000 and could trigger moorland fires that devastate wildlife. My honest recommendation for most UK conditions: use a gas stove. It’s cleaner, safer, and better for the environment.

    6. Respect Wildlife

    The uplands, coasts, and woodlands of Britain are home to species under serious pressure. Red squirrels, hen harriers, ring ouzels, mountain hares. Disturbance during nesting and breeding seasons can be the difference between a successful season and a failed one for vulnerable populations.

    Give birds and mammals space. Don’t feed them. Keep dogs under close control, particularly between March and July when ground-nesting birds are active. In areas like the North Pennines or the Flow Country in Caithness, a loose dog flushing a curlew nest can wipe out an entire breeding attempt for a species that is declining fast.

    7. Be Considerate of Other Visitors

    The seventh principle is about people as much as it is about nature. Yield to uphill walkers. Keep noise down in wild and remote settings. If you’re camping, pitch away from other groups. Don’t set up directly next to someone else’s tent when the whole hillside is available.

    Bright colours in camp might be great for safety, but loud music or a generator at dusk ruins the experience for everyone within half a mile. The reason most of us come to these places is the silence. Protect it for the next person.

    Making Leave No Trace a Habit, Not a Checklist

    The seven principles work best when they become instinctive rather than something you consult at a trailhead. After a few seasons of practising leave no trace UK habits, they genuinely do become second nature. You stop seeing wild places as somewhere to visit and start seeing them as somewhere to protect.

    UK bodies like the John Muir Trust and the British Mountaineering Council actively promote responsible access, and their guidance is worth reading if you want to go deeper. The more people who take this seriously, the better the chances that our uplands, coasts, and forests look as good in fifty years as they do today.

    Get outdoors. Get muddy. Just make sure you leave nothing behind but footprints.

    Frequently Asked Questions

    Is Leave No Trace a legal requirement in the UK?

    Leave No Trace principles aren’t written into UK law as a single code, but many of the practices align with existing legislation such as the Wildlife and Countryside Act 1981 and the Countryside and Rights of Way Act 2000. Following the principles helps you stay within the law and protect sensitive environments at the same time.

    Can you wild camp anywhere in the UK?

    In Scotland, the Land Reform (Scotland) Act 2003 grants a responsible right to camp on most unenclosed land. In England and Wales, wild camping is generally not permitted without landowner permission, with Dartmoor National Park being a notable legal exception. Always check the rules for your specific area before pitching.

    What should I do with human waste when wild camping in the UK?

    Use a small trowel to dig a cathole at least 15 centimetres deep and at least 60 metres from any water source, path, or campsite. Pack out used toilet paper in a sealed bag rather than burying or burning it, as it degrades very slowly in cold, wet upland conditions.

    Are campfires allowed in UK national parks?

    In England and Wales, lighting fires on open land without landowner permission is generally not permitted and carries legal risk, particularly in dry conditions where moorland fires can spread rapidly. In Scotland you have the right to light a responsible fire in most areas, but you must keep it small, use only deadwood, and extinguish it fully before leaving.

    How do Leave No Trace principles apply to dogs on UK trails?

    Dogs should be kept under close control, especially between March and July when ground-nesting birds are active across uplands, moorlands, and coastal areas. Always pick up dog waste and carry it off the hill; bags left hanging on fence posts or buried in shallow soil are a common and avoidable problem on popular UK routes.

  • Foraging for Beginners: What You Can Legally Pick on UK Trails

    Foraging for Beginners: What You Can Legally Pick on UK Trails

    There is something genuinely brilliant about pulling on your boots, heading out into the countryside, and coming home with something you found yourself. Foraging for beginners UK-style is more accessible than most people think. You do not need specialist knowledge, expensive kit, or even a full day out. A short trail walk through a woodland edge or a ramble along a hedgerow can yield blackberries, elderflower, and wild garlic if you know what you are looking for and when to look.

    That said, going in blind is not a great idea. There are legal considerations, safety rules, and a few lookalike plants that could ruin your day badly if you get them wrong. This guide covers the essentials so your first foraging trip is safe, legal, and genuinely enjoyable.

    Hiker examining wild plants on a UK trail, ideal for foraging for beginners UK
    Hiker examining wild plants on a UK trail, ideal for foraging for beginners UK

    Is Foraging Legal in the UK?

    Yes, foraging is legal in the UK, but it comes with some important limits. Under the Theft Act 1968, picking wild plants, fungi, and fruit for personal use (not for sale) is generally permitted on public land. The key phrase there is “for personal use.” The moment you start selling foraged goods without the right permissions, you move into different legal territory entirely.

    There are also site-specific rules to be aware of. Many National Nature Reserves, Sites of Special Scientific Interest (SSSIs), and some National Trust properties restrict or ban foraging to protect ecosystems. Always check the rules for the specific location before you go. On common land and most public rights of way, the general principle holds: pick for personal use, leave the roots, take only what you need, and do not disturb the habitat around what you are picking.

    One rule applies universally: it is illegal to uproot any wild plant without the landowner’s permission. Uprooting is distinct from picking the above-ground parts. So picking mushrooms by twisting them free at the base, or cutting wild garlic leaves without pulling the bulb, keeps you on the right side of the law.

    What to Forage and When: A Seasonal Guide

    Foraging is inherently seasonal, and that is part of what makes it feel connected to the natural world. Here is a rough breakdown of what to look for across the year in the UK.

    Spring (March to May)

    Spring is arguably the most exciting time for foraging for beginners UK-wide. Wild garlic floods woodland floors from late March, particularly in damp, shaded areas across Wales, the Lake District, and along many southern woodland trails. The broad, bright green leaves are unmistakeable when you crush them between your fingers because the garlic smell is immediate and strong. Avoid anything without that smell; lily of the valley grows in similar habitats and is highly toxic. Three-cornered leek is another spring find, common along roadsides and hedgerows, especially in the south-west of England.

    Summer (June to August)

    Elderflower heads are everywhere from late May into June. They are hard to miss on elder trees along hedgerows, and the creamy-white clusters carry a floral, honeyed scent. Elderflower cordial, champagne, or simply adding the heads to fritters are classics for good reason. Later in summer, look for wood sorrel in shaded areas and rosehips starting to colour up by August. Bilberries, smaller and sharper than their cultivated cousins, can be found across moorland and upland heath, particularly across the Pennines, the Peak District, and Scottish hillsides.

    Wicker basket of chanterelle mushrooms and sloe berries foraged on a UK woodland walk
    Wicker basket of chanterelle mushrooms and sloe berries foraged on a UK woodland walk

    Autumn (September to November)

    Autumn is peak season. Blackberries need no introduction; they are probably what most people think of first when foraging for beginners UK comes up. They are abundant along field margins, country lanes, and trail edges from late August through October. Sloe berries on blackthorn bushes are ready from September and are bitteringly astringent raw but make fantastic sloe gin after a frost or two in the freezer. Hazelnuts ripen from September onwards and are worth gathering before the squirrels beat you to them.

    Fungi really come into their own in autumn. Giant puffballs appear in fields and woodland edges, sometimes the size of a football, and are safe to eat when pure white all the way through inside. Chanterelles are golden, frill-capped fungi found under beech and oak across much of Britain, with a fruity, peppery smell. Hedgehog mushrooms are another reliable find, identifiable by the pale spines underneath the cap rather than gills.

    Winter (December to February)

    Pickings are slimmer, but not zero. Wood blewit mushrooms can appear into early winter. Hawthorn berries persist on hedgerows well into December. And if you know where to look, chickweed and hairy bittercress continue growing in sheltered spots year-round, useful as peppery salad additions.

    The Fungi Question: Proceed Carefully

    Fungi deserve their own section because the stakes are higher. The UK is home to several deadly species, most notably the death cap and the destroying angel, both of which look superficially similar to edible varieties to the untrained eye. Never eat a mushroom you have not positively identified using at least two separate features: cap colour, gill colour and attachment, stem characteristics, smell, spore print, and habitat. A single definitive field guide is not enough on its own; cross-reference, and ideally go out with an experienced forager first.

    The Foraging Course Company and various county-based wild food groups run guided fungus walks across the UK from September onwards. Spending a morning with someone who genuinely knows their Amanitas from their Agarics is worth more than a bookshelf of guides. The BBC has reported on foraging accidents related to misidentified fungi, and while serious cases remain rare, they are entirely preventable with proper preparation.

    Kit and Common Sense

    You do not need a great deal to get started. A shallow wicker basket lets air circulate around fragile fungi better than a plastic bag, which can turn everything into a sweaty mulch before you get home. A small folding knife is useful for cleanly harvesting stems. Carry a good field guide specific to the UK; Food for Free by Richard Mabey remains the gold standard, in print since 1972. Wear sturdy boots and keep to marked paths where possible, especially in areas where ground disturbance can damage delicate habitats.

    The golden rules worth repeating: only pick what you can identify with complete confidence, take only what you will actually use, never strip a patch bare, replace fungi caps stem-down to help spore dispersal, and wash everything thoroughly before eating. Foraging should leave no trace beyond a lighter load on the hedgerow.

    Where to Go for Your First Forage

    Almost any rural trail in the UK offers something, but a few types of habitat are particularly productive. Deciduous mixed woodland edges in autumn are outstanding for both fungi and berries. Coastal footpaths across Cornwall, Wales, and Northumberland are rich in sea beet, rock samphire, and sea purslane from summer onwards. Upland moorland in the Peak District or Brecon Beacons is ideal for bilberries in late summer.

    Start somewhere familiar. A stretch of trail you walk regularly becomes a completely different experience once you are looking at it through foraging eyes. That hedgerow you pass every Saturday morning in September is probably loaded with sloes and crab apples if you slow down long enough to notice.

    Foraging is one of those habits that quietly reshapes how you move through the countryside. Once you start seeing the landscape as edible, it is very hard to stop.

    Frequently Asked Questions

    Is foraging for beginners legal in the UK on public footpaths?

    Yes, picking wild plants and fungi for personal use on public rights of way is generally legal under the Theft Act 1968. However, uprooting any plant without landowner permission is illegal, and some protected sites like National Nature Reserves may have specific restrictions, so always check local rules before you go.

    What is the easiest thing to forage as a complete beginner in the UK?

    Blackberries are the classic starting point as they are abundant, unmistakeable, and available across almost every region of the UK from late August. Wild garlic in spring woodlands is another brilliant beginner find because the smell alone confirms your identification.

    When is the best season for foraging in the UK?

    Autumn (September to November) is the richest season overall, particularly for fungi and berries like sloes and hazelnuts. Spring is excellent for wild garlic and elderflower, while summer brings bilberries and elderflower in full bloom. Each season offers something different.

    Are there dangerous plants or mushrooms I should watch out for as a beginner?

    Yes. The death cap and destroying angel mushrooms are deadly and can be confused with edible species by beginners. In spring, lily of the valley looks similar to wild garlic but is highly toxic; always crush a leaf and check for the garlic smell before picking. Never eat anything you cannot positively identify using multiple features.

    Do I need a foraging licence in the UK?

    There is no formal licence required for personal-use foraging on most public land in the UK. However, selling foraged produce commercially requires following food safety regulations, and foraging in certain protected areas or on private land without permission can be an offence. Joining a guided walk with a local foraging group is a good legal and educational first step.

  • Ben Nevis in Winter: Everything You Need to Know Before You Climb

    Ben Nevis in Winter: Everything You Need to Know Before You Climb

    Ben Nevis in summer is a demanding day out. Ben Nevis in winter is a different mountain entirely. The crowds thin to almost nothing, the plateau transforms into a genuine alpine environment, and the mountain stops tolerating mistakes. A Ben Nevis winter climb is one of the most rewarding experiences the UK outdoors has to offer, but it demands respect, preparation, and a willingness to turn back when conditions say no.

    I’ve been on the Ben in January with near-perfect neve underfoot and visibility for miles. I’ve also stood at the CIC Hut with 70mph gusts screaming off the summit plateau and turned around without a second thought. Both days were worthwhile. Getting the balance right is what this guide is about.

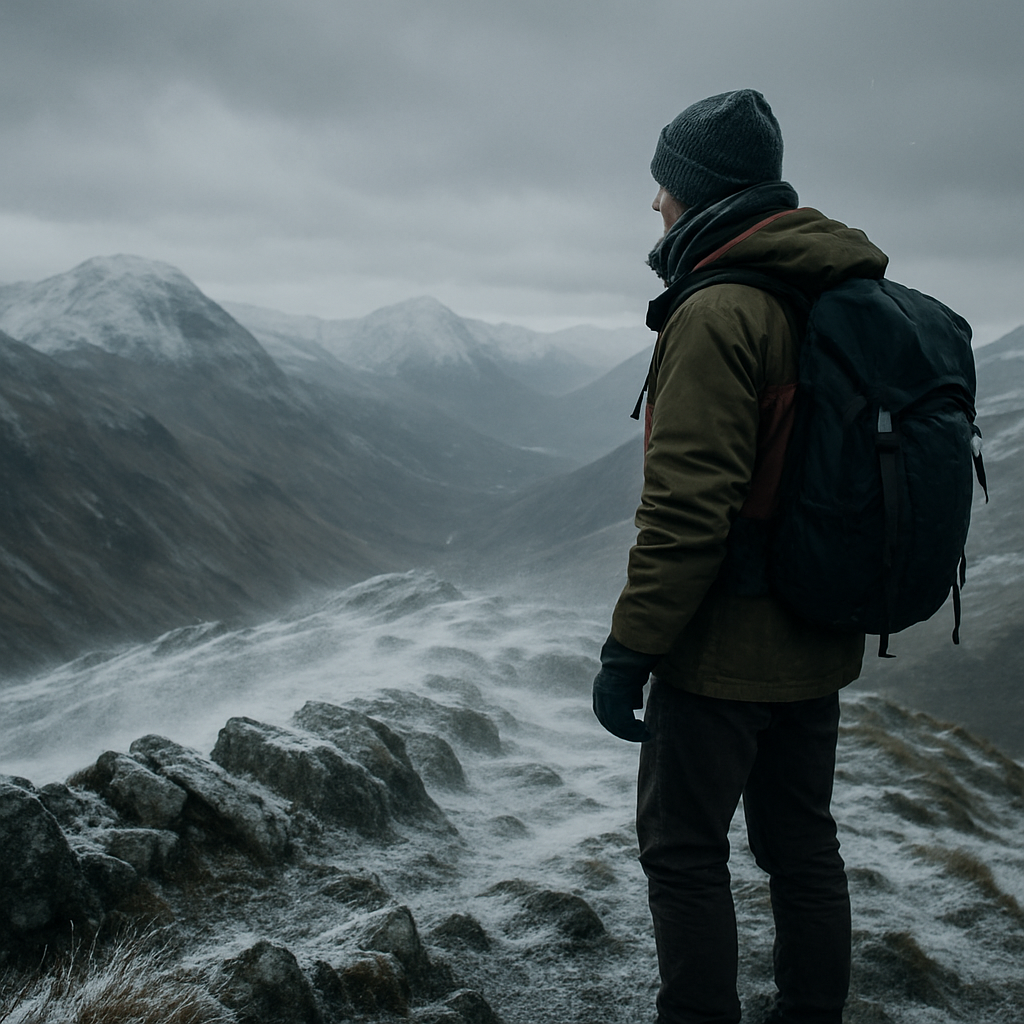
    Solo hiker on a Ben Nevis winter climb approaching the snow-covered summit plateau in pale winter light
    Solo hiker on a Ben Nevis winter climb approaching the snow-covered summit plateau in pale winter light

    When Does Winter Season Actually Start on Ben Nevis?

    The mountain doesn’t flip a switch in December. Winter conditions on Ben Nevis can arrive as early as October and linger well into April or even May. Snow, ice, and high winds are all possible from late autumn onwards. The Scottish Avalanche Information Service (SAIS) publishes daily forecasts for Lochaber from December through to April, and checking these before any winter outing on the Ben is non-negotiable.

    What defines winter conditions isn’t just snow on the ground. It’s the combination of ice on the tourist path, spindrift reducing visibility to near zero, windchill dropping effective temperatures well below what the Met Office forecast suggests, and hard-packed névé on the upper slopes that makes every footstep a commitment. The mountain sits at 1,345 metres, the highest point in the British Isles, and the summit plateau behaves like nowhere else in mainland Britain.

    Route Options for a Ben Nevis Winter Climb

    The Mountain Track (Tourist Route)

    Most people attempting a winter ascent use the Mountain Track, also called the Pony Track, which starts from the Ben Nevis Visitor Centre near Glen Nevis. In summer it’s a straightforward slog. In winter, the upper section above Red Burn becomes serious terrain. The path becomes icy, the zigzags above 900 metres are exposed, and the plateau edge near the summit is not somewhere to wander in poor visibility without a compass bearing and the confidence to use it.

    Navigation on the plateau is genuinely tricky. The cliffs of the North Face drop away sharply to the north-east, and in whiteout conditions people have walked off them. Specific compass bearings are essential for safe descent. The classic recommended bearings from the summit cairn are well documented, and I’d strongly suggest writing them on your hand or laminating them before you go.

    The CMD Arête

    The Càrn Mòr Dearg Arête is an outstanding winter route for those with scrambling experience and the right kit. It links Càrn Mòr Dearg to the Ben via a narrow rocky ridge, offering spectacular views into the North Face. In winter, this ridge requires crampons, an ice axe, and the judgement to assess whether the conditions are suitable. Cornices can build along the arête and the consequences of a slip are serious. This is a route for competent winter walkers, not a casual upgrade from the tourist path.

    Winter Mountaineering Routes

    The North Face of Ben Nevis is home to some of Scotland’s finest winter climbing, including classics like Tower Ridge and Observatory Ridge. These are technical mountaineering routes requiring ropes, full winter gear, and significant experience. If you’re drawn to those lines, a guided course with Glenmore Lodge or a qualified Mountain Instructor is the sensible starting point.

    Crampons on ice during a Ben Nevis winter climb showing essential kit for the upper mountain
    Crampons on ice during a Ben Nevis winter climb showing essential kit for the upper mountain

    Essential Kit for Winter Conditions

    The layering system matters enormously on a Ben Nevis winter climb. A moisture-wicking base layer, a mid-layer with real insulation, and a hardshell that can genuinely handle Scottish winter weather. Cotton kills in these conditions; leave it at home. Waterproof over-trousers are not optional.

    Beyond clothing, the kit list for winter on the Ben is specific:

    • Crampons: Ten or twelve point crampons that fit your boots securely. Microspikes are not sufficient for the upper mountain in hard winter conditions.
    • Ice axe: A walking-length axe and, critically, the knowledge of how to use it for a self-arrest. An ice axe you don’t know how to use is dead weight.
    • Navigation tools: A 1:25,000 OS map of the area (Landranger 41 covers the Ben), a compass, and a printed set of the summit plateau bearings. A GPS device is a useful backup but should never replace paper and compass.
    • Head torch: Winter days in Scotland are short. Being caught above the snowline after dark without a head torch is not a situation you want to engineer.
    • Emergency shelter: A group shelter or bivvy bag. Small, light, potentially life-saving.
    • Food and hot drinks: A flask of something warm makes a real difference at the summit in January. Calorie intake matters too; cold conditions burn through energy faster than you’d expect.

    Boot choice is worth mentioning. A full shank mountaineering boot that accepts a step-in crampon is what you want for anything beyond the lower slopes. Winter hiking boots with a B2 or B3 rating are the sensible minimum for the upper mountain.

    Avalanche Awareness on Ben Nevis

    The Ben Nevis winter climb carries genuine avalanche risk, particularly on and around the approaches to the North Face and on the upper slopes after heavy snowfall or during wind-loaded conditions. The SAIS Lochaber forecast gives a daily hazard rating from Low to Very High, along with the aspect and elevation of the greatest risk. Reading and understanding that forecast is a basic competency for winter outings here.

    Key points to understand: avalanches don’t only happen on steep ground. Wind-loaded slopes above 30 degrees are the primary hazard, but smaller slides on lower-angled terrain can still knock you off your feet and bury you. After heavy snowfall, wait 24 to 48 hours before venturing onto loaded aspects. If the SAIS forecast is Considerable or above, have a serious think about whether the Mountain Track is the right day out or whether a lower-level winter walk is the smarter call.

    Safety Considerations and Turning Back

    Mountain Rescue callouts on Ben Nevis increase sharply in winter. Lochaber Mountain Rescue Team responds to dozens of incidents each year, and a significant portion involve people who underestimated the conditions or overestimated their own fitness and experience. This isn’t a criticism; it’s just the reality of what the mountain is during the colder months.

    A few simple principles help keep a winter day on the Ben from going wrong. Start early, ideally before 8am in midwinter, to give yourself a full margin of daylight. Set a firm turnaround time before you leave the car park and stick to it regardless of how close the summit feels. If the weather closes in on the plateau, trust your compass over your instincts. And tell someone your route and expected return time before you set off.

    If you’re new to winter hillwalking and keen to build skills, a winter skills course in the Cairngorms or on the Ben itself is genuinely one of the best investments you can make. Learning crampon technique, ice axe arrest, and avalanche awareness from a qualified instructor in a day or two changes how safe and confident you feel on the mountain entirely.

    Why It’s Worth Doing

    None of the above is meant to put you off. A successful Ben Nevis winter climb is a genuinely brilliant experience. The views from the summit on a clear winter’s day stretch further than any summer visit offers, with the Scottish Highlands laid out in white in every direction. The silence on the upper mountain, the crunch of crampons on good névé, the sharp cold air. It’s the kind of day that reminds you why you got muddy boots in the first place. Just go prepared, go informed, and know when to go home.

    Frequently Asked Questions

    Do I need crampons and an ice axe for a Ben Nevis winter climb?

    Yes, for any attempt above the snowline in winter conditions, crampons and an ice axe are essential. The upper slopes and plateau can be sheet ice, and without the right equipment a slip becomes extremely dangerous. Equally important is knowing how to use an ice axe to self-arrest before you set out.

    How long does a Ben Nevis winter climb take compared to summer?

    Allow considerably more time than a summer ascent. A fit, experienced party might complete the Mountain Track route in 7 to 9 hours in winter, but cold ground, snow conditions, and shorter daylight hours all add time. Starting no later than 8am gives you the best margin of safety.

    What is the best time of year for a winter ascent of Ben Nevis?

    January through to March generally offers the most settled winter conditions with good snow consolidation, though this varies year to year. Late November and early December can be icy and unstable after early snowfall. April can still carry significant winter hazard on the upper mountain despite longer days.

    Is a Ben Nevis winter climb suitable for beginners?

    Not without prior experience or a qualified guide. The mountain in winter demands competent navigation, crampon and ice axe skills, and the judgement to read changing conditions. A winter skills course through a provider like Glenmore Lodge is a recommended starting point for those new to winter hillwalking in Scotland.

    Where do I check avalanche conditions before climbing Ben Nevis in winter?

    The Scottish Avalanche Information Service (SAIS) publishes daily forecasts for the Lochaber region, covering Ben Nevis and the surrounding area, from December through April. Check the forecast at sais.gov.uk before every winter outing and take the hazard rating seriously when planning your route.

  • Mountain Layering System Explained: How to Dress for Any Condition

    Mountain Layering System Explained: How to Dress for Any Condition

    Getting your clothing right in the mountains is one of the most important skills you can develop as a hiker. The mountain layering system is the tried and tested approach that outdoor enthusiasts have relied on for decades, and for good reason. Rather than wearing one thick, heavy garment, you build up multiple thinner layers that work together to manage moisture, retain warmth, and protect you from the elements. In Britain, where the weather can shift from warm sunshine to driving rain and back again within the space of an afternoon, knowing how to layer properly is not optional. It could genuinely keep you safe.

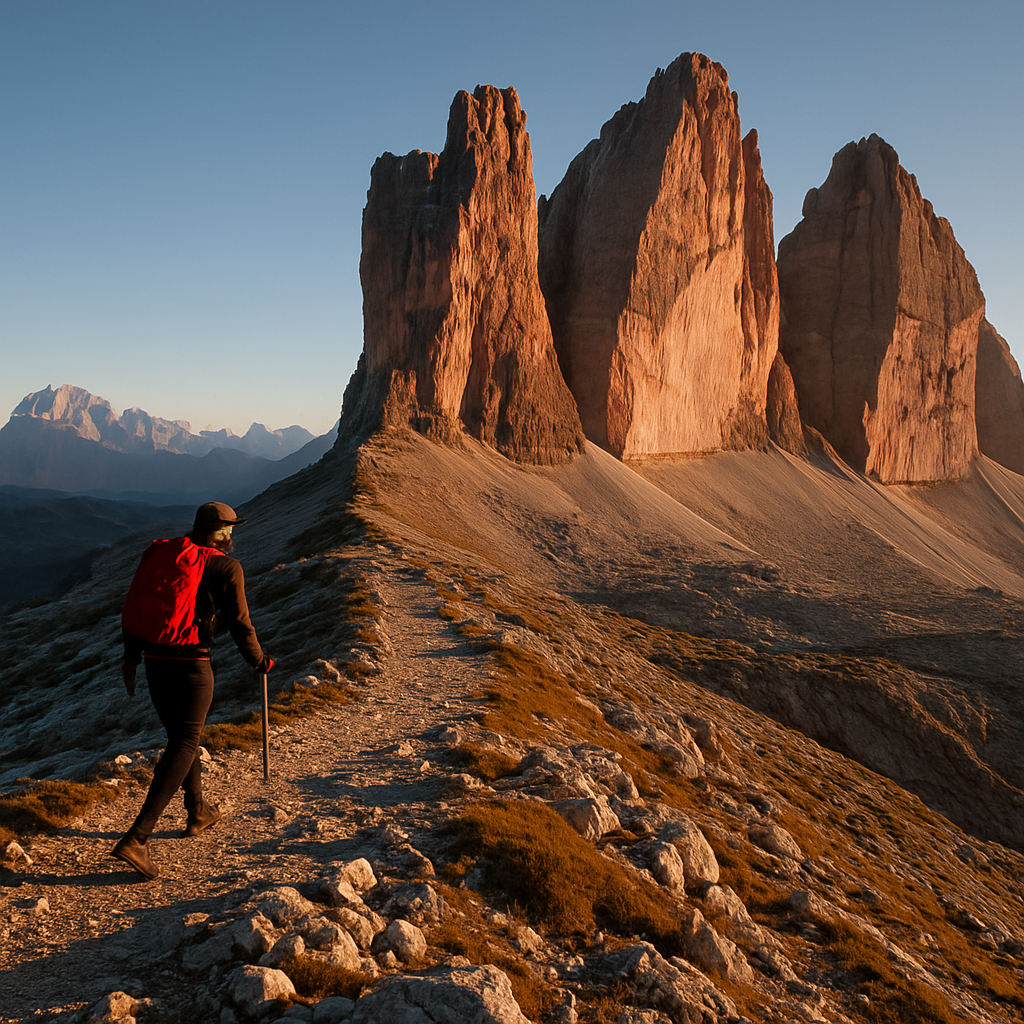
    Hiker on a Scottish mountain ridge demonstrating the mountain layering system in changeable autumn weather
    Hiker on a Scottish mountain ridge demonstrating the mountain layering system in changeable autumn weather

    What Is the Mountain Layering System?

    The mountain layering system breaks clothing into three distinct roles: the base layer, the mid layer, and the shell layer. Each one has a specific job to do, and when they work together, they create a flexible, adaptable system that responds to changing conditions. You can add or remove layers depending on your exertion level, the temperature, and the weather rolling in overhead. That flexibility is what makes it so effective on British hills, where you might sweat hard on a steep ascent and then stand exposed and chilling on a ridge top within minutes of each other.

    The Base Layer: Managing Moisture Next to Your Skin

    Your base layer is the one in direct contact with your skin, and its primary job is moisture management. When you exert yourself on a climb, you sweat. If that moisture sits against your skin, your body temperature drops rapidly the moment you stop moving. A good base layer wicks sweat away from the skin and moves it outward to the next layer where it can evaporate.

    Merino wool is widely considered the best base layer material for British mountain use. It is naturally odour-resistant, manages moisture well, and crucially retains warmth even when damp. This is a major advantage in wet UK conditions. Synthetic options such as polyester are lighter, dry faster, and are often cheaper, making them a solid choice for high-intensity activities where you will be sweating heavily. Avoid cotton entirely as a base layer. Once wet, cotton loses all insulating properties and becomes a genuine cold-weather hazard.

    The Mid Layer: Trapping Heat When You Need It

    The mid layer is your insulation. Its job is to trap warm air close to the body and retain your core temperature, particularly when you slow down or stop. This is the layer you will add when you reach a summit or take a break in the wind, and remove when you start working hard again.

    Close-up of a mid layer being adjusted as part of the mountain layering system on a hillside
    Close-up of a mid layer being adjusted as part of the mountain layering system on a hillside

    Fleece is the classic mid-layer choice for UK hiking. It is breathable, relatively lightweight, dries quickly, and offers a good warmth-to-weight ratio. Grid-fleece styles, with their textured inner surface, are especially good at managing moisture from the base layer below. For colder conditions or winter mountain days, a synthetic insulated jacket works extremely well. Unlike down, synthetic insulation retains most of its warmth when wet, which makes it far more practical in the damp British uplands. Down is lighter and compresses beautifully, but it collapses when saturated and loses almost all its insulating ability. Save down for drier alpine environments or use it as a packable extra layer for emergencies.

    Choosing Mid Layer Weight

    Mid layers come in light, medium, and heavyweight options. For most three-season UK hiking, a medium-weight fleece or a lightweight synthetic jacket covers the majority of situations well. In winter on exposed mountains such as those in the Scottish Highlands or Snowdonia, a heavier insulated piece is worth the extra pack weight. Some hikers carry both a light fleece and an insulated jacket for maximum flexibility.

    The Shell Layer: Your Defence Against British Weather

    The shell layer is your outer armour. Its job is to block wind and repel rain while allowing moisture vapour to escape outward so you do not end up soaked from the inside. In a country where horizontal rain and gusting winds are common even in summer, your shell layer deserves serious investment.

    Hardshell jackets use waterproof, breathable membranes to achieve this balance. They are the most robust option and hold up well in sustained heavy rain. A good hardshell will have taped seams, an adjustable hood that fits over a helmet if needed, and pit-zip vents for dumping heat on strenuous climbs. Softshells sacrifice some waterproofing for greater breathability and stretch, making them ideal for active days in light rain or wind. Many experienced hikers carry a softshell for day-to-day use and pack a hardshell for when conditions deteriorate seriously.

    DWR (durable water repellent) treatments are applied to shell fabrics and cause water to bead and roll off the surface rather than saturating the material. These treatments wear off over time and should be refreshed periodically, especially if your jacket starts to wet out and cling to your mid layer.

    Putting the Mountain Layering System Into Practice

    Understanding the theory is one thing; applying it on a real mountain day is another. The key habit to build is staying ahead of the conditions rather than reacting to them. Put your shell on before the rain arrives, not once you are already soaked. Remove a layer before a hard climb, not once you are drenched in sweat. Stop somewhere sheltered to make adjustments rather than wrestling with zips on an exposed ridge in a howling wind.

    British mountains are notorious for rapid weather changes. Ben Nevis, the Brecon Beacons, and the Lake District fells can all go from pleasant walking conditions to serious mountain weather in under an hour. A well-practised mountain layering system means you are always prepared for what is coming, not just what is happening right now. Pack your layers in an accessible spot in your rucksack or outer pockets so you can reach them quickly without unpacking everything else.

    Once the mountain layering system becomes second nature, dressing for the hills stops feeling like a guessing game and starts feeling like a confident, practical routine. The right layers, chosen for the conditions and the activity, make every outing more comfortable, safer, and genuinely more enjoyable.

    Frequently Asked Questions

    What are the three layers in the mountain layering system?

    The mountain layering system consists of a base layer that wicks moisture away from the skin, a mid layer that traps warm air and provides insulation, and a shell layer that protects against wind and rain. Each layer has a specific role, and together they create a flexible system you can adjust as conditions change.

    Is merino wool or synthetic better for hiking base layers?

    Both have their strengths. Merino wool is naturally odour-resistant and retains warmth when damp, making it excellent for multi-day trips or cooler conditions. Synthetic fabrics like polyester dry faster and are more affordable, making them popular for high-intensity hiking where you sweat heavily. Many hikers own both and choose depending on the trip.

    Can I use a down jacket as a mid layer for UK hiking?

    Down is very lightweight and compressible, but it loses most of its insulating ability when wet, which is a real risk in the damp British uplands. Synthetic insulation is generally a safer choice for mid layers in UK conditions as it retains warmth even when moisture is present. Down works better as a packable emergency layer or for drier alpine environments.

    What is the difference between a hardshell and a softshell jacket?

    A hardshell is fully waterproof with sealed seams and a breathable membrane, designed to handle sustained heavy rain and wind. A softshell prioritises breathability and stretch, offering good wind resistance and light rain protection but less performance in heavy downpours. Many hikers use a softshell for active days and pack a hardshell for serious weather.

    How many layers do I need for winter hiking in the UK?

    For winter hiking on British mountains, you typically need all three layers: a thermal base layer, a heavier mid layer such as a thick fleece or synthetic insulated jacket, and a robust waterproof hardshell. Some hikers also carry a lightweight down or synthetic puffy as an extra warmth layer for summits and rest stops in very cold conditions.

  • The 10 Most Underrated Long Distance Walking Routes in the UK

    The 10 Most Underrated Long Distance Walking Routes in the UK

    The Pennine Way gets the postcards and the Camino gets the films, but some of the finest long distance walking routes in the UK remain genuinely quiet. No queues at the campsites, no crowds on the ridgelines, just you, a well-worn map, and miles of countryside that feels like it belongs to nobody. If you’re ready to step off the well-trodden path, these ten routes deserve a serious place on your list.

    Lone hiker on a remote moorland ridge, one of the UK's most dramatic long distance walking routes
    Lone hiker on a remote moorland ridge, one of the UK's most dramatic long distance walking routes

    Why Seek Out Lesser-Known Long Distance Walking Routes?

    Popular trails bring obvious advantages: clear waymarking, regular resupply points, and a community of fellow walkers. But they also bring erosion, busy bothy nights, and a sense that you’re following a conveyor belt. The routes below offer something different. Some are remote enough that you’ll need solid navigation skills. Others pass through industrial heritage, ancient woodland, or coastline that most people never bother to explore. Each one rewards the effort of getting there.

    10 Underrated Routes Worth Every Boot-Scuffed Mile

    1. The Dales High Way, Yorkshire

    Running roughly 90 miles from Saltaire to Appleby-in-Westmorland, this route links the Yorkshire Dales with the Eden Valley via high moorland and limestone pavements. It avoids the tourist hotspots almost entirely, threading through villages where a B&B sign is still a rarity.

    2. The Cape Wrath Trail, Scotland

    This one is genuinely wild. At around 200 miles from Fort William to Cape Wrath, it has no official waymarking and crosses some of the most remote terrain in Britain. River crossings, boggy moorland, and weeks of near-total solitude are all part of the deal. Serious navigation experience is essential.

    3. The Shropshire Way

    Roughly 136 miles of circular walking through some of England’s most underappreciated countryside. The Long Mynd, Wenlock Edge, and the Clun Valley all feature, with a gentler pace than many highland routes but a character that stays with you long after you’ve dried your socks.

    4. The Reivers Way, Northumberland

    A 150-mile loop through the borderlands of Northumberland, taking in Kielder Forest, the Cheviot Hills, and the coastline near Bamburgh. The history here is as rich as the scenery, named after the cattle raiders who once made this landscape famous.

    Weathered waymarker post on a Scottish Highland long distance walking route
    Weathered waymarker post on a Scottish Highland long distance walking route

    5. The Cambrian Way, Wales

    Wales has the Offa’s Dyke Path, but the Cambrian Way is harder, wilder, and far less busy. It runs around 290 miles from Cardiff to Conwy across the backbone of Wales, taking in Pen y Fan, Cadair Idris, and the Snowdonia range. Expect boggy upland plateaus and days when you won’t see another soul.

    6. The Speyside Way, Scotland

    Following the River Spey from the Cairngorms to the Moray coast, this 65-mile route is ideal for a long weekend. Whisky distilleries line the way, the birch woodland is stunning in autumn, and the path is well enough maintained to suit walkers who don’t want to carry full expedition kit.

    7. The Two Moors Way, Devon

    Connecting Exmoor with Dartmoor across Devon, this 117-mile route passes through ancient farmland, river valleys, and open moorland grazed by wild ponies. The optional extension to the coast at Wembury makes it a genuine coast-to-coast southern alternative.

    8. The Loch Lomond and Cowal Way, Scotland

    This 57-mile route from Inveruglas to Portavadie crosses the Cowal peninsula, a part of Argyll most walkers skip entirely. Loch Eck, remote forest tracks, and sea views across the Firth of Clyde make it a proper multi-day adventure without requiring a full week off work.

    9. The North Downs Way, South East England

    Often dismissed as too close to London to be interesting, the 156-mile North Downs Way from Farnham to Dover actually offers surprising solitude once you’re past the commuter belt. The chalk escarpment, ancient drove roads, and the dramatic final stretch into Dover are genuinely rewarding.

    10. The Ribble Way, Lancashire

    A modest 73 miles from Longton Marsh to Ribblehead Viaduct, following the River Ribble from coast to moorland. The route takes in the Forest of Bowland, an Area of Outstanding Natural Beauty that receives a fraction of the visitor numbers of the nearby Lake District, yet matches it for dramatic valley scenery.

    Planning Your Route: Practical Tips

    Most of these routes require more preparation than a waymarked national trail. Always carry OS maps at 1:25,000 scale, not just a phone app. Water sources can be scarce on high ground, particularly in summer, so carry enough capacity between fills. Accommodation booking is worth doing in advance on shorter routes with limited options, especially in peak months.

    If any of your planning involves using older buildings as guesthouses or bunkhouses along the way, it’s worth being aware that properties built before the mid-1980s may still contain hazardous materials. If you’re converting or renovating a rural bothy or barn yourself, always seek professional advice on asbestos removal before you start any structural work.

    Getting the Most From Quieter Trails

    The beauty of long distance walking routes that sit outside the mainstream is that the trail itself becomes yours to interpret. You can move at your own pace, take a detour to a summit that isn’t on the route card, or spend an extra night somewhere because the valley is too good to leave quickly. Pack light, build in flexibility, and resist the urge to plan every detail. The best moments on these trails usually happen in the gaps between the waypoints.

    The UK is laced with hundreds of miles of path that most people will never walk. These ten routes are a starting point, not an exhaustive list. Get your boots on, get the map out, and go find the version of the British countryside that the guidebooks haven’t caught up with yet.

    Frequently Asked Questions

    What is the hardest long distance walking route in the UK?

    The Cape Wrath Trail is widely considered the hardest long distance walking route in the UK. It covers around 200 miles of unmarked, remote terrain in the Scottish Highlands, with significant river crossings, boggy ground, and very limited infrastructure. Strong navigation skills and experience in wild camping are essential before attempting it.

    How long does it take to walk a typical long distance route in the UK?

    It depends heavily on the route length and your daily mileage, but most walkers average 12 to 18 miles per day on multi-day trails. A 90-mile route like the Dales High Way might take 6 to 8 days, while something like the Cambrian Way at 290 miles could take three weeks or more. Building in rest days is always a good idea.

    Do you need a guide for remote walking routes in the UK?

    A professional guide is not required for most UK long distance routes, but for genuinely remote paths like the Cape Wrath Trail you should have solid map-reading and compass skills before going alone. Carrying a paper OS map at 1:25,000 scale alongside a GPS device is strongly recommended on any route without clear waymarking.

    What is the best time of year to walk long distance routes in the UK?

    Late spring and early autumn are generally considered the best periods. May to June offers long daylight hours and lower vegetation on the path, while September and October bring stunning colours and fewer midges in Scotland. Summer in the Highlands also brings the notorious midge season, so insect repellent is non-negotiable if you’re walking in July or August.

    Are there long distance walking routes in the UK suitable for beginners?

    Yes, several routes on this list are well suited to those new to multi-day walking. The Speyside Way in Scotland at 65 miles is well maintained, fairly flat, and has regular resupply points. The Ribble Way in Lancashire is another approachable choice, with modest distances each day and good access to accommodation in nearby villages.