Author: Alex Mason

  • Foraging for Beginners: What You Can Legally Pick on UK Trails

    Foraging for Beginners: What You Can Legally Pick on UK Trails

    There is something genuinely brilliant about pulling on your boots, heading out into the countryside, and coming home with something you found yourself. Foraging for beginners UK-style is more accessible than most people think. You do not need specialist knowledge, expensive kit, or even a full day out. A short trail walk through a woodland edge or a ramble along a hedgerow can yield blackberries, elderflower, and wild garlic if you know what you are looking for and when to look.

    That said, going in blind is not a great idea. There are legal considerations, safety rules, and a few lookalike plants that could ruin your day badly if you get them wrong. This guide covers the essentials so your first foraging trip is safe, legal, and genuinely enjoyable.

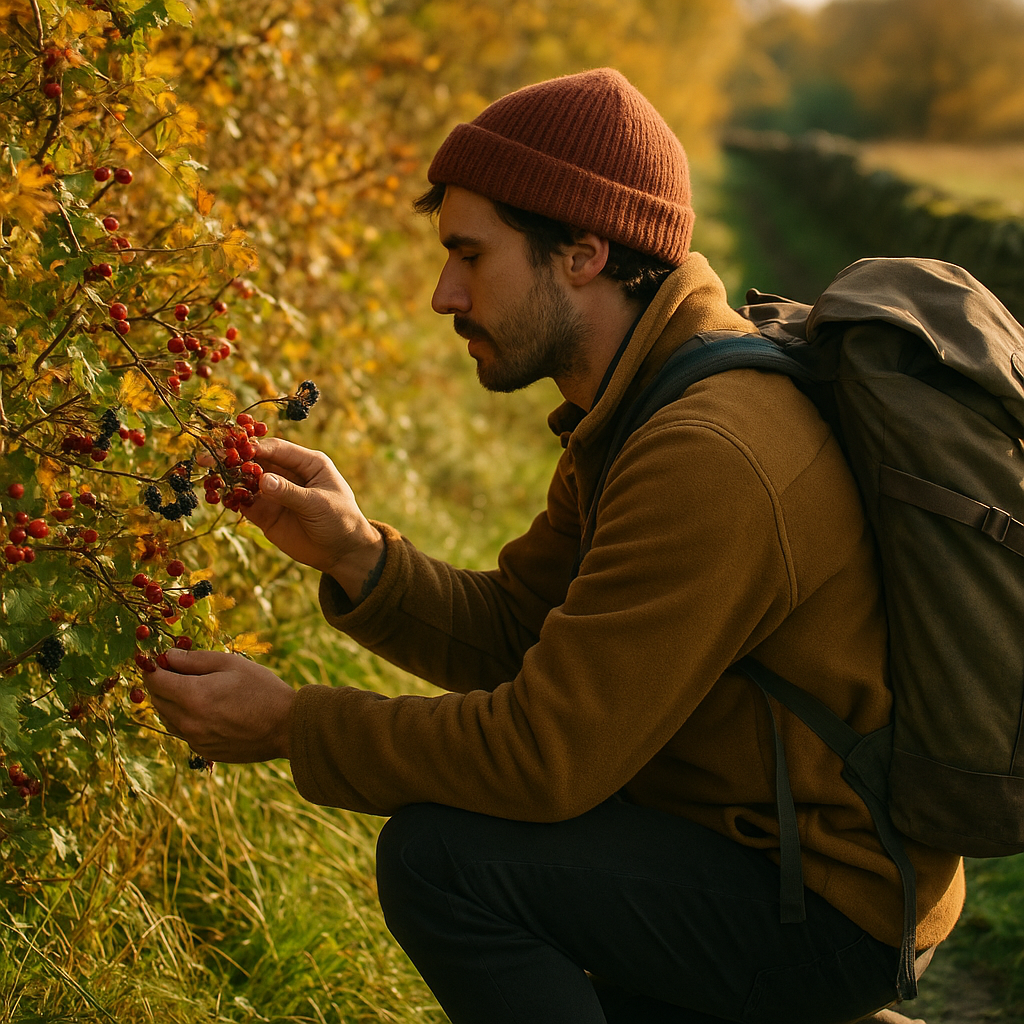
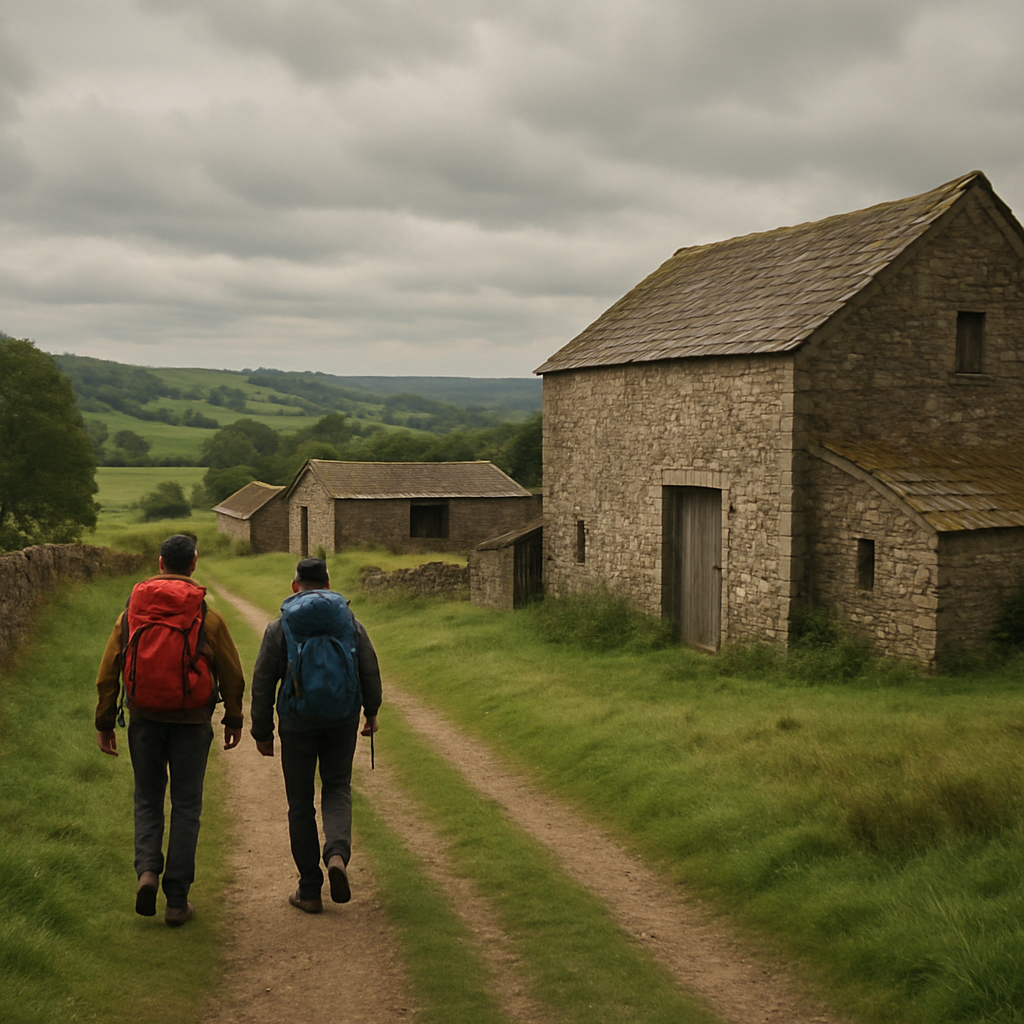
    Hiker examining wild plants on a UK trail, ideal for foraging for beginners UK
    Hiker examining wild plants on a UK trail, ideal for foraging for beginners UK

    Is Foraging Legal in the UK?

    Yes, foraging is legal in the UK, but it comes with some important limits. Under the Theft Act 1968, picking wild plants, fungi, and fruit for personal use (not for sale) is generally permitted on public land. The key phrase there is “for personal use.” The moment you start selling foraged goods without the right permissions, you move into different legal territory entirely.

    There are also site-specific rules to be aware of. Many National Nature Reserves, Sites of Special Scientific Interest (SSSIs), and some National Trust properties restrict or ban foraging to protect ecosystems. Always check the rules for the specific location before you go. On common land and most public rights of way, the general principle holds: pick for personal use, leave the roots, take only what you need, and do not disturb the habitat around what you are picking.

    One rule applies universally: it is illegal to uproot any wild plant without the landowner’s permission. Uprooting is distinct from picking the above-ground parts. So picking mushrooms by twisting them free at the base, or cutting wild garlic leaves without pulling the bulb, keeps you on the right side of the law.

    What to Forage and When: A Seasonal Guide

    Foraging is inherently seasonal, and that is part of what makes it feel connected to the natural world. Here is a rough breakdown of what to look for across the year in the UK.

    Spring (March to May)

    Spring is arguably the most exciting time for foraging for beginners UK-wide. Wild garlic floods woodland floors from late March, particularly in damp, shaded areas across Wales, the Lake District, and along many southern woodland trails. The broad, bright green leaves are unmistakeable when you crush them between your fingers because the garlic smell is immediate and strong. Avoid anything without that smell; lily of the valley grows in similar habitats and is highly toxic. Three-cornered leek is another spring find, common along roadsides and hedgerows, especially in the south-west of England.

    Summer (June to August)

    Elderflower heads are everywhere from late May into June. They are hard to miss on elder trees along hedgerows, and the creamy-white clusters carry a floral, honeyed scent. Elderflower cordial, champagne, or simply adding the heads to fritters are classics for good reason. Later in summer, look for wood sorrel in shaded areas and rosehips starting to colour up by August. Bilberries, smaller and sharper than their cultivated cousins, can be found across moorland and upland heath, particularly across the Pennines, the Peak District, and Scottish hillsides.

    Wicker basket of chanterelle mushrooms and sloe berries foraged on a UK woodland walk
    Wicker basket of chanterelle mushrooms and sloe berries foraged on a UK woodland walk

    Autumn (September to November)

    Autumn is peak season. Blackberries need no introduction; they are probably what most people think of first when foraging for beginners UK comes up. They are abundant along field margins, country lanes, and trail edges from late August through October. Sloe berries on blackthorn bushes are ready from September and are bitteringly astringent raw but make fantastic sloe gin after a frost or two in the freezer. Hazelnuts ripen from September onwards and are worth gathering before the squirrels beat you to them.

    Fungi really come into their own in autumn. Giant puffballs appear in fields and woodland edges, sometimes the size of a football, and are safe to eat when pure white all the way through inside. Chanterelles are golden, frill-capped fungi found under beech and oak across much of Britain, with a fruity, peppery smell. Hedgehog mushrooms are another reliable find, identifiable by the pale spines underneath the cap rather than gills.

    Winter (December to February)

    Pickings are slimmer, but not zero. Wood blewit mushrooms can appear into early winter. Hawthorn berries persist on hedgerows well into December. And if you know where to look, chickweed and hairy bittercress continue growing in sheltered spots year-round, useful as peppery salad additions.

    The Fungi Question: Proceed Carefully

    Fungi deserve their own section because the stakes are higher. The UK is home to several deadly species, most notably the death cap and the destroying angel, both of which look superficially similar to edible varieties to the untrained eye. Never eat a mushroom you have not positively identified using at least two separate features: cap colour, gill colour and attachment, stem characteristics, smell, spore print, and habitat. A single definitive field guide is not enough on its own; cross-reference, and ideally go out with an experienced forager first.

    The Foraging Course Company and various county-based wild food groups run guided fungus walks across the UK from September onwards. Spending a morning with someone who genuinely knows their Amanitas from their Agarics is worth more than a bookshelf of guides. The BBC has reported on foraging accidents related to misidentified fungi, and while serious cases remain rare, they are entirely preventable with proper preparation.

    Kit and Common Sense

    You do not need a great deal to get started. A shallow wicker basket lets air circulate around fragile fungi better than a plastic bag, which can turn everything into a sweaty mulch before you get home. A small folding knife is useful for cleanly harvesting stems. Carry a good field guide specific to the UK; Food for Free by Richard Mabey remains the gold standard, in print since 1972. Wear sturdy boots and keep to marked paths where possible, especially in areas where ground disturbance can damage delicate habitats.

    The golden rules worth repeating: only pick what you can identify with complete confidence, take only what you will actually use, never strip a patch bare, replace fungi caps stem-down to help spore dispersal, and wash everything thoroughly before eating. Foraging should leave no trace beyond a lighter load on the hedgerow.

    Where to Go for Your First Forage

    Almost any rural trail in the UK offers something, but a few types of habitat are particularly productive. Deciduous mixed woodland edges in autumn are outstanding for both fungi and berries. Coastal footpaths across Cornwall, Wales, and Northumberland are rich in sea beet, rock samphire, and sea purslane from summer onwards. Upland moorland in the Peak District or Brecon Beacons is ideal for bilberries in late summer.

    Start somewhere familiar. A stretch of trail you walk regularly becomes a completely different experience once you are looking at it through foraging eyes. That hedgerow you pass every Saturday morning in September is probably loaded with sloes and crab apples if you slow down long enough to notice.

    Foraging is one of those habits that quietly reshapes how you move through the countryside. Once you start seeing the landscape as edible, it is very hard to stop.

    Frequently Asked Questions

    Is foraging for beginners legal in the UK on public footpaths?

    Yes, picking wild plants and fungi for personal use on public rights of way is generally legal under the Theft Act 1968. However, uprooting any plant without landowner permission is illegal, and some protected sites like National Nature Reserves may have specific restrictions, so always check local rules before you go.

    What is the easiest thing to forage as a complete beginner in the UK?

    Blackberries are the classic starting point as they are abundant, unmistakeable, and available across almost every region of the UK from late August. Wild garlic in spring woodlands is another brilliant beginner find because the smell alone confirms your identification.

    When is the best season for foraging in the UK?

    Autumn (September to November) is the richest season overall, particularly for fungi and berries like sloes and hazelnuts. Spring is excellent for wild garlic and elderflower, while summer brings bilberries and elderflower in full bloom. Each season offers something different.

    Are there dangerous plants or mushrooms I should watch out for as a beginner?

    Yes. The death cap and destroying angel mushrooms are deadly and can be confused with edible species by beginners. In spring, lily of the valley looks similar to wild garlic but is highly toxic; always crush a leaf and check for the garlic smell before picking. Never eat anything you cannot positively identify using multiple features.

    Do I need a foraging licence in the UK?

    There is no formal licence required for personal-use foraging on most public land in the UK. However, selling foraged produce commercially requires following food safety regulations, and foraging in certain protected areas or on private land without permission can be an offence. Joining a guided walk with a local foraging group is a good legal and educational first step.

  • Ben Nevis in Winter: Everything You Need to Know Before You Climb

    Ben Nevis in Winter: Everything You Need to Know Before You Climb

    Ben Nevis in summer is a demanding day out. Ben Nevis in winter is a different mountain entirely. The crowds thin to almost nothing, the plateau transforms into a genuine alpine environment, and the mountain stops tolerating mistakes. A Ben Nevis winter climb is one of the most rewarding experiences the UK outdoors has to offer, but it demands respect, preparation, and a willingness to turn back when conditions say no.

    I’ve been on the Ben in January with near-perfect neve underfoot and visibility for miles. I’ve also stood at the CIC Hut with 70mph gusts screaming off the summit plateau and turned around without a second thought. Both days were worthwhile. Getting the balance right is what this guide is about.

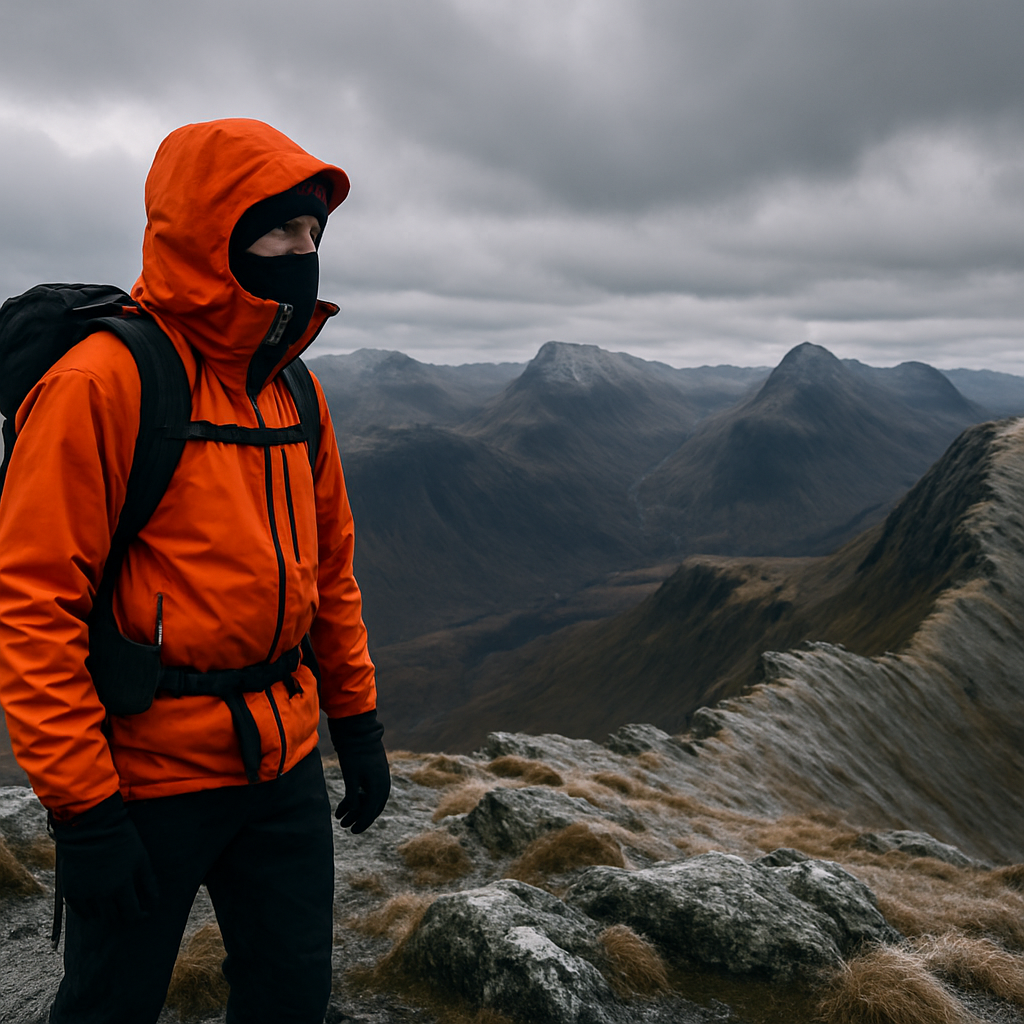
    Solo hiker on a Ben Nevis winter climb approaching the snow-covered summit plateau in pale winter light
    Solo hiker on a Ben Nevis winter climb approaching the snow-covered summit plateau in pale winter light

    When Does Winter Season Actually Start on Ben Nevis?

    The mountain doesn’t flip a switch in December. Winter conditions on Ben Nevis can arrive as early as October and linger well into April or even May. Snow, ice, and high winds are all possible from late autumn onwards. The Scottish Avalanche Information Service (SAIS) publishes daily forecasts for Lochaber from December through to April, and checking these before any winter outing on the Ben is non-negotiable.

    What defines winter conditions isn’t just snow on the ground. It’s the combination of ice on the tourist path, spindrift reducing visibility to near zero, windchill dropping effective temperatures well below what the Met Office forecast suggests, and hard-packed névé on the upper slopes that makes every footstep a commitment. The mountain sits at 1,345 metres, the highest point in the British Isles, and the summit plateau behaves like nowhere else in mainland Britain.

    Route Options for a Ben Nevis Winter Climb

    The Mountain Track (Tourist Route)

    Most people attempting a winter ascent use the Mountain Track, also called the Pony Track, which starts from the Ben Nevis Visitor Centre near Glen Nevis. In summer it’s a straightforward slog. In winter, the upper section above Red Burn becomes serious terrain. The path becomes icy, the zigzags above 900 metres are exposed, and the plateau edge near the summit is not somewhere to wander in poor visibility without a compass bearing and the confidence to use it.

    Navigation on the plateau is genuinely tricky. The cliffs of the North Face drop away sharply to the north-east, and in whiteout conditions people have walked off them. Specific compass bearings are essential for safe descent. The classic recommended bearings from the summit cairn are well documented, and I’d strongly suggest writing them on your hand or laminating them before you go.

    The CMD Arête

    The Càrn Mòr Dearg Arête is an outstanding winter route for those with scrambling experience and the right kit. It links Càrn Mòr Dearg to the Ben via a narrow rocky ridge, offering spectacular views into the North Face. In winter, this ridge requires crampons, an ice axe, and the judgement to assess whether the conditions are suitable. Cornices can build along the arête and the consequences of a slip are serious. This is a route for competent winter walkers, not a casual upgrade from the tourist path.

    Winter Mountaineering Routes

    The North Face of Ben Nevis is home to some of Scotland’s finest winter climbing, including classics like Tower Ridge and Observatory Ridge. These are technical mountaineering routes requiring ropes, full winter gear, and significant experience. If you’re drawn to those lines, a guided course with Glenmore Lodge or a qualified Mountain Instructor is the sensible starting point.

    Crampons on ice during a Ben Nevis winter climb showing essential kit for the upper mountain
    Crampons on ice during a Ben Nevis winter climb showing essential kit for the upper mountain

    Essential Kit for Winter Conditions

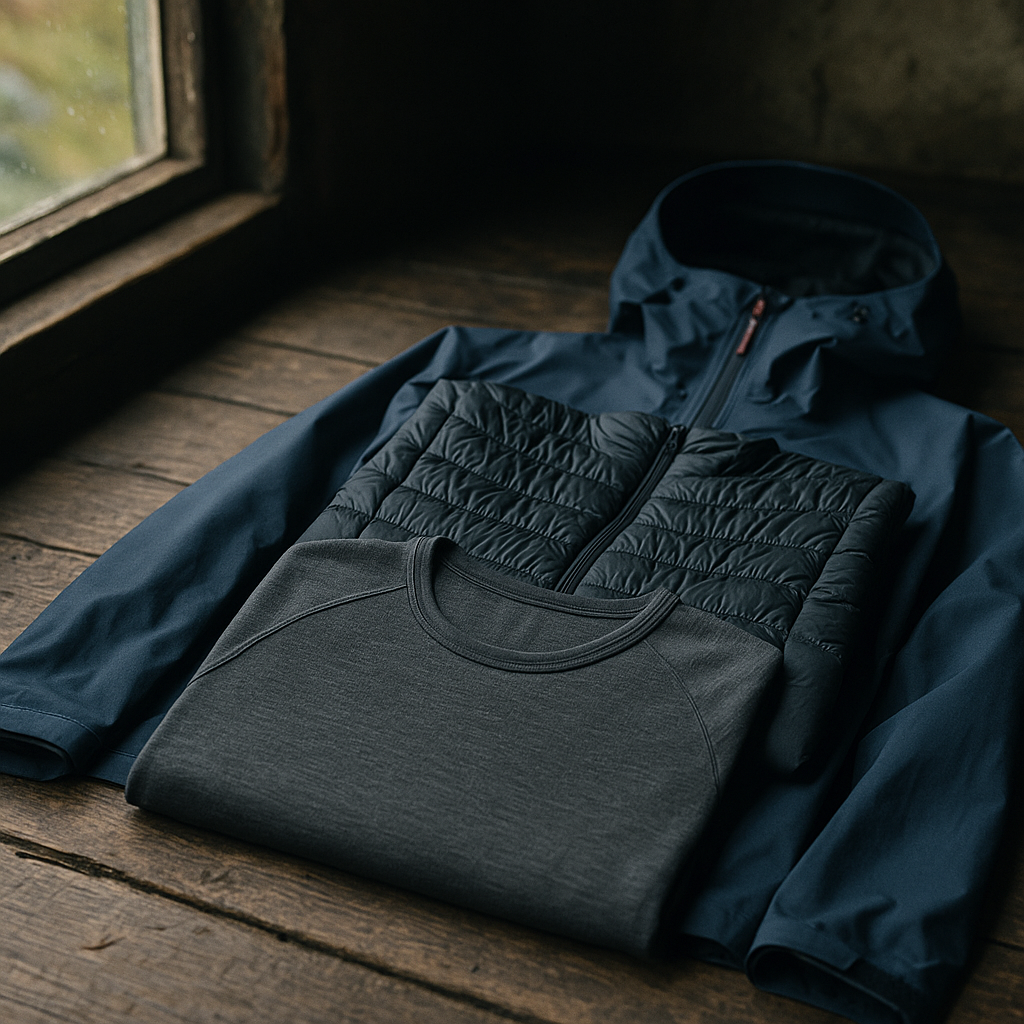
    The layering system matters enormously on a Ben Nevis winter climb. A moisture-wicking base layer, a mid-layer with real insulation, and a hardshell that can genuinely handle Scottish winter weather. Cotton kills in these conditions; leave it at home. Waterproof over-trousers are not optional.

    Beyond clothing, the kit list for winter on the Ben is specific:

    • Crampons: Ten or twelve point crampons that fit your boots securely. Microspikes are not sufficient for the upper mountain in hard winter conditions.
    • Ice axe: A walking-length axe and, critically, the knowledge of how to use it for a self-arrest. An ice axe you don’t know how to use is dead weight.
    • Navigation tools: A 1:25,000 OS map of the area (Landranger 41 covers the Ben), a compass, and a printed set of the summit plateau bearings. A GPS device is a useful backup but should never replace paper and compass.
    • Head torch: Winter days in Scotland are short. Being caught above the snowline after dark without a head torch is not a situation you want to engineer.
    • Emergency shelter: A group shelter or bivvy bag. Small, light, potentially life-saving.
    • Food and hot drinks: A flask of something warm makes a real difference at the summit in January. Calorie intake matters too; cold conditions burn through energy faster than you’d expect.

    Boot choice is worth mentioning. A full shank mountaineering boot that accepts a step-in crampon is what you want for anything beyond the lower slopes. Winter hiking boots with a B2 or B3 rating are the sensible minimum for the upper mountain.

    Avalanche Awareness on Ben Nevis

    The Ben Nevis winter climb carries genuine avalanche risk, particularly on and around the approaches to the North Face and on the upper slopes after heavy snowfall or during wind-loaded conditions. The SAIS Lochaber forecast gives a daily hazard rating from Low to Very High, along with the aspect and elevation of the greatest risk. Reading and understanding that forecast is a basic competency for winter outings here.

    Key points to understand: avalanches don’t only happen on steep ground. Wind-loaded slopes above 30 degrees are the primary hazard, but smaller slides on lower-angled terrain can still knock you off your feet and bury you. After heavy snowfall, wait 24 to 48 hours before venturing onto loaded aspects. If the SAIS forecast is Considerable or above, have a serious think about whether the Mountain Track is the right day out or whether a lower-level winter walk is the smarter call.

    Safety Considerations and Turning Back

    Mountain Rescue callouts on Ben Nevis increase sharply in winter. Lochaber Mountain Rescue Team responds to dozens of incidents each year, and a significant portion involve people who underestimated the conditions or overestimated their own fitness and experience. This isn’t a criticism; it’s just the reality of what the mountain is during the colder months.

    A few simple principles help keep a winter day on the Ben from going wrong. Start early, ideally before 8am in midwinter, to give yourself a full margin of daylight. Set a firm turnaround time before you leave the car park and stick to it regardless of how close the summit feels. If the weather closes in on the plateau, trust your compass over your instincts. And tell someone your route and expected return time before you set off.

    If you’re new to winter hillwalking and keen to build skills, a winter skills course in the Cairngorms or on the Ben itself is genuinely one of the best investments you can make. Learning crampon technique, ice axe arrest, and avalanche awareness from a qualified instructor in a day or two changes how safe and confident you feel on the mountain entirely.

    Why It’s Worth Doing

    None of the above is meant to put you off. A successful Ben Nevis winter climb is a genuinely brilliant experience. The views from the summit on a clear winter’s day stretch further than any summer visit offers, with the Scottish Highlands laid out in white in every direction. The silence on the upper mountain, the crunch of crampons on good névé, the sharp cold air. It’s the kind of day that reminds you why you got muddy boots in the first place. Just go prepared, go informed, and know when to go home.

    Frequently Asked Questions

    Do I need crampons and an ice axe for a Ben Nevis winter climb?

    Yes, for any attempt above the snowline in winter conditions, crampons and an ice axe are essential. The upper slopes and plateau can be sheet ice, and without the right equipment a slip becomes extremely dangerous. Equally important is knowing how to use an ice axe to self-arrest before you set out.

    How long does a Ben Nevis winter climb take compared to summer?

    Allow considerably more time than a summer ascent. A fit, experienced party might complete the Mountain Track route in 7 to 9 hours in winter, but cold ground, snow conditions, and shorter daylight hours all add time. Starting no later than 8am gives you the best margin of safety.

    What is the best time of year for a winter ascent of Ben Nevis?

    January through to March generally offers the most settled winter conditions with good snow consolidation, though this varies year to year. Late November and early December can be icy and unstable after early snowfall. April can still carry significant winter hazard on the upper mountain despite longer days.

    Is a Ben Nevis winter climb suitable for beginners?

    Not without prior experience or a qualified guide. The mountain in winter demands competent navigation, crampon and ice axe skills, and the judgement to read changing conditions. A winter skills course through a provider like Glenmore Lodge is a recommended starting point for those new to winter hillwalking in Scotland.

    Where do I check avalanche conditions before climbing Ben Nevis in winter?

    The Scottish Avalanche Information Service (SAIS) publishes daily forecasts for the Lochaber region, covering Ben Nevis and the surrounding area, from December through April. Check the forecast at sais.gov.uk before every winter outing and take the hazard rating seriously when planning your route.

  • Staying Safe Around Old Rural Buildings On Country Walks

    Staying Safe Around Old Rural Buildings On Country Walks

    Long days outside are one of the best things in life, but country walk safety is easy to forget when the views are good and the path feels peaceful. Old barns, sheds and forgotten farmyards can look harmless or even charming, yet they sometimes hide risks that are worth knowing about before you wander too close.

    Why country walk safety matters around old buildings

    Across the UK, thousands of rural buildings are quietly falling into disrepair. Roofs sag, timber rots and metal rusts. Many of these places sit right beside popular footpaths and bridleways. They are part of the landscape we love, but they are not maintained as visitor attractions. That means loose materials, unstable walls and hidden drops are all possible.

    Most of the time, nothing dramatic happens. You pass by, admire the stonework and move on. Problems start when curiosity pulls you inside, or when a shortcut takes you under a leaning wall or crumbling roof. A cautious approach lets you enjoy the scenery without putting yourself or your group at risk.

    Spotting the warning signs on a country walk

    Good country walk safety starts with learning to read the landscape. As you approach an old structure, pause and look for:

    • Missing roof tiles or sheets, especially if others look loose or bowed
    • Walls that lean or show wide cracks in the stone or brick
    • Rusty metal sheets flapping or lifting in the wind
    • Floors that look uneven, soft or partly collapsed
    • Overgrown entrances hiding holes, broken glass or sharp metal

    If something feels unstable, it probably is. Treat every old building as private unless clearly signed as open to visitors. Even where public rights of way pass close by, that does not mean it is safe to explore inside.

    Respecting nature while keeping yourself safe

    Old rural buildings are often rich with wildlife. Barn owls, swallows, bats and insects all use these quiet spaces as shelter. Sound country walk safety goes hand in hand with caring for these creatures.

    Try these simple habits:

    • Stay outside and watch quietly rather than entering and disturbing nests or roosts
    • Keep dogs on a lead near farmyards, lambing sheds and poultry areas
    • Avoid shining bright torches into dark roof spaces where bats may be resting
    • Stick to marked paths to protect wildflowers and ground-nesting birds

    The less we intrude, the more likely it is that wildlife will continue to thrive in these forgotten corners of the countryside.

    Hidden hazards in ageing farm buildings

    Even when a structure looks solid, time and weather can create hazards that are not obvious from a distance. Rotten floorboards, uncovered wells, old slurry pits and sharp machinery parts can all sit just out of sight. In some cases there may also be older construction materials that are best left undisturbed. If you ever have concerns about specific materials in a building you legally manage or work in, specialist guidance such as Asbestos sampling faqs can help, but for walkers the safest choice is usually to admire from the outside and move on.

    Practical tips for safer days out

    A few small habits can transform country walk safety without taking away the fun of a spontaneous day outdoors.

    • Plan your route so you know where you should and should not be walking
    • Wear sturdy footwear that grips well on mud, grass and uneven tracks
    • Give all old buildings a wide berth in high winds or heavy rain
    • Avoid climbing walls, gates or fences, especially those that look old or loose
    • Supervise children closely near farmyards, ponds and steep drops

    It is also worth carrying a small first aid kit and a charged phone in case someone in your group takes a tumble on a stile or slippery slope.

    Balancing adventure and common sense

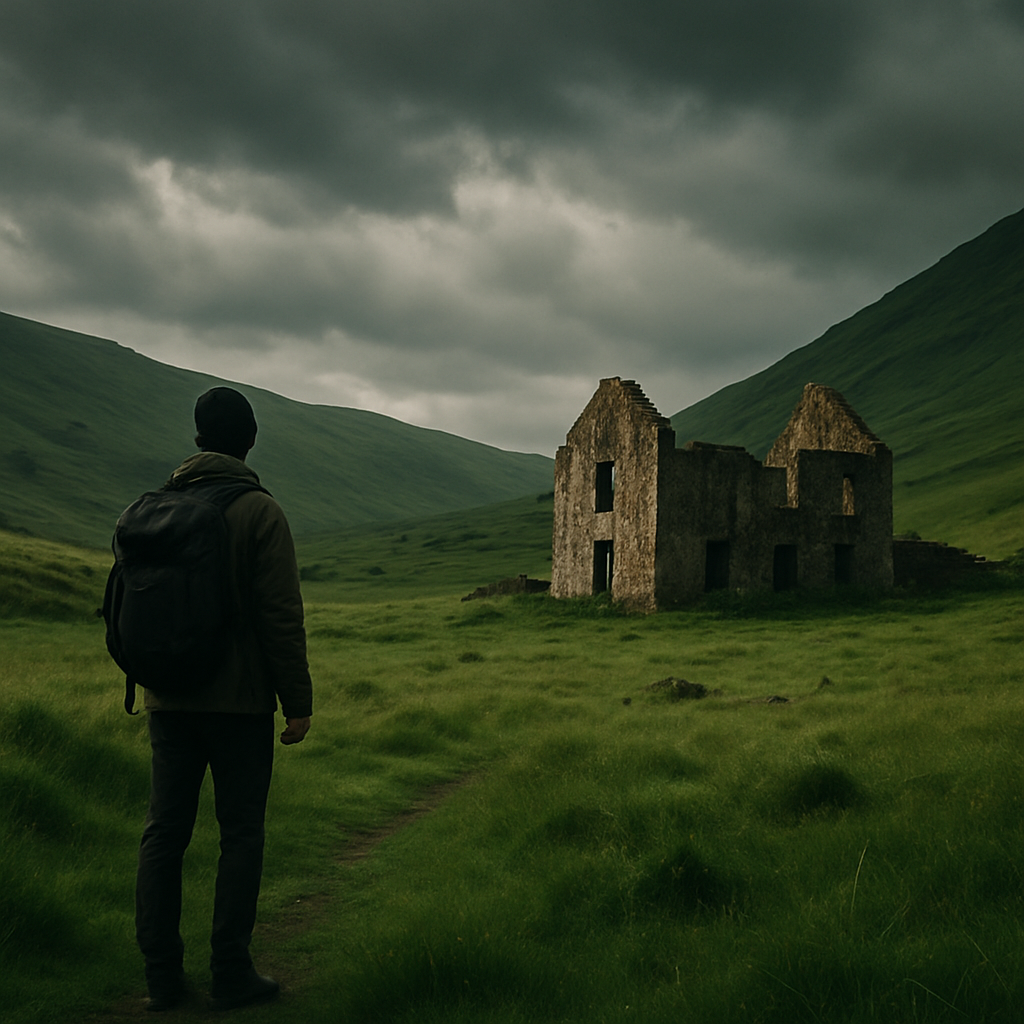
    Part of the joy of walking is the sense of discovery: a ruined farmhouse appearing through the mist, a rusted tractor in a hedgerow, a stone barn glowing in the late sun. Country walk safety is not about avoiding these moments, but about enjoying them from a sensible distance.

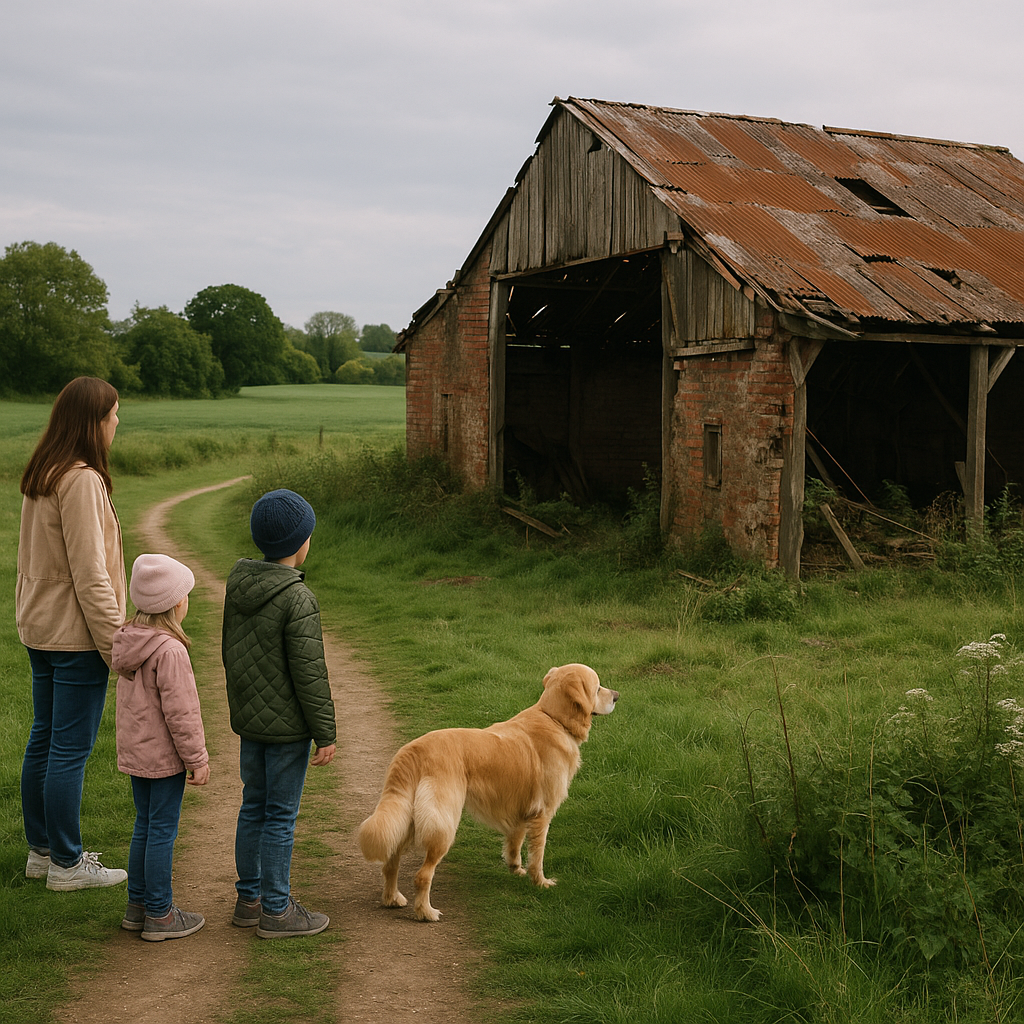
    Family demonstrating country walk safety by keeping clear of a derelict farm building on a country path
    Lone walker applying country walk safety while admiring a ruined rural building from a distance

    Country walk safety FAQs

    Is it ever safe to go inside old barns or farm buildings on a walk?

    Unless a building is clearly open to the public, it is best to stay outside. Old barns may have weak floors, loose roofing and hidden drops that are hard to spot at first glance. Enjoy the view from a distance, take your photos from outside and treat all doors, gates and fences as private unless there is clear signage inviting visitors in.

    What should I do if my path goes very close to a derelict building?

    If the right of way passes close by, you can follow it as normal, but give the structure as much space as you reasonably can. Avoid walking under leaning walls, loose roof edges or hanging branches. If the route feels unsafe, backtrack and look for a signed alternative or a parallel path across open ground, taking care not to damage crops or disturb livestock.

    How can I teach children about country walk safety without scaring them?

    Keep things simple and positive. Explain that old buildings are interesting to look at but can be fragile, like a sandcastle that might suddenly crumble. Set clear rules, such as no climbing on walls and no going inside barns, and turn it into a game of spotting wildlife and safe viewpoints instead. Leading by example is powerful, so show them how you keep a sensible distance and still have fun.

  • How to Enjoy Rainy Day Hiking in the UK

    How to Enjoy Rainy Day Hiking in the UK

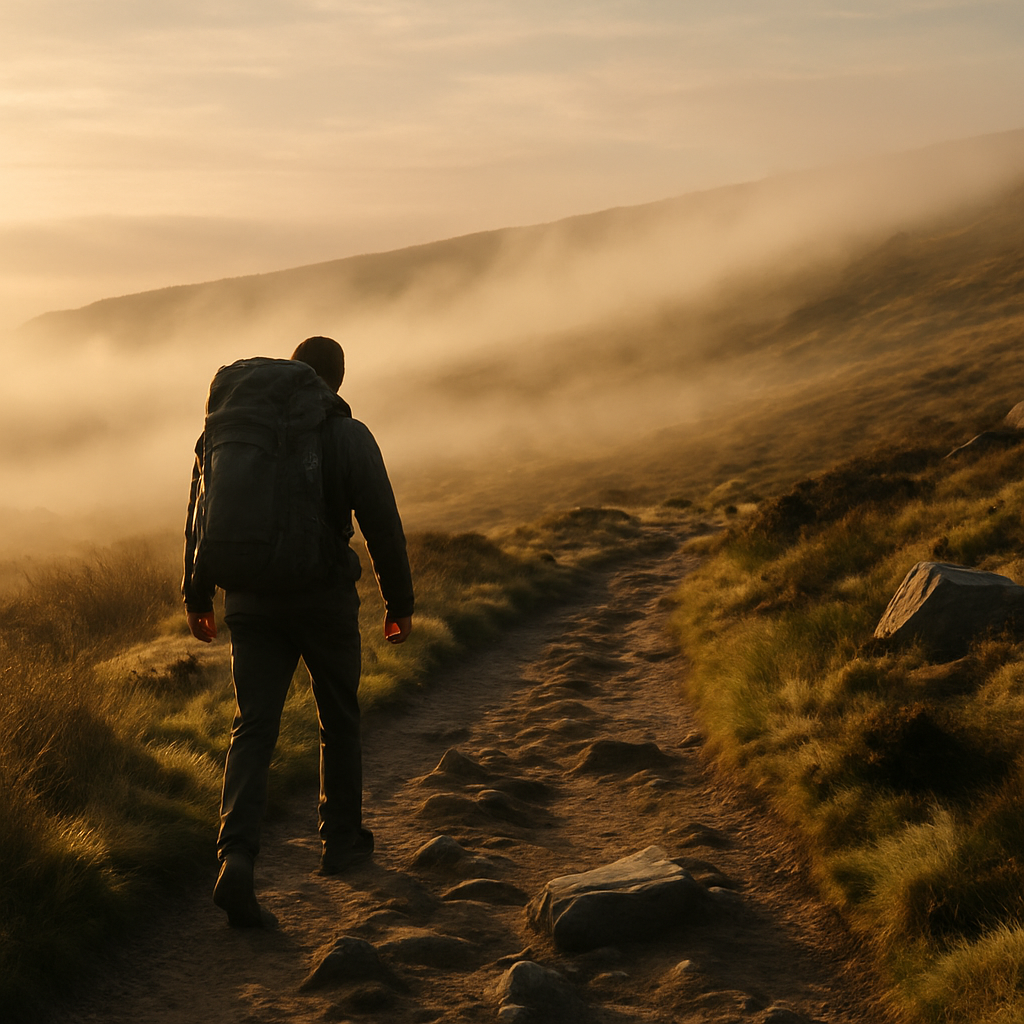
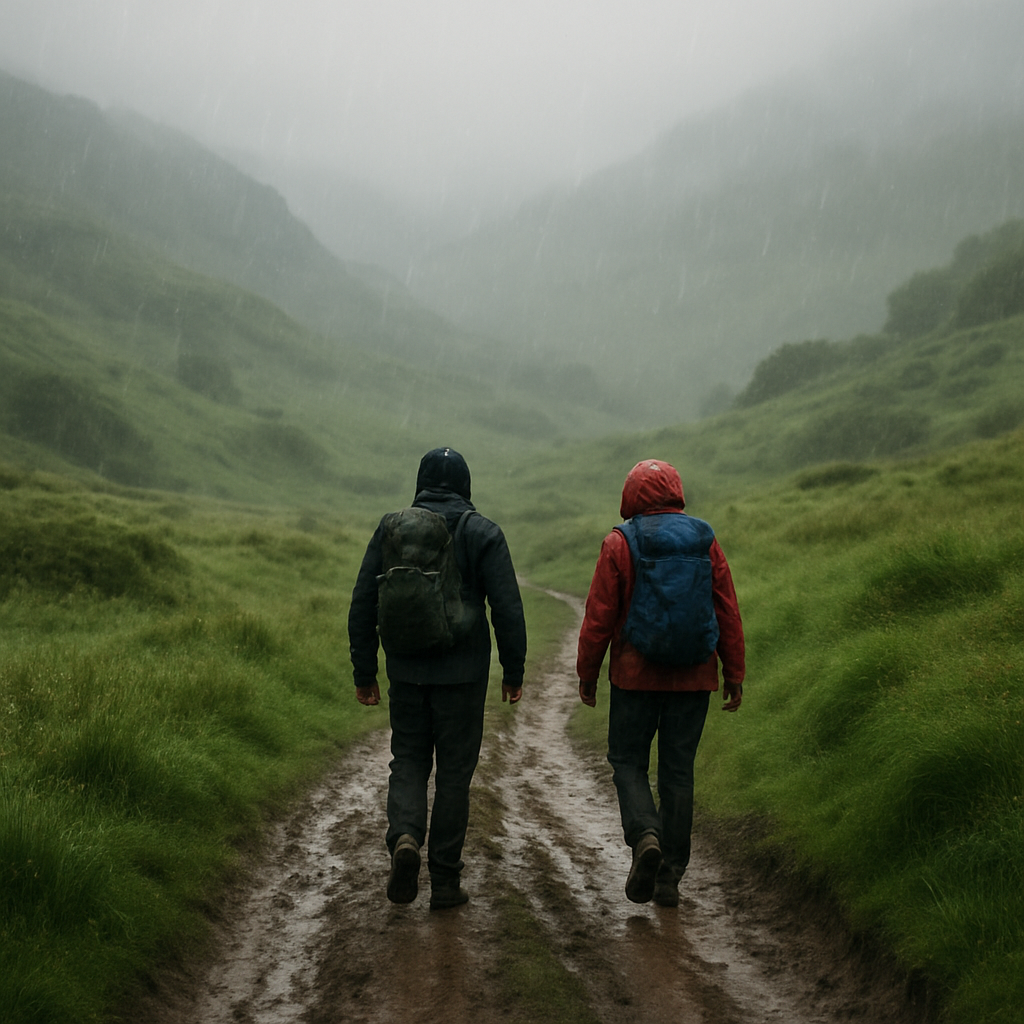
    If you spend much time outdoors, you soon realise that rainy day hiking in the UK is not the exception – it is the norm. Showers roll in, clouds cling to the hills, and the trail turns muddy under your boots. With the right kit, mindset and route choice, those wet days can become some of your most memorable walks.

    Why rainy day hiking in the UK can be brilliant

    Rain changes the landscape in a way sunshine never can. Streams roar to life, waterfalls swell, woodland smells richer and colours deepen. Mist softens ridgelines and makes familiar paths feel new. As long as you are warm, reasonably dry and moving safely, there is a quiet magic to being out when most people stay indoors.

    It also builds confidence. Learning how your body responds to cold and damp, how your boots grip on slick rock, and how your gear performs in a downpour makes you a stronger, more capable walker for every future trip.

    Layering for damp conditions

    Good layering is the secret to comfortable rainy day hiking in the UK. You are aiming to stay warm without overheating, and dry enough that you do not start to shiver when you stop.

    Start with a moisture wicking base layer next to your skin. Synthetic or merino tops move sweat away so you do not feel clammy. Avoid cotton, which holds onto moisture and chills you quickly once the wind picks up.

    On top, add a light insulating layer such as a fleece or thin synthetic jacket. This traps warm air even if it gets a little damp. In cooler months, you might carry a second mid layer to pull on for stops.

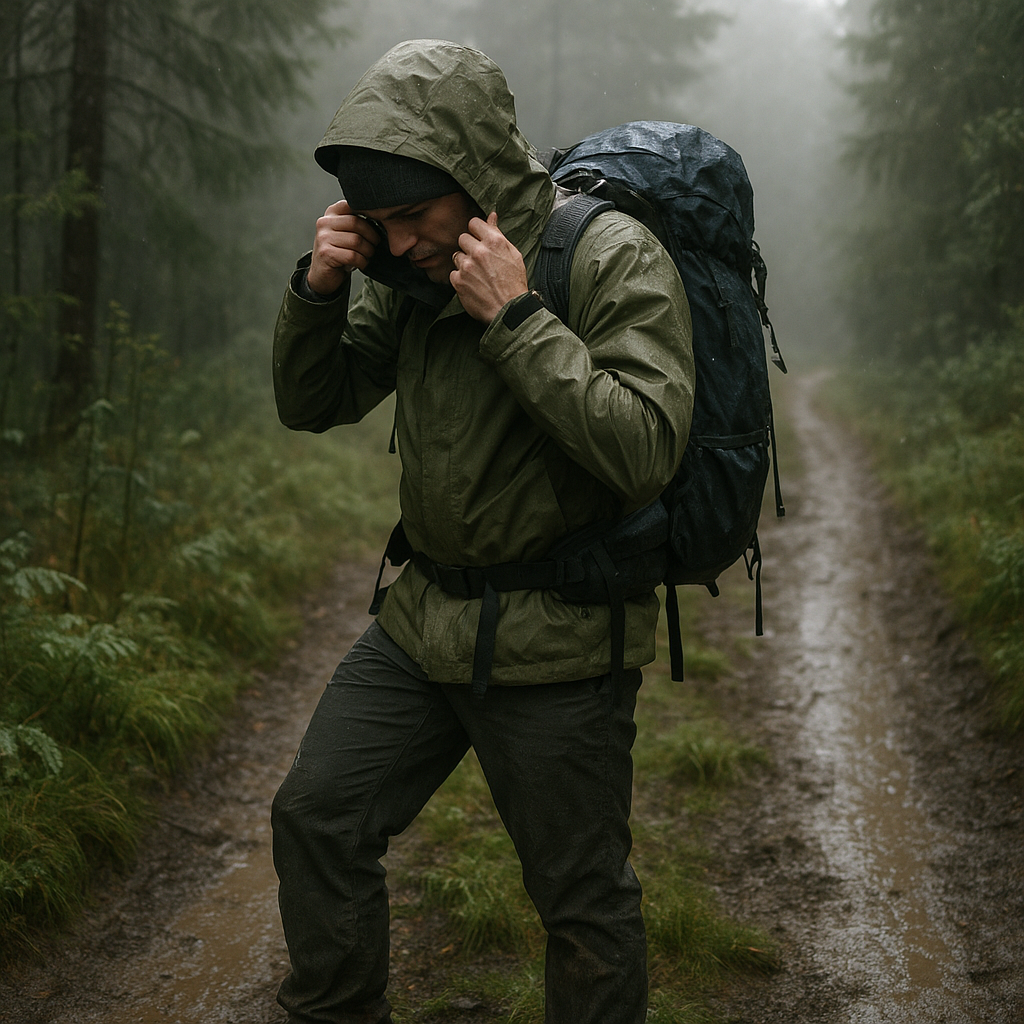
    Your outer shell needs to be waterproof and windproof, with a decent hood that moves with your head. Pit zips and front zips help you dump heat on climbs, so you do not soak yourself from the inside out. On very wet days, waterproof trousers over walking trousers keep your legs comfortable and help cut windchill.

    Managing body temperature on wet trails

    On a soggy hill day, you will constantly balance effort, sweat and rain. Start slightly cool at the car or campsite, because you will warm up quickly once you are moving. If you set off feeling toasty, you are likely wearing too much.

    Use every pause as a chance to fine tune. Too hot on the ascent? Open zips, remove a hat, or take off a mid layer and stash it in your pack. Feeling a chill when you stop for a snack? Pull on a warm layer straight away, before you get properly cold.

    Hands and head make a big difference. A thin beanie and a pair of light gloves weigh almost nothing but can transform your comfort on a windy, wet ridge. In milder rain, a cap under your hood helps keep water off your face so you can look around and enjoy the views.

    Keeping maps and essentials dry

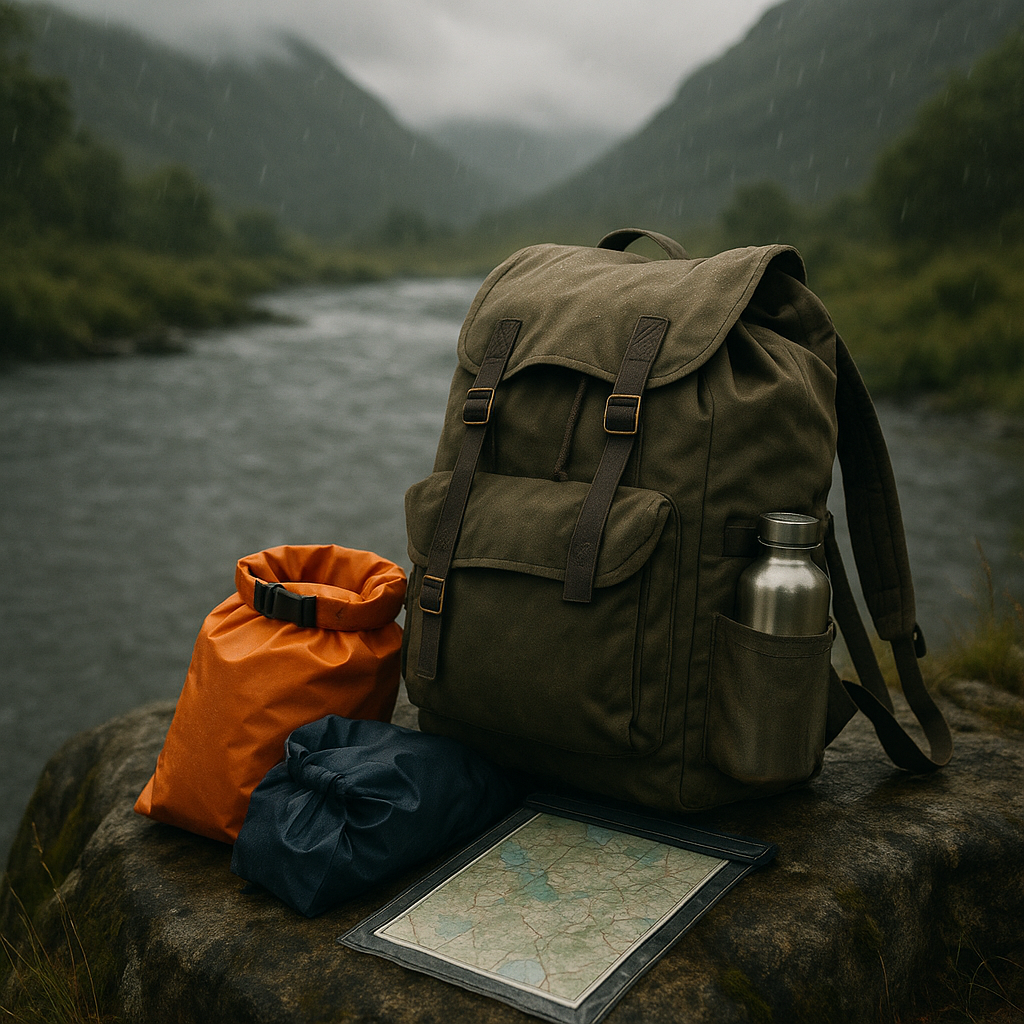
    When you are planning rainy day hiking in the UK, think about what must stay dry at all costs: map, phone, spare layers, first aid kit, and food. A pack liner or large dry bag inside your rucksack is the simplest way to protect everything. Even if water sneaks in around zips or seams, your kit stays safe.

    Keep your map in a waterproof case or map sleeve so you can read it in the rain without it turning to mush. If you use a guidebook or printed notes, tuck them in a small zip lock bag. Small dry bags are handy for grouping items like spare socks, gloves and hats so you can find them quickly with cold fingers.

    Snacks and a hot drink make a big difference on wet days. Store food in easy to reach pockets so you do not have to unpack half your bag in the rain. A flask of tea, coffee or soup can lift spirits when the cloud drops and the wind picks up.

    Choosing routes that work well in the rain

    Some trails shine in sunshine, others come alive in wet weather. Picking the right route is key to enjoying rainy day hiking in the UK.

    Hiker adjusting layers beside a wet woodland path during rainy day hiking in the UK
    Backpack and dry kit laid out beside a rainy valley during rainy day hiking in the UK

    Rainy day hiking in the UK FAQs

    Is it safe to go hiking in heavy rain?

    It can be safe to hike in heavy rain if you choose your route carefully and know your limits. Avoid steep, eroded slopes, scrambling terrain, narrow ledges and paths that cross fast rivers or streams. Lower level woodland and valley routes are usually a better choice. Always check the forecast, be prepared to turn back if conditions worsen, and let someone know your plans before you set out.

    What should I wear for a short rainy walk?

    For a short wet walk, focus on staying comfortable rather than buying lots of specialist kit. A moisture wicking base layer, warm mid layer and a waterproof jacket with a decent hood are the basics. Add comfortable walking trousers, waterproof overtrousers if you have them, and boots or shoes with good grip. A hat, light gloves and dry socks waiting in the car will help you finish the day smiling.

    How do I dry my hiking boots after a wet day?

    After a wet walk, remove insoles and laces, then gently stuff your boots with newspaper or clean rags to draw out moisture. Change the paper as it becomes damp. Leave boots to dry naturally in a warm, airy place, away from direct heat like radiators or fires, which can damage the materials. Once dry, brush off any remaining mud and reproof the outer if water is no longer beading on the surface.

  • Staying Safe Around Old Farm Buildings On Country Walks

    Staying Safe Around Old Farm Buildings On Country Walks

    If you love long rambles through fields and bridleways, you will have walked past more than a few crumbling barns and sheds. They look romantic and timeless, but old farm building safety is something every walker should quietly keep in mind.

    Why old farm building safety matters for walkers

    Across the UK countryside, many barns, byres and outbuildings are no longer in active use. Roofs sag, doors rot, and walls crack. To a curious child, or a walker looking for quick shelter from the rain, they can seem inviting. In reality, they can hide all sorts of hazards, from unstable structures to sharp metal and chemicals left behind.

    Most of the time, simply giving these buildings a respectful distance is enough. The aim is not to make you nervous about your next hike, but to help you recognise when an attractive old barn is better admired from the path.

    Common hazards in and around old farm buildings

    Old farm building safety starts with knowing what you might be walking past. Typical risks include:

    • Unstable roofs and floors – Rotten beams, loose tiles and broken joists can give way under very little weight.
    • Rusty metal and broken glass – Discarded machinery, barbed wire and smashed windows can cause deep cuts and infections.
    • Chemical residues – Old fuel drums, pesticide containers or fertiliser bags may still hold traces of their contents.
    • Animal hazards – Wasps, nesting birds, rodents and even livestock can be hiding in dark corners or behind doors.
    • Hidden holes – Old inspection pits, wells and drainage channels may be disguised by vegetation or loose boards.

    None of this means you should avoid countryside walks. It simply means treating derelict buildings as you would a steep cliff edge – beautiful to look at, but not a place to wander into without permission or care.

    Practical tips for staying safe near derelict barns

    You do not need specialist knowledge to keep on top of old farm building safety. A few simple habits go a long way:

    • Stay on the right of way – Footpaths and bridleways are usually routed to keep you away from the most hazardous areas.
    • Admire from a distance – Enjoy the view, take photos, but avoid entering buildings or climbing on walls and machinery.
    • Watch your footing – Where paths pass close by, look out for loose rubble, hidden wire and rabbit holes.
    • Keep an eye on the weather – High winds and heavy rain can bring down weak structures, so give them extra space in bad conditions.
    • Respect signs and barriers – Warning notices, locked gates and tape are there for a reason, even if the danger is not obvious.

    If you are walking with friends or a group, make sure everyone understands that abandoned buildings are strictly off limits, no matter how tempting they look.

    Keeping children and dogs out of harm’s way

    For families, old farm building safety is often about managing curiosity. Children love exploring, and a tumbledown barn can feel like a ready-made adventure playground. Before you set off, talk about what you might see and why you will not be going inside old buildings, no matter how interesting they appear.

    Keep younger children close when paths pass through farmyards or near machinery. With dogs, use a lead around livestock and near any buildings or scrap piles. Broken glass, nails and chemicals are as risky for paws as they are for boots.

    What to do if you spot something worrying

    Most of the time you can simply move on, but occasionally you might notice something that feels like an immediate danger to others – for example, an open pit right next to a popular path, or a building that looks close to collapse beside a school route. If you know which farm the land belongs to, a polite word can be helpful. For more technical concerns, such as crumbling roofs or damaged cladding that might need asbestos sampling, it is best left to the landowner and qualified specialists.

    As a walker, your responsibility is simply to avoid putting yourself at risk, and to flag anything serious to the right people when you can.

    Family keeping children and dog on the path to practise old farm building safety near barns
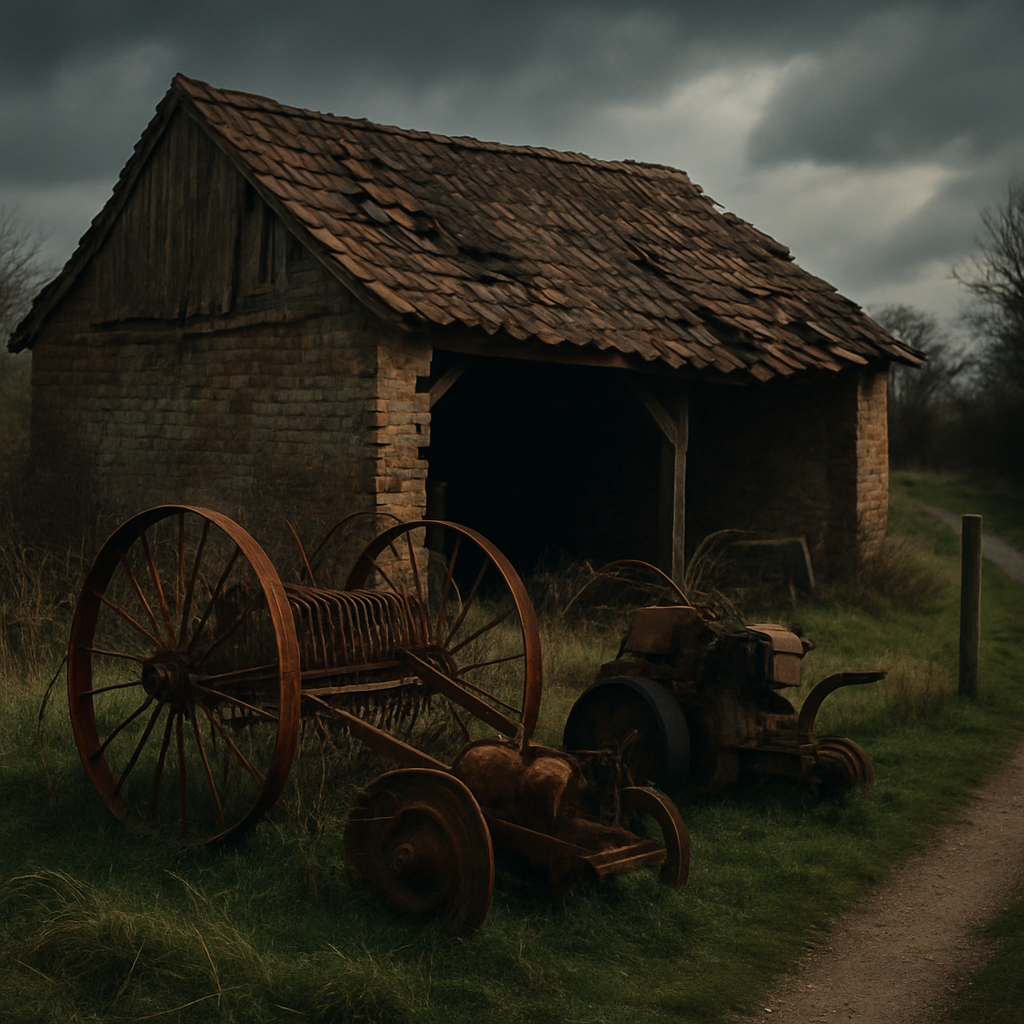
    Derelict shed and rusted machinery viewed from a path to highlight old farm building safety

    Old farm building safety FAQs

    Is it ever safe to shelter in an old farm building during bad weather?

    Unless you have clear permission from the landowner and know the building is sound, it is better to avoid using old barns or sheds for shelter. Unstable roofs, loose tiles and rotten beams can fail without warning, especially in strong winds. A line of trees, a hedge or a modern field shelter that is clearly in use and well maintained are usually safer options, provided you stay on the right of way and do not disturb livestock.

    Can I take photos of derelict barns on my countryside walks?

    Yes, you can usually take photos from public rights of way without any issue. Old barns make wonderful subjects for landscape photography. Just be sure to stay on the marked path, avoid climbing fences or walls to get a better angle, and do not enter buildings or yards without permission. Respecting boundaries keeps you safe and maintains good relationships between walkers and landowners.

    What should I do if my dog cuts its paw on glass or metal near a farm building?

    If your dog is injured, move away from the hazard first so no further damage is done. Rinse the wound with clean water if you can, apply gentle pressure with a clean cloth to stop bleeding, and keep your dog as calm and still as possible. Seek veterinary advice as soon as you are able, as cuts from glass or rusty metal can become infected. On future walks, using a lead near old buildings and scrap piles can reduce the risk of this happening again.

  • How To Pack For A Muddy Walk In The British Countryside

    How To Pack For A Muddy Walk In The British Countryside

    There is something wonderfully grounding about a muddy walk in the British countryside. The squelch of the path, the smell of wet leaves, and the mist hanging in the fields all remind us that we belong outside, in all weathers. Getting your packing right means you can relax into the day instead of worrying about cold feet or a soaked rucksack.

    Why a muddy walk in the British countryside feels so good

    Mud can feel like a nuisance when you are scraping it off boots, but it is also a sign of living landscapes. Wet ground means healthy soils, busy worms and thriving plant life. When you lean into the mess of a muddy walk in the British countryside, you give yourself permission to slow down, notice birdsong, and feel the textures of the trail under your feet.

    Many of us spend our week indoors, moving from one dry, controlled space to another. A few hours sliding around on a bridleway or splashing through puddles is a simple reset for the mind. Packing well is not about chasing perfection – it is about removing small worries so you can enjoy the weather exactly as it is.

    Clothing layers that keep you comfortable

    Start with a breathable base layer next to your skin. Cotton holds water, so choose a quick drying fabric that will not stay clammy if you sweat or get caught in a shower. Add a warm mid layer like a fleece or wool jumper, then finish with a waterproof shell that has a decent hood and cuffs you can tighten against the wind.

    For your legs, go for walking trousers that dry quickly rather than heavy denim. On truly filthy days, waterproof overtrousers are worth their weight in gold. They keep the worst of the spray off and help trap warmth, especially if you are stopping often to take photos or enjoy the view.

    Hands and head matter more than people think. A thin pair of gloves and a simple beanie make all the difference when the breeze picks up on an exposed lane or hill.

    Footwear and socks for serious mud

    Footwear can make or break any muddy walk in the British countryside. Look for boots with good ankle support and a chunky, grippy sole that can bite into wet grass and churned tracks. Waterproofing helps, but even the best boots will eventually wet out if you are wading through deep puddles, so think in layers.

    Wear proper walking socks that cushion your heel and wick moisture away. Many walkers like to pack a spare pair in a dry bag, ready for the halfway point or the pub at the end. Changing into dry socks is a small luxury that can transform how you feel on the journey home.

    If you prefer wellies for shorter, low level routes, pair them with thick socks and make sure they fit snugly around your calves so they do not rub.

    What to pack in your day pack

    Your rucksack does not need to be huge, but it should be comfortable and have a simple rain cover. Pack the heaviest items closest to your back so the load feels stable on uneven ground.

    • Water in a sturdy bottle
    • Hot drink in a flask for cold days
    • Snacks that will not crumble – nuts, oat bars, cheese, apples
    • A lightweight sit mat or bin bag so you can rest on damp ground
    • Small first aid kit and blister plasters
    • Map and compass for longer or unfamiliar routes
    • Spare socks and a thin extra layer in a dry bag

    It is also worth tucking in a simple tote or stuff sack for muddy kit at the end. That way, wet gloves or a filthy hat do not have to touch anything else.

    Keeping your kit dry and organised

    Plastic food bags or lightweight dry bags are brilliant for organisation. One for spare clothes, one for snacks, one for essentials like keys and wallet. If everything has its place, you will not be rummaging with cold fingers on a windswept track.

    Muddy hiking boots on a forest path during a muddy walk in the British countryside
    Rolling fields and muddy paths setting the scene for a muddy walk in the British countryside

    Muddy walk in the British countryside FAQs

    What should I wear on a muddy walk in the British countryside?

    Wear a breathable base layer, a warm mid layer and a waterproof outer shell. Choose quick drying walking trousers and sturdy boots with good grip. Add a hat and light gloves so you can stay warm when the wind picks up or you stop for a break.

    How can I keep my feet dry on a muddy countryside walk?

    Pick waterproof walking boots with solid tread and pair them with proper walking socks that wick moisture away. Avoid cotton socks, which stay damp. Packing a spare pair of socks in a small dry bag means you can change if your feet do get wet.

    What essentials should I pack for a muddy walk in the British countryside?

    Pack water, a hot drink, snacks, a small first aid kit, map and compass, spare socks, and an extra layer in a waterproof bag. A simple sit mat, tissues and a bag for muddy kit at the end of the walk are also useful for staying comfortable and organised.

  • Beginner’s Guide to Hiking in the UK Without Losing Your Nerve

    Beginner’s Guide to Hiking in the UK Without Losing Your Nerve

    If you feel drawn to hills and muddy paths but do not quite know where to start, this beginner’s guide to hiking in the UK is for you. You do not need to be super fit, own expensive gear or move to the mountains. You just need a bit of planning, realistic expectations and a willingness to get your boots dirty.

    Why hiking is for more people than you think

    Many people imagine hiking as epic ridges and huge backpacks. In reality, most days out are gentle rambles, short hill walks and coastal paths. Hiking is simply walking with purpose in natural places. If you can walk around town for an hour, you can start hiking – you just choose routes that match where you are now, not where you think you should be.

    Being outdoors works wonders for stress, sleep and mood. Mud on your boots and wind on your face can do more than any gym session on a treadmill. Think of hiking as time in nature first and exercise second.

    Choosing your first routes

    The most important step in any beginner’s guide to hiking in the UK is picking the right first walks. Start small and build up.

    Look for these features

    • Clear paths: National parks, country parks and popular beauty spots usually have well trodden trails.
    • Short distance: Aim for 3 to 6 km to begin with, or around 1 to 2 hours of easy walking.
    • Low ascent: Gentle hills rather than steep climbs. Canal paths, forest trails and coastal promenades are perfect.
    • Escape options: Loops that pass near roads, villages or car parks so you can cut it short if needed.

    Local nature reserves, riverside paths and waymarked trails are ideal. Famous mountains can wait. A relaxed loop through your nearest woodland still counts as hiking and builds the confidence you will need later.

    Fitness worries: starting where you are

    It is normal to worry about holding people up or not keeping pace. The answer is simple: match the hike to your current fitness, not your future ambitions.

    • Test your base: If a brisk 30 minute town walk leaves you puffed, start with flat countryside paths of a similar length.
    • Use time, not distance: Plan walks by hours on your feet. Begin with 1 hour, then 90 minutes, then 2 hours.
    • Take more breaks than you think: Short pauses to drink, snack and look around make a huge difference.

    Hiking fitness builds surprisingly quickly. After a few weekends, hills that once felt daunting begin to feel manageable.

    Basic kit that actually matters

    It is easy to be overwhelmed by gear adverts, but a simple beginner’s kit list is enough to get you outside.

    Essentials

    • Footwear: Comfortable walking boots or sturdy trainers with good grip. Waterproof boots are helpful in our famously soggy countryside.
    • Layers: A breathable base layer, a warm mid layer and a waterproof jacket. Layers let you adapt to changing weather.
    • Small backpack: Big enough for water, snacks, spare layer, hat, gloves and a basic first aid kit.
    • Water and food: More than you think you will need. Nuts, sandwiches, fruit and flapjacks all travel well.

    Nice to have, not essential

    • Walking poles for balance on hills and muddy descents.
    • Gaiters to keep mud and water out of your boots.
    • A sit mat or bin bag to keep your bum dry during breaks.

    Ignore anything that sounds overly technical or promises to transform your performance. Comfort, warmth and dry feet matter far more than fancy labels.

    Staying safe on the trail

    Safety is about common sense and preparation. Tell someone where you are going and when you expect to be back. Check the weather forecast and avoid exposed hills in storms, high winds or thick fog. Stick to marked paths until you gain more experience, especially in remote areas.

    Carry a simple first aid kit, a small torch, a paper map of the area and a fully charged phone. Learn the basics of reading the map so you can match features like rivers, forests and hills to what you see around you. If you are unsure, turn back. The hill will be there another day.

    Muddy walking boots on a damp woodland path illustrating a beginner’s guide to hiking in the UK
    Small group of new walkers following an easy hill path as part of a beginner’s guide to hiking in the UK

    Beginner’s guide to hiking in the UK FAQs

    How fit do I need to be to start hiking in the UK?

    You do not need to be especially fit to start hiking. If you can manage a steady hour’s walk on pavements, you can begin with short, flat countryside routes and build up gradually. Focus on time on your feet rather than distance, take plenty of breaks and listen to your body. Over a few weeks of regular walks, your stamina will naturally improve.

    What should I wear on my first easy hike?

    Wear comfortable clothes you can move in, ideally in layers so you can add or remove warmth as the weather changes. A breathable top, a fleece or jumper and a waterproof jacket work well. On your feet, choose walking boots or sturdy trainers with good grip. Avoid heavy cotton that stays damp, and pack a spare warm layer, hat and gloves just in case.

    Is it safe to hike alone as a beginner?

    It can be safe to hike alone if you choose simple, well used routes and prepare properly. Start with short walks in local country parks or popular trails, tell someone exactly where you are going, and agree a time to check in afterwards. Carry a map, basic first aid kit, water, food and a fully charged phone. As your confidence and navigation skills grow, you can gradually explore more remote paths.

  • How Greener Homes Are Changing Our Connection With The Outdoors

    How Greener Homes Are Changing Our Connection With The Outdoors

    If you love big skies, muddy boots and long days on the hill, you have probably wondered how your life indoors can match the way you feel outside. That is where greener homes come in. It is not just about saving a few quid on your bills. It is about building a life that fits better with the landscapes we hike through and the wild places we care about.

    What do we really mean by greener homes?

    For many people, the phrase brings to mind solar panels and clever gadgets, but at heart it is much simpler. A green home uses less energy, wastes less water and materials, and is kinder to the land around it. It is a place that works with the weather rather than fighting it, staying warm in winter and cool in summer without burning through fuel.

    Think of those stone cottages you pass on a wet fellside walk. The thick walls, small windows and snug rooms were all early attempts to live more lightly in a tough climate. Modern ideas build on that, using good insulation, natural materials and smart design so that we can tread more gently while still being comfortable.

    How greener homes protect the wild places we love

    Every time we head for the hills, we see the marks of a changing climate: bogs drying, paths washed out by sudden storms, snow lines creeping higher. Our homes are part of that story. Heating and powering buildings is a big source of emissions, and those emissions change the very landscapes we escape to at weekends.

    By turning our houses into greener homes, we chip away at that pressure. Better insulation means fewer draughts and less fuel burned. Choosing low impact materials means fewer scars from quarrying and logging. Simple habits like line-drying kit, collecting rainwater for the garden and planting trees in our own back yards all add up to cleaner rivers, healthier soils and more resilient habitats.

    Comfort, warmth and the joy of coming back indoors

    Anyone who has trudged home after a long, wet hike knows how good it feels to step into a warm, dry house. The trouble is, many older UK homes leak heat like a torn waterproof. Rooms feel chilly, walls are cold to the touch and the heating seems to be on full blast for half the year.

    Improving the fabric of a building can transform that feeling. Good loft and wall insulation, draught proofing and decent windows turn a shivery house into a cosy basecamp. Some people choose options like external wall insulation as part of a wider upgrade, but even small steps make a difference. The result is a home that feels more like a mountain hut after a day on the ridge: snug, welcoming and ready to dry your socks.

    Bringing the outdoors into everyday life

    Greener homes are not only about what we add to the walls and roof. They are also about how we open up to the outside world. Simple design choices can make nature part of the daily routine, not just something reserved for weekends away.

    Big windows that frame a garden, balcony or shared courtyard invite us to notice the weather. A bench by the back door makes it easy to slip on boots and step out for five minutes of fresh air. Planting herbs in pots, leaving a corner of the lawn to go wild, or adding a small pond can turn even a tiny space into a pocket habitat buzzing with life.

    When our homes are shaped around sunlight, views and fresh air, we naturally spend more time outside. Morning coffees move to the doorstep, laptops migrate to the patio on bright days, and children drift towards trees and mud instead of screens.

    Practical steps for turning your house into a greener basecamp

    You do not need a grand design budget to start the journey. Many of the most effective changes are simple and affordable:

    Hiker relaxing on a patio of one of several greener homes, surrounded by plants and views of rolling hills.
    Street of greener homes with children playing in front gardens filled with plants and trees.

    Greener homes FAQs

    What are the easiest first steps to make an older house more eco friendly?

    Start by tackling heat loss and draughts. Topping up loft insulation, sealing gaps around doors and windows and fitting thick curtains can make a big difference without major building work. Bleeding radiators, fitting simple reflector panels behind them and using thermostatic valves can also help. Outside, you can add water butts, plant native shrubs and leave a small wild corner to support birds and insects.

    How can a rented home be made greener without major changes?

    If you are renting, focus on changes that are reversible and low cost. Use draught excluders, thermal curtains and rugs on cold floors. Choose energy efficient bulbs and switch off appliances properly when not in use. Grow herbs and flowers in pots or window boxes, and ask your landlord before adding simple items like a water butt or a small compost bin. Even without big renovations, these steps can cut bills and reduce your impact.

    How do greener homes affect our wellbeing?

    A home that is warm, dry and filled with natural light is better for both physical and mental health. Reducing damp and cold helps prevent respiratory problems, while good insulation and ventilation create a more stable, comfortable indoor climate. When a house is designed to connect with gardens, balconies or nearby green spaces, people tend to spend more time outdoors, which is linked to lower stress, better sleep and a stronger sense of connection with the natural world.

  • Hidden Hazards Outdoors: Understanding Asbestos in Nature

    Hidden Hazards Outdoors: Understanding Asbestos in Nature

    If you love long walks, wild camping or poking around old farm buildings, it is worth knowing a bit about outdoor asbestos exposure. We often think of asbestos as something hidden inside office ceilings or old boiler rooms, but it can just as easily be found in the places we explore for fun.

    Across the UK, asbestos was used in sheds, barns, garages, farm roofs and even old picnic shelters. As these structures age, break or get demolished, fibres can escape into the air and soil. You do not need to panic every time you see a broken roof tile, but having some basic awareness helps you enjoy the countryside with confidence.

    Where you might encounter asbestos outdoors

    Most outdoor asbestos risks are linked to older man made structures in otherwise wild or rural settings. Common places include:

    • Old farm buildings with corrugated grey roofing sheets
    • Disused industrial sites that have become unofficial walking spots
    • Abandoned garages, sheds or outbuildings on the edge of villages
    • Fly tipped building waste in woodland or on country lanes
    • Former military sites and derelict holiday parks slowly being reclaimed by nature

    In many cases the material is stable and left undisturbed, which keeps risk low. Problems start when sheets are badly broken, burnt, drilled or crumbling, or when rubble has clearly been smashed up and scattered.

    How risky is outdoor asbestos exposure for walkers?

    Breathing asbestos fibres over long periods can cause serious illness, but the danger depends on how much you breathe in and how often. For most hikers and climbers, a one off walk past an old barn is very unlikely to cause harm. Fresh air and open space help to disperse fibres quickly.

    Higher risk situations include:

    • Playing, climbing or sheltering inside derelict buildings
    • Kicking or throwing broken roofing sheets or pipe lagging
    • Cutting or burning old asbestos materials on campfires
    • Regularly using unofficial paths through badly damaged structures

    Think of asbestos a bit like steep ground or fast flowing water. It is part of the landscape in some places, but you can manage the risk sensibly if you know what to look for and when to back away.

    Spotting suspect materials on your adventures

    You do not need to become an expert surveyor, but a few clues help you recognise possible asbestos outdoors:

    • Flat or corrugated grey sheets with a dimpled or textured surface
    • Old cement panels around animal pens or yard walls
    • Pipe work or tanks wrapped in flaky, fibrous insulation
    • Broken fragments of grey board or tiles mixed into soil or tracks

    If something looks old, brittle and out of place in a natural setting, give it space. Never break bits off as souvenirs, and do not let children or dogs play with debris, no matter how harmless it appears.

    Practical tips to stay safe while enjoying nature

    You can still enjoy wild places and forgotten corners of the countryside without worrying constantly about outdoor asbestos exposure. Simple habits go a long way:

    • Stick to marked paths where possible, especially around derelict sites
    • Avoid entering unsafe buildings, even if they look tempting in bad weather
    • Do not disturb rubble, burn mysterious boards or move dumped waste
    • Wash your hands before eating if you have been scrambling over old structures
    • Rinse muddy kit and boots at home, particularly after walking through fly tipped areas

    If you find what looks like damaged asbestos near a popular route, report it to the local council or landowner. A quick email with a grid reference or map screenshot can help them deal with it properly.

    Why landowners and clubs are taking asbestos more seriously

    Many farms, outdoor centres and climbing clubs are quietly tackling asbestos in their buildings to keep visitors safe. They are having surveys done, repairing or removing old materials and putting up clear signs where needed. Behind the scenes, they may follow an Asbestos management plan so that staff and volunteers know how to handle any issues.

    Family on a woodland walk learning about outdoor asbestos exposure around old sheds and structures.
    Walker reading a safety sign about outdoor asbestos exposure beside a derelict rural building.

    Outdoor asbestos exposure FAQs

    Can I get ill from walking past an old asbestos roof once?

    A single short walk past an old roof is very unlikely to cause illness. Health problems from asbestos are usually linked to higher levels of dust breathed in over a long time, often in work settings. Outdoors, fresh air helps to disperse fibres quickly. The main thing is to avoid disturbing damaged sheets or rubble and not to play in or around derelict buildings.

    What should I do if I find broken asbestos on a favourite walking route?

    Do not touch or move the debris. Make a note of the location, ideally with a grid reference or a pin on a map app, and report it to the local council, national park authority or landowner if you know who they are. They can then arrange for a qualified contractor to assess and deal with it safely. In the meantime, give the area a wide berth and keep children and dogs away from the rubble.

    Is outdoor asbestos exposure a concern for children who love exploring?

    Children are naturally curious, so the main concern is that they may play with broken sheets, rubble or mysterious looking materials. The best approach is to explain, in simple terms, that some old building bits can be harmful if broken or handled, so they should leave them alone and tell an adult. Stick to safer play areas, avoid derelict buildings, and wash hands before eating after exploring. These habits help reduce many outdoor risks, not just asbestos.

  • How Ethical Landlords Build Stronger Tenancies And Better Returns

    How Ethical Landlords Build Stronger Tenancies And Better Returns

    Being a landlord is no longer just about collecting rent at the end of the month. In a tighter rental market, with rising living costs and growing regulation, ethical landlord practices are becoming one of the most reliable ways to protect your investment, reduce stress and keep good tenants for longer.

    Tenants are far more informed than they used to be. They read reviews, compare properties online and talk openly about their experiences. Landlords who treat people fairly, communicate clearly and maintain safe homes are the ones who enjoy stable income, fewer disputes and stronger long term returns.

    What do ethical landlord practices actually look like?

    Ethics in property is not a vague feel good concept. It shows up in day to day decisions and habits. At the core is a simple idea: if you provide a decent, safe home and behave fairly, your tenants are more likely to stay, pay on time and look after the property.

    That starts before a tenancy even begins. Clear, honest adverts that do not hide issues, accurate photos and transparent pricing help attract the right people. During viewings, being upfront about costs, council tax bands and any quirks of the property sets expectations and builds trust from the outset.

    Written agreements that are easy to understand, with no unfair clauses, are another pillar of ethical landlord practices. Taking the time to walk through the contract with new tenants, explaining deposit protection, notice periods and responsibilities on both sides, avoids confusion later.

    Creating homes people actually want to stay in

    Long tenancies are one of the biggest drivers of landlord profit. Every void period costs money, and every changeover brings advertising, referencing and cleaning costs. A focus on liveability is therefore both ethical and commercial.

    Simple upgrades can make a big difference: decent flooring, modern light fittings, secure locks and efficient heating all signal that you care about the standard of the home. Regular safety checks, prompt servicing of boilers and clear instructions for appliances keep the property safe and reduce emergency call outs.

    Energy efficiency is increasingly important too. Good insulation, draught proofing and modern heating controls help tenants with their bills and reduce the risk of arrears. A warm, affordable home is far more likely to be treated with respect, and tenants who feel looked after tend to report issues early, before they become expensive repairs.

    Communication, boundaries and mutual respect

    Ethical landlord practices are also about how you communicate. Setting clear channels for reporting repairs, giving proper notice before visits and responding within reasonable timeframes all build a sense of professionalism.

    It is helpful to agree preferred methods of contact at the start of the tenancy, and to outline what counts as an emergency. This avoids late night calls for minor issues, while reassuring tenants that they will be heard when something serious happens.

    Respecting privacy is crucial. Sticking to legal notice periods for inspections, being flexible about timings and turning up when you say you will shows that you value your tenants’ time and home life. In return, tenants are more likely to cooperate with access for repairs and inspections.

    Handling problems fairly without losing control

    Even in the best run properties, problems arise. Ethical landlords do not ignore rent arrears, antisocial behaviour or damage, but they handle them in a structured, fair way.

    For arrears, early, calm conversations can prevent issues escalating. Understanding whether the problem is temporary, such as a job change, or more serious helps you decide whether to agree a payment plan, signpost to benefits advice or begin formal action. Documenting every step protects you if you need to go to court later.

    When disputes feel complex or overwhelming, external guidance can be invaluable. Specialist services that offer Support for landlords can help you navigate regulations, mediation and, if necessary, possession proceedings while keeping the process as fair and professional as possible.

    Why being a good landlord is good business

    Some landlords still worry that taking an ethical approach means lower profits. In reality, the opposite is usually true. Good tenants stay longer, reducing voids. Well maintained homes suffer less serious damage. Clear processes and records reduce legal risk and insurance headaches.

    Ethical landlord practices FAQs

    How can I encourage tenants to stay longer?

    Focus on providing a safe, comfortable and well maintained home, respond quickly to repair requests and review rent levels fairly in line with the local market. Clear communication, reasonable notice for inspections and a respectful attitude all contribute to tenants feeling settled and valued, which makes them far more likely to renew their tenancy.

    What should I do if a tenant falls behind on rent?

    Act early and stay calm. Contact the tenant to understand what has caused the arrears, then agree a realistic payment plan if the problem is temporary. Keep written records of all conversations and payments, and signpost tenants to debt or benefits advice where appropriate. If arrears continue to grow, follow the correct legal process for serving notice and seeking possession, and consider taking professional advice.

    Do I need to use an agent to manage my rental property?

    You do not have to use an agent, but many landlords find professional management helpful, especially if they live far from the property or have several rentals. An agent can handle advertising, referencing, inspections and maintenance, but you should still choose one that shares your values and is transparent about fees so that your tenants receive a consistent and fair service.

    Read more muddy stories…